Sandwiched ’tween 2 o’ the greatest video games o’ all time, it’s easy for Super Mario Bros. 2 to be forgotten. While many talk ’bout how Super Mario Bros. 2 is viewed a black sheep o’ the series, usually by people praising the game, unlike Super Mario Sunshine, I have rarely seen this sentiment 1st-hand. It did only sell 10 million copies, which while amazing for most games, was nearly half o’ what Super Mario Bros. 3 sold — tho that was also during a chip shortage.
What I can say for certain is that I ne’er liked this game as much as 1, 3, World, or e’en Lost Levels, but this is primarily due to Super Mario Bros. 2’s slower, awkward gameplay & mechanics & its wonky physics & controls. I still find it odd that people call Luigi’s slippery controls in Lost Levels unplayable, but have no problem with the fact that everyone is slippery in this game, specially Luigi. I ne’er liked how easy it is for characters to clip into blocks or how they bounce all round when they get hit.
Also, the decision to make your character shrink when you only have 1 hit point is idiotic, specially with the half-assed way they implemented it ( in the NES & SNES versions, a’least ): they don’t actually change your hitbox; they just make your graphic smaller, so it’s less representative — so it’s a lie. Making your character’s graphics non-representative o’ your hitbox is a cardinal sin o’ bad game design, & it’s shocking that an official Mario game would have such a thing. ¿Why’d they e’en need to shrink your character with 1 hitpoint? Despite the lazy repainting o’ Doki Doki Panic’s hearts to mushrooms, your health is still nothing like health in Super Mario Bros. — hell, despite the trouble they went to to make your character visually shrink, they didn’t bother to repaint your hit points on the side o’ the screen from diamonds ( & for some reason used hearts in the SNES & Game Boy Advance remakes ). Furthermo’, Super Mario 64 didn’t have mushrooms or growing & shrinking @ all, & that game was mo’ beloved than Super Mario Bros. 2, & Super Mario Bros. 2 was just after the 1st game to have the grow-&-shrink mechanic, making it probably the 1 game that most get ’way from the deviance to this “pattern”.
I also ne’er liked how the characters all feel like they have many weaknesses rather than a strength: all but Toad take way too long to pick up things, so that it’s very easy for Birdo to throw off cheap shots you’re vulnerable, unable to dodge as you’re character’s too busy slowly grabbing an egg for, like, a whole second, which is made worse by how slow Luigi & Peach fall, making them mo’ vulnerable while up in the air. Meanwhile, Toad is almost useless @ jumping & Mario is almost useless @ everything. Also, I always found it nonsensical that Toad runs fastest when holding something. Since jumping is still the most important element o’ this game, specially with skipping section, this means most players will probably prefer to stick with Luigi & Peach & just stomach the fact that they suck @ anything regarding throwing or digging & use Toad in the rare places where jumping is less important than throwing or digging. Thus, the game somehow manages to fail @ encouraging balanced use o’ characters while also making e’en the best characters feel crippled.
Most importantly, I always felt the whole Subcon health upgrade system, which, giving you extra health, played an integral part o’ how difficult the game was, was too much o’ a trial-&-error guessing game.
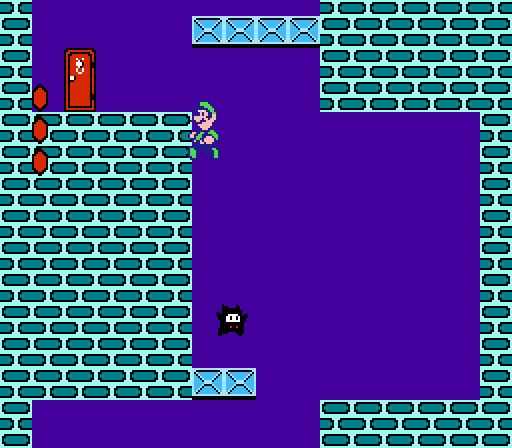
But Super Mario Bros. 2 had 2 strengths: it had memorable graphics & enemy designs & had catchy music. Moreo’er, tho, Super Mario Bros. 2 had underrated level designs that evolved from the 1st Super Mario Bros.’s linear left-to-right pattern to mo’ complex layouts that twisted in all kinds o’ shapes.
20. World 6-1
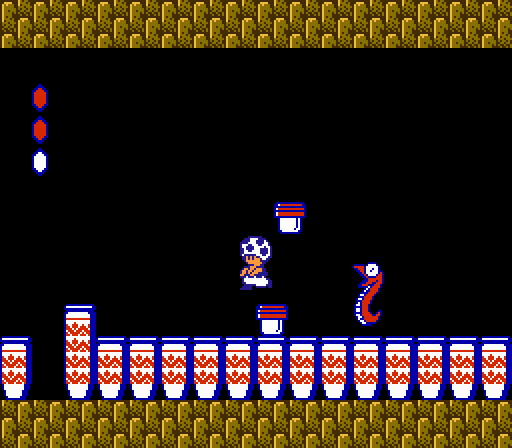
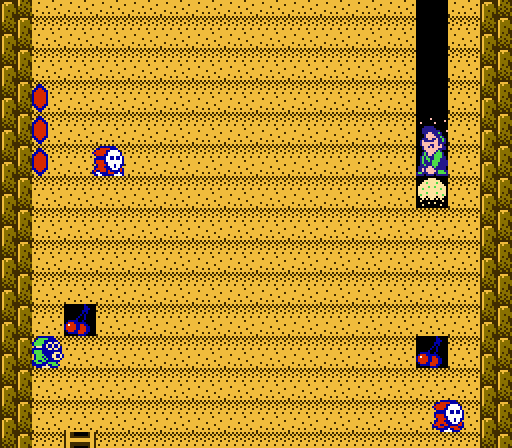
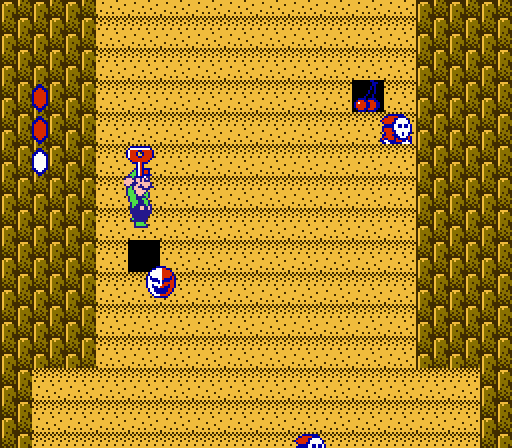
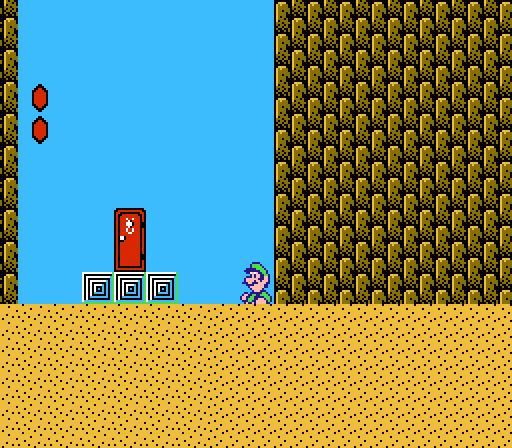
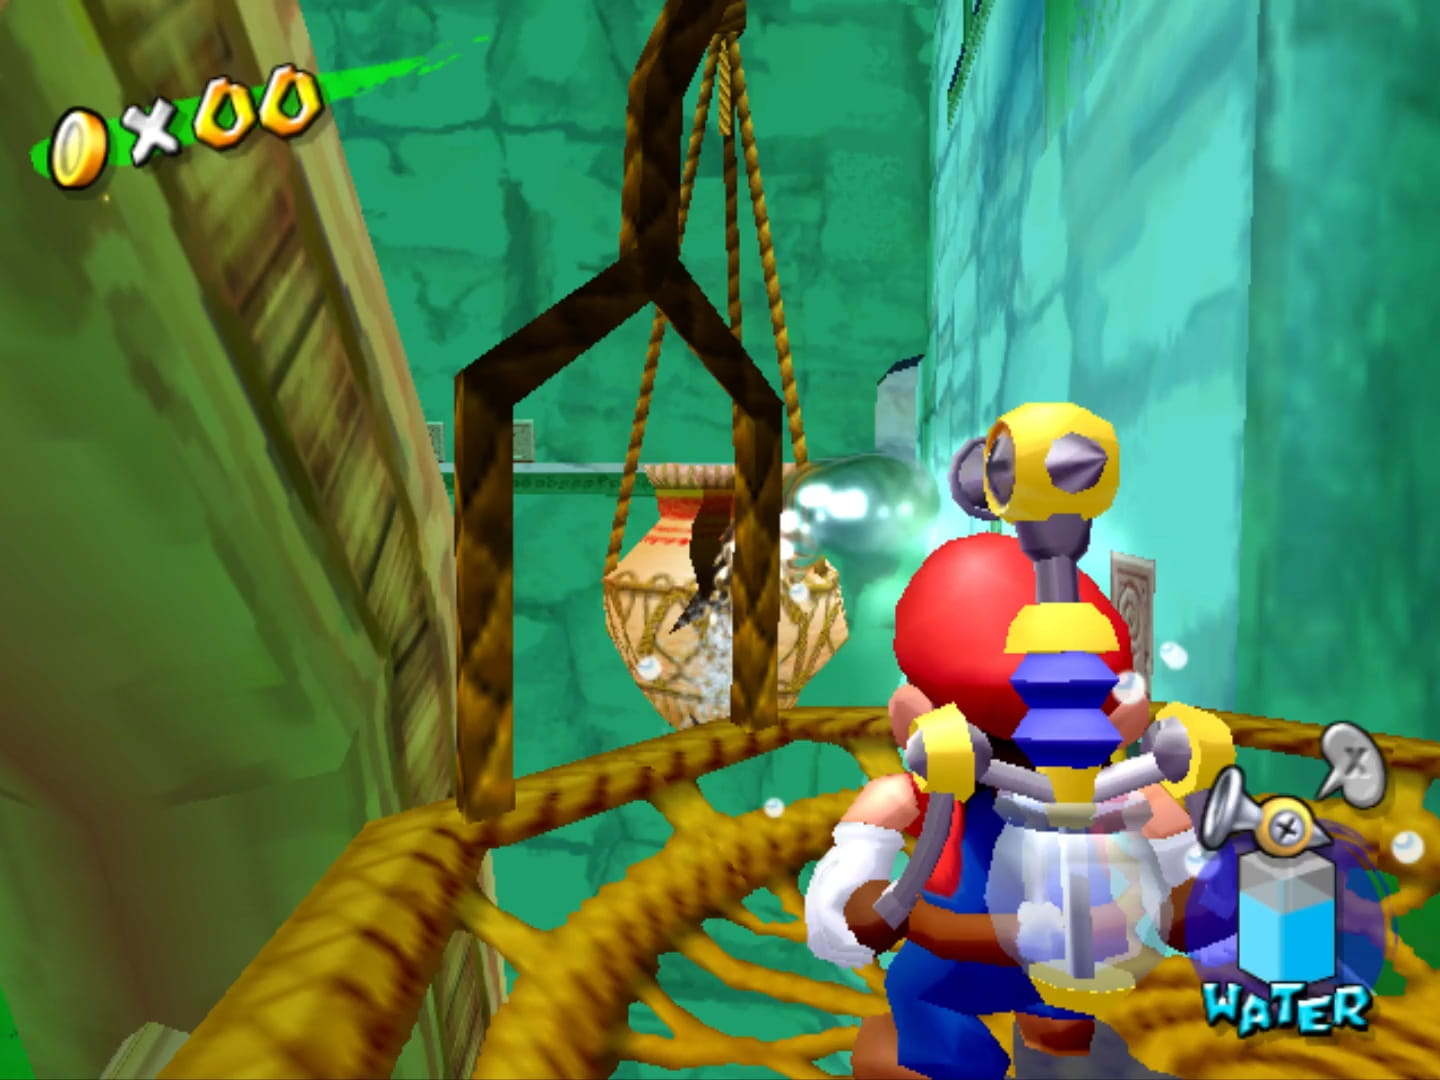
4 worlds after world 2, which already used the desert theme, we get yet ’nother desert level with the same litany o’ Cobrats & Pokeys. & unlike the other desert levels, which usually make the 2nd half be a cave with sand-digging, this level makes the 2nd half be a cave with… e’en mo’ Cobrats, but popping out o’ pots. I actually don’t know if I should be glad for this “twist” or find it worse.
Actually, I do know: it’s much worse — that 2nd cave involves a genius puzzle wherein you have to trial-&-error thru all 21 pots to find the 1 that has a key @ the bottom to unlock the door @ the end o’ the cave. E’en better: There are 4 pots with sand areas in them, but only 1 o’ these sand areas has the key @ the bottom, so you have to tediously dig thru each to see whether or not each has a key.
This level sucks & I’m baffled why any human would think it could be entertaining to play.
19. World 2-1
Desert levels in Super Mario Bros. 2 fall into what I will now call “Jolly Roger Bay Syndrome” harder than Jolly Roger Bay: it doesn’t truly matter that much which came 1st; the fact that all these levels feel similar brings them all down. & like “Jolly Roger Bay” makes it worse by having it apply to tedious water levels, Super Mario Bros. 2 makes it worse by applying this to desert levels with the sleep-inducing digging mechanic, which just involves rapidly pressing a button & maybe moving every so oft to make sure a Shy Guy doesn’t fall on you — all as a contrived way to make Toad feel mo’ useful, e’en tho he already has advantages when fighting bosses ( & just moving faster for speedrunners ), so these sand sections may actually make the game less balanced.
All 3 world 2 levels follow the same pattern more o’ less: 1st section is stretch o’ sandy outside area full o’ Cobrats & maybe Pokeys, followed by a cave section full o’ sand you have to dig thru. 2-1 has the least interesting sand pattern, being just a rectangle with a few holes with cherries in them. If you preserved your cherries well, you can time it so that the last cherry gives you a star & then rush thru the last stretch & kill Birdo with it. Other than that, there’s nothing else to say ’bout this level.
18. World 2-2
Same pattern as 2-1. This level’s outside area has mo’ intricate terrain that isn’t all flat, but it looks jankier & less natural. Sand just stops gainst a pot with cut-off round the pots edges.
The underground sand section in this level is mo’ interesting, with a branching path. Howe’er, 1 o’ the 2 paths just leads to a dead end. This section is notorious for possibly leading to a softlock if the player, for some reason, removes all the sand there so that they can’t get back up.
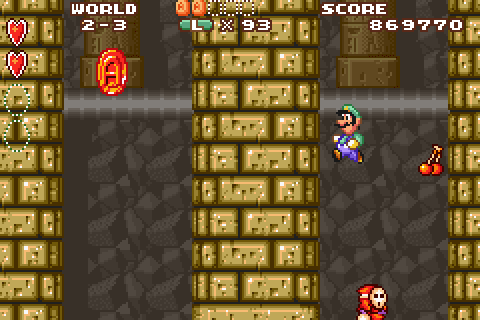
17. World 2-3
Similar pattern to 2-1, but with spawning Beezos in the outdoors section & just 1 Cobrat & Pokey each.
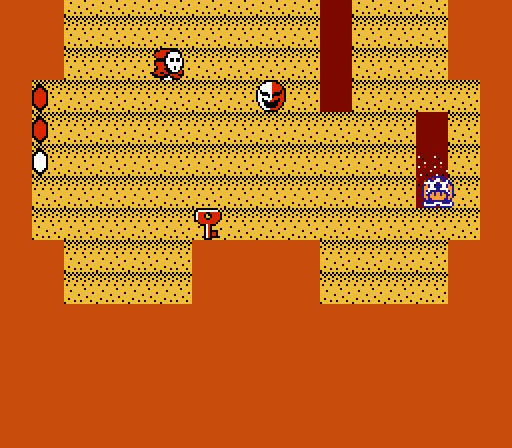
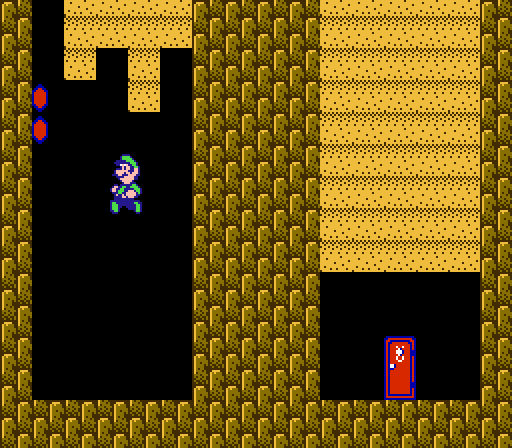
The underground section is also mo’ interesting. Rather than just digging down to the bottom o’ a sand pit, you dig to the bottom to grab a key & then race up to the locked door in the middle while avoiding Phanto. This sand patch also has a branching path, but both branches end together @ the same door.
There’s also a short non-sand section @ the start with a branching path. The right path is full o’ enemies, but gives you a POW block for your troubles, while the left path is just an empty hole. The Game Boy Advance remake uses this split to be cheap assholes & put an ace coin on the left, so if you happen to take the right path ( or miss the ace coin floating slightly to the left o’ the left path ), you have to kill yourself or restart the level.
16. World 6-3
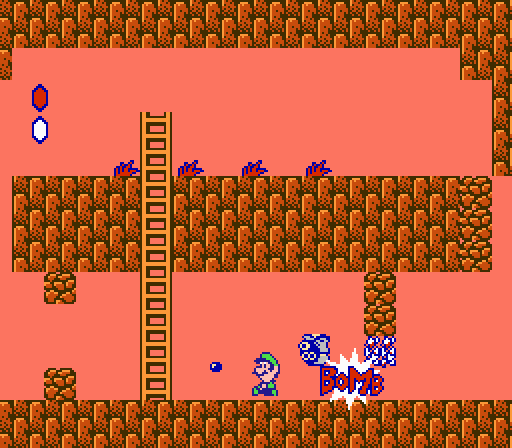
This is the least uninteresting desert level that follows the “outside area with Cobrats & Pokeys followed by cave full o’ sand you have to dig up” pattern used for 4 o’ this game’s levels. Actually, while this level has sand you can dig up, there’s no reason to, ’less you’re desperate for cherries or bombs. Your main focus is 2 rock walls you need to blow up with bombs to continue. Not the most interesting challenge, considering you’ve already had to do this in previous levels.
If you want mo’ challenge, you can waste your time blowing up many mo’ rocky walls to get access to a mushroom or some coins, but it’s not worth the effort, not the least o’ which since not screwing yourself o’er is trial-&-error: there’s a 90% chance you’ll accidentally grab the potion, which is just an arbitrary grass in the middle o’ the main route forward, lost ’mong the bombs, which is long before you’re ready to get the mushroom ( or get mo’ than a few coins ), wasting it. E’en better, you can easily get yourself stuck in a lower area if you’re not careful, forcing you to commit suicide to continue.
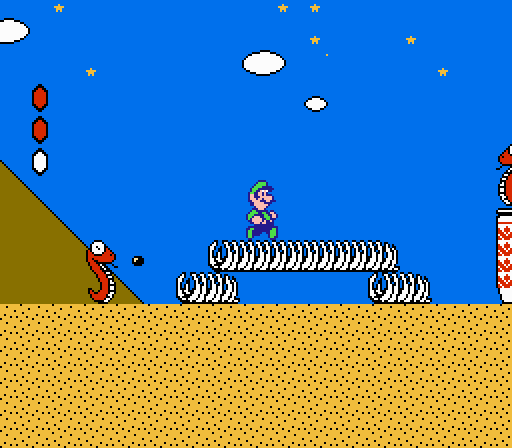
The 2nd half o’ this level is a climb up to the top o’ a cloudy area to find a pyramid in the sky. While the pyramid in the sky is amusing, I guess, & I like the rare autumnal red vines, the challenge itself is just a mo’ bloated, less tricky version o’ 5-2’s vine section, despite coming a full world afterward. If they had made the section a bit mo’ relevant to the desert theme — a’least have Cobrats or Pokeys, ’stead — this section would be much stronger & feel less like just a generic section that could fit just as well as in any other level.
This level’s strongest element is the secret @ the beginning o’ the level: quick sand that goes under the left wall, which you can use to go under the wall to a secret door on the other side. This door takes you right to the pyramid in the sky @ the end o’ the level. Since, as I’ve written here, nothing you’ll skip is o’ any interest, this is the recommended route ’less you’re the kind o’ poor sap going for the ace coins or Yoshi eggs in the Game Boy Advance remake.
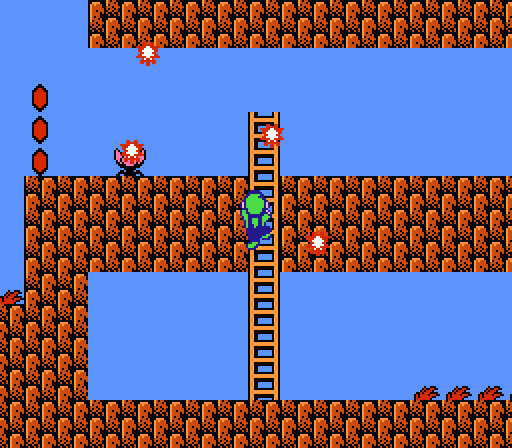
15. World 1-3
This level falls victim to introducing mechanics done better in later levels. It starts with logs falling down waterfalls, which are fun if not impressive jumping challenges, which are perhaps properly formidable in its simplest form for the 1st boss level — a great place for a slight difficulty spike.
After this we have a factory area that gives you a longer-form version o’ grabbing the key & dodging Phanto, introduced in 1-2. Howe’er, since you’re mainly falling downward with the key, it’s still easier than later varieties. The only problem is the last fall, which is blind: the left side can make you fall into spikes, & the only way to avoid that is to know ’head o’ time to avoid the left side.
Other than that cheap blind fall, tho, this is a solid level for where it is. Unfortunately, all other things being equal, the early, introductory levels usually end up being the least great levels.
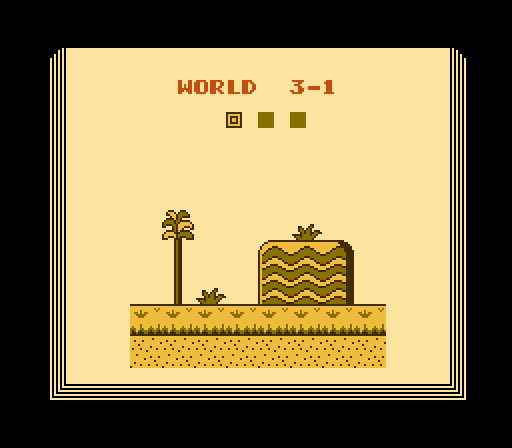
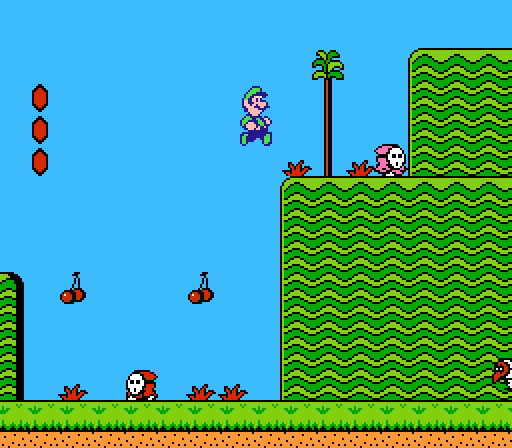
14. World 3-1
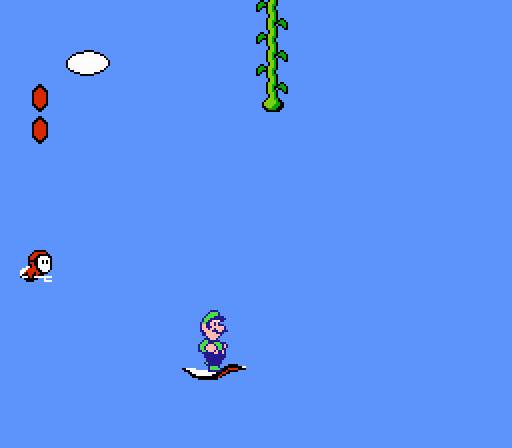
Tho the 1st part is mostly just basic cloud jumps with enemies, the waterfall theme is refreshingly rare. The use o’ the Pidgit straight up the final part o’ the waterfall section builds on World 1-2’s challenge; while that 1 let you easily weave round the Beezos’ paths, here you have to weave ’tween their paths.
The next section builds on the challenge o’ the Pansers. Whereas 2-2 & 2-3 had them o’er flat land, here they are o’er short platforms o’er a pit. Granted, being fiery plant enemies, they don’t fit the sky as well as deserts. You can skip this section with a door past a wide gap if you’re playing as Peach ( Luigi might be able to reach it, too, with clever jumping ); but this section is so simple, you may not want to bother, specially since you need to bomb down a rock wall in the shortcut, anyway. Speedrunners don’t e’en bother taking this “shortcut”.
The mushrooms in this level are dickishly placed before their respective potions, & the 2nd mushroom isn’t worth the effort: you can’t climb out with the potion, leading the player to doubt the designers would put a mushroom outside o’ that li’l cave area, which means that e’en if the player knows where the mushroom is, they have to race up the ladder & onto the mushroom — making sure not to o’ershoot their drop & run right off into the pit — before Subcon kicks them out, leaving no extra time for grabbing coins. Worse, after this you need to climb up the ladder with the Panser back, hovering o’er you.
I’m not sure how to feel ’bout the secret @ the bottom o’ the waterfall, under the 1st platforms. While putting rewards down where players expect death is unintuitive, designwise, I guess it works as a consolation prize for those bad ’nough @ the game to fall down by accident.
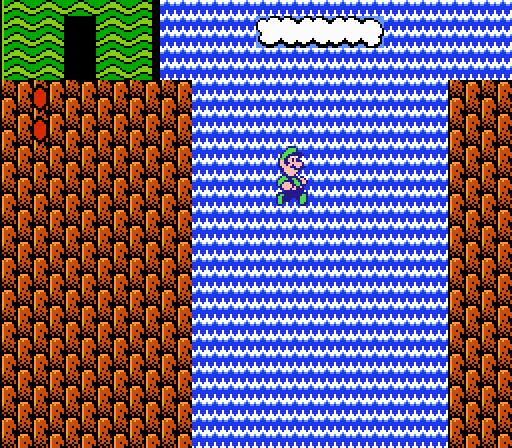
13. World 1-2
Widely known as “the Pidget level”. Pidget is surprisingly underused in this game, & e’en mo’ surprising, this level may be the best use. This mechanic is e’en better since the game doesn’t tutorialize it: it just shows you a pit that’s obviously too large to jump past ( ’cept maybe with Toadstool — I’ve ne’er tried ) & a bird on a flying carpet & expects the player to fill in the squares themselves. I like how the Beezos seem a threat; but since you can freely fly anywhere, not really, since you can just fly o’er them. &, ’course, I can’t ignore the clever way this game lets you skip the whole underground section with careful use o’ the flying carpet.
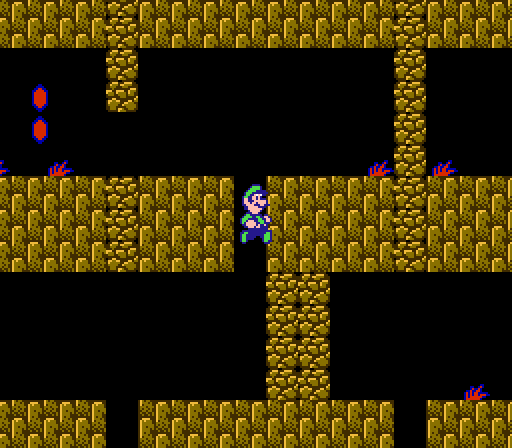
The underground section introduces breaking rocky blocks with bombs to get thru. It’s just 2 walls, but they did still implement a shortcut: the main path actually involves going up a ladder round the 2nd rocky wall that doesn’t have any bombs in front o’ it & tediously blowing up all 3 rocky blocks to the right with the bombs up ’bove ( you can’t go down the ladder with bombs, so you can’t just break the bottom wall ) to drop back down below the rocky wall below. Howe’er, you could also just go back to an earlier part o’ the underground section, grab a bomb, & then race to the 2nd bottom rocky wall to break it & bypass the whole upper area.
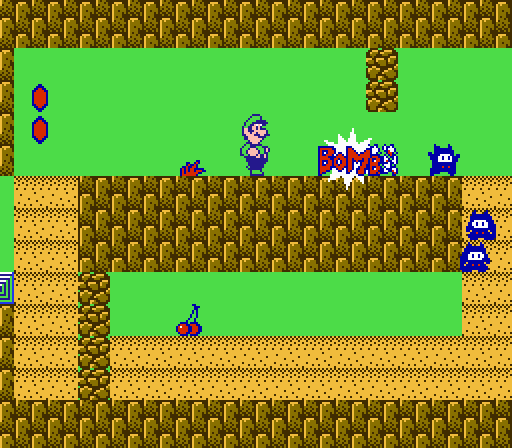
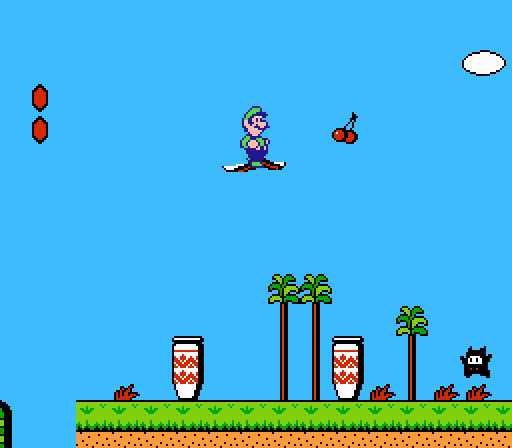
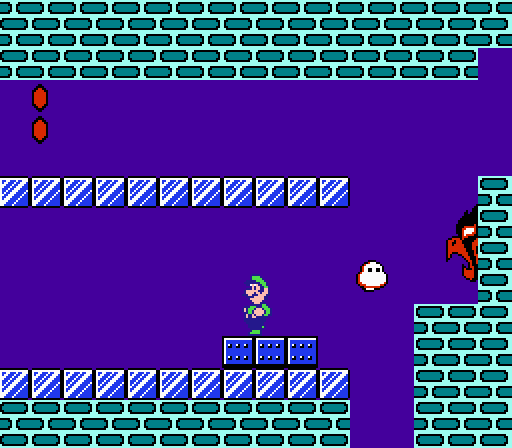
12. World 5-3
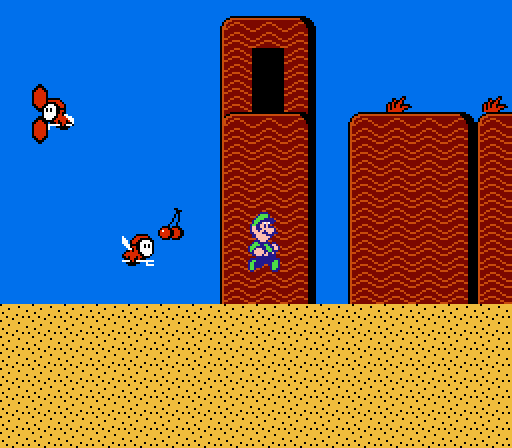
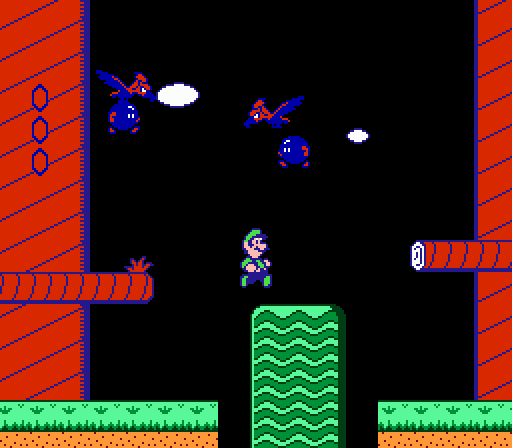
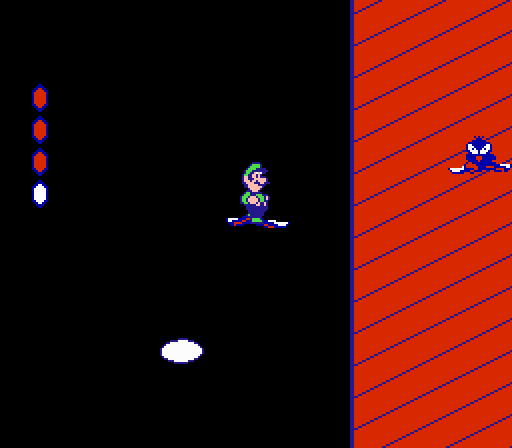
This may be 1 o’ the most bizarre-looking levels in the original NES version, thanks to its bizarre palette with the lime grass & yellow dirt accompanied by eye-searingly red hills with dark blue borders. To be honest, it looks tacky, specially with the log platforms that blend in with them — some o’ which are missing their left face for some reason, leading to jarring cutoff. This is 1 o’ the few times I prefer the remakes making the palettes mo’ consistent with other levels. That said, I do like how the hills continue down into the underground area — e’en if they don’t quite line-up, technically.
This level introduced Bob-Omb-dropping Albatrosses, with rocky walls that said Bob-Ombs can break ’pon exploding, just like regular bombs, tho you have no reason to bother, since you can easily jump o’er them. This pattern continues to the end o’ the 1st area, where you have 2 rock walls that hide a secret mushroom you can just jump round to get to the next area, which starts with a lower section blocked by rocky walls you can skip, which only hold coins. Considering the game forces you to break rock walls with regular bombs as early as 1-2 ( or 3-2 if you skip that section using Pidgit — which takes mo’ forethought that skipping these rocky walls requires ), it’s odd that they don’t force you to use the Bob-Ombs anywhere in this level.
Inside the tree-hill thing has clever challenges timing dropping down block-clogged passageways while dodging the spinning Sparks, with 2 subtle shortcuts with a single-block space o’er the Shy Guy producing pots that a ducking character can slide thru with the right momentum. Then there’s a climb up short platform steps while dodging the fireballs o’ Pansers moving down the steps & a long outside area with the last Pidgit in the game & a bunch o’ short jumps with enemies.
This level goes on a bit too long & tapers off the rails o’ its theme @ the end. This level has a lot o’ good ideas, but some are wasted by making them pointless & many o’ them don’t belong together in a single level.
This level may have the most blatantly obvious warp secret in the game, with that pot right up there where you can clearly see it & a potion right next to it.
11. World 4-3
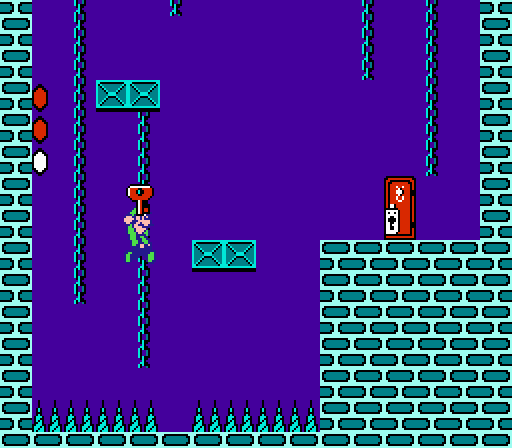
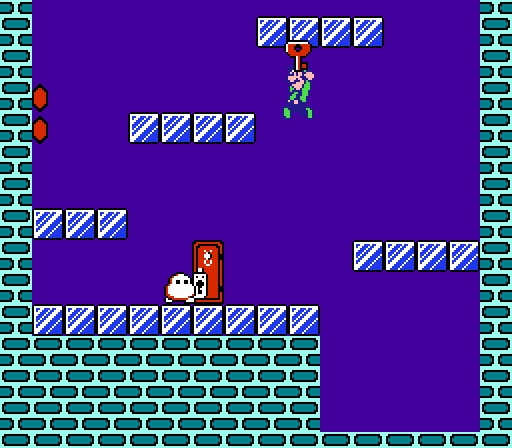
This level begins with the most iconic puzzle in Super Mario Bros. 2: a benign Birdo whose eggs you need to ride past the gaping hole right @ the start.
After that you have vertical versions o’ 4-1’s Flurry dodging challenges, going up, & then down, with half o’ the downward section requiring you to carry a key to the bottom.
The downward section also starts with a short challenge forcing you to ride a Shy Guy or Tweeter o’er spikes. It’s less memorable than 4-2’s cannon o’er spikes, but arguably trickier, specially in the Game Boy Advance remake, as you have to jump off the enemy before the long fall to reach an ace coin on a small alcove that in all other versions o’ this game has no purpose. You can skip 1 o’ these long sections with Luigi or Peach by jumping o’er a long gap ’tween the entrance & exit o’ the palace.
I don’t know why the crystal ball room is designed the way it is. It’s just a crystal ball followed by a small hole you have to try to fall into & the hawk entrance, but there’s a high-up place with a single Flurry & nothing else. Maybe it’s there to create the ( cheap, bullshit ) risk o’ the Flurry falling on your head as you move for the Hawk head, but it’ll probably fall off before you e’en reach the jump, & a dumb challenge e’en if it worked.
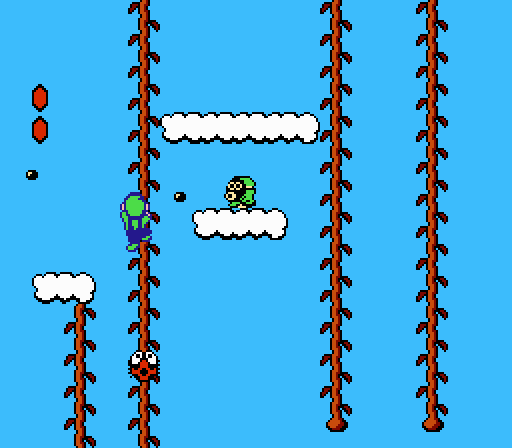
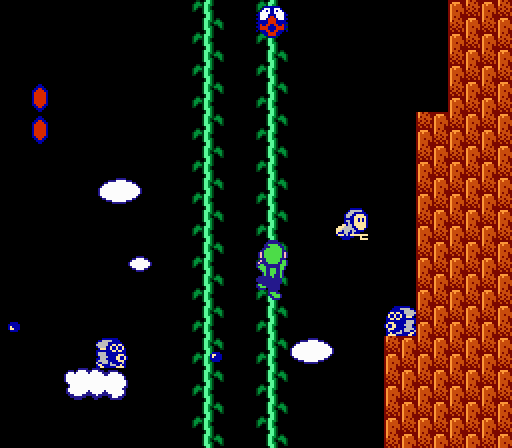
10. World 5-2
The 1st half is a clever layout o’ rising & falling Hoopsters you have to weave thru, followed by the most interesting vine-climbing section in the game, forcing the player to weave ’tween both Hoopsters & Snifits.
Then the level ends with a bullshit drop where you have to weave ’tween spikes you don’t have nearly ’nough time to move round before you see them, making this section trial-&-error. The floor @ the very bottom e’en has holes o’er bottomless pits. Also, the Game Boy Advance remake has an ace coin in a very unnatural place you’re almost certain to miss the 1st time, with no way back up but suicide or restarting the level.
Fighting Birdo in a waterfall area with hopping Trouters ’stead o’ in yet ’nother cave is refreshing, a’least.
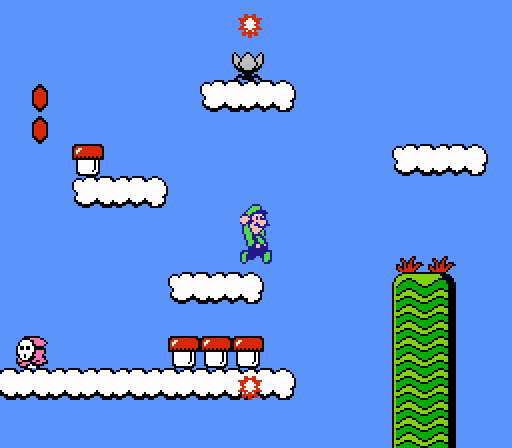
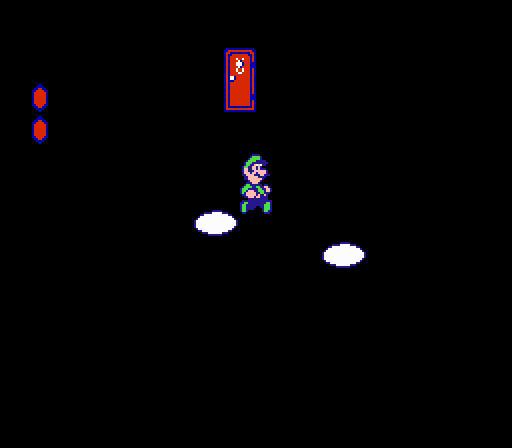
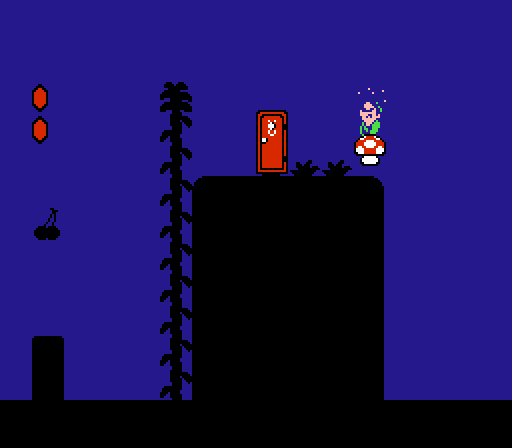
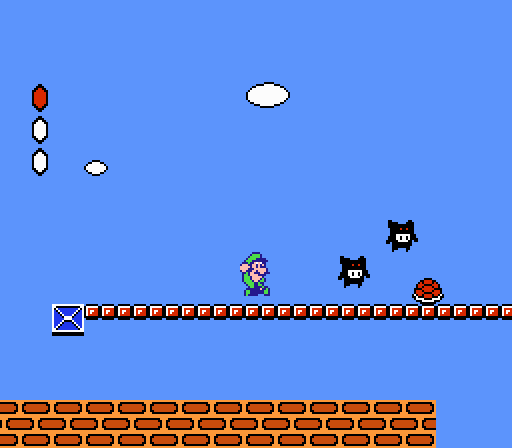
9. World 1-1
This game’s 1st level is subtly clever, with both a variety o’ themes that don’t feel contrived — including a cave you enter & climb up to reach the top o’ a mountain, which ends @ a vine that you climb up as the mountains gradually end while the clouds come into play. The level has a U shape, entering from a door in the middle o’ the sky ( which is night in the original NES version, for some reason ) & dropping straight down, going straight right on a seemingly normal grassland, & then climbing up a sky area to the fight with Birdo in the clouds.
The level also subtly introduces mechanics, such as the hill that stands out near the otherwise flat beginning that hides the 1st potion, to the short log-rolling section you can skip if it’s too hard for you so soon, to the POW block just after, & then the cherries spread out that the player will likely collect & likely see the star appear. The level weaves them together into what feels like a normal level, rather than breaking them out into conspicuously separate areas like a modern game would do.
This level also provides 2 shortcuts for mo’ skilled players, such as a way to jump the mountain in the main room to skip the cave or the door in the cave hidden ’hind a rocky wall that requires timing a bomb throw before it to break the rocks, allowing the player to skip the whole 2nd half o’ the level.
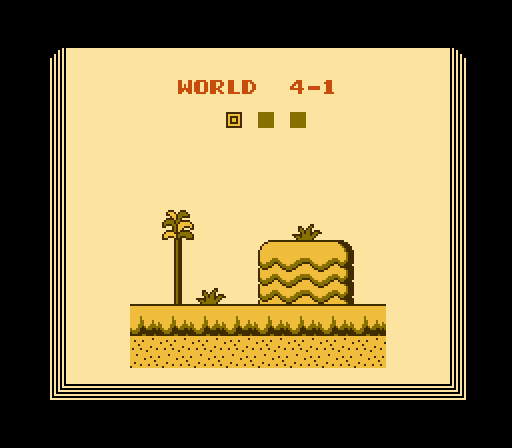
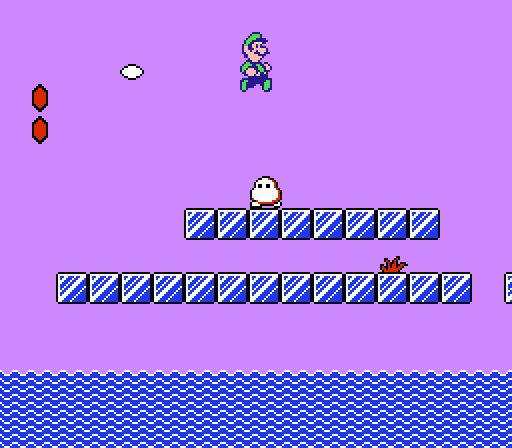
8. World 4-1
This level introduces the ice theme unique to world 4, which starts by honing your skills dealing with slippery physics with a simply but challenging section wherein you jump from ice-block bridge to bridge, weaving ’tween Flurries who slip round back & forth, trying to follow you & oft o’ershooting their mark thanks to their low traction.
This is followed not by the typical Birdo fight, but by a long battlezone littered with Flurries & cannon-manning Shy Guys, who shoot you with fireballs as you try climbing up the high ice towers.
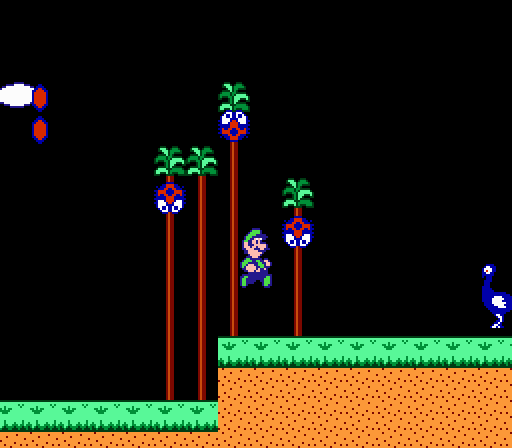
7. World 5-1
World 5 is to world 3 what world 6 is to world 3 in the original Super Mario Bros., with world 3 having a vague tropical waterfall & hill during the day & world 5 having the same theme, but @ night.
This level may have the cleverest use o’ the Panser, challenging you to cross both o’er & under it while dodging its fireballs.
Most o’ the level takes place in front o’ underground waterfalls wherein the player must hop ’cross falling logs & hopping Trouters, the only time this game requires the player to cross waterfalls in such precarious ways with no way round it.
Tho the mushroom halfway thru the section is just a plain platform just after the potion, the last mushroom is a clever puzzle that requires the player to hop up to the ceiling & grab the block to fall down so that the mushroom can fall down when you go into Subcon. Howe’er, this puzzle loses points for having 2 blocks up there, forcing the player to either risk going up & doing it ’gain for the other block or try 1 block & hope they guess correctly.
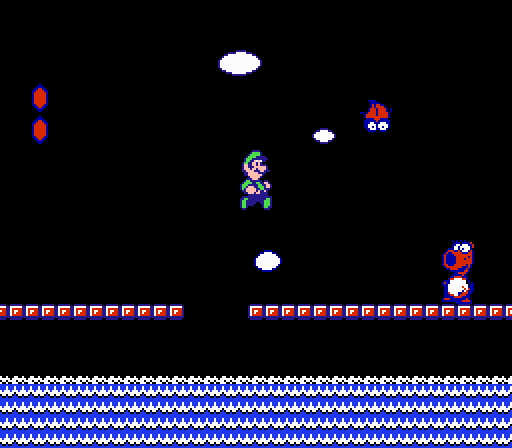
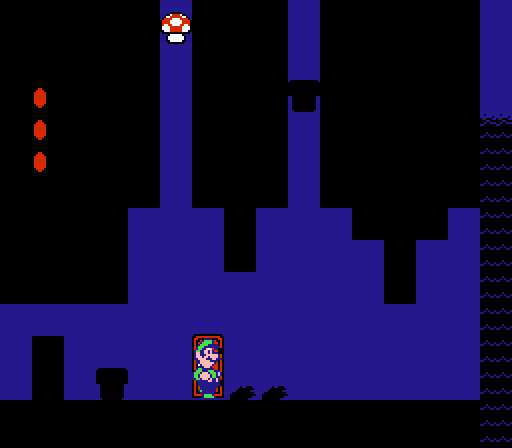
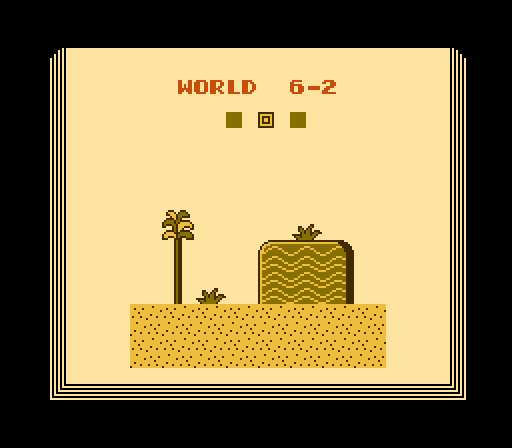
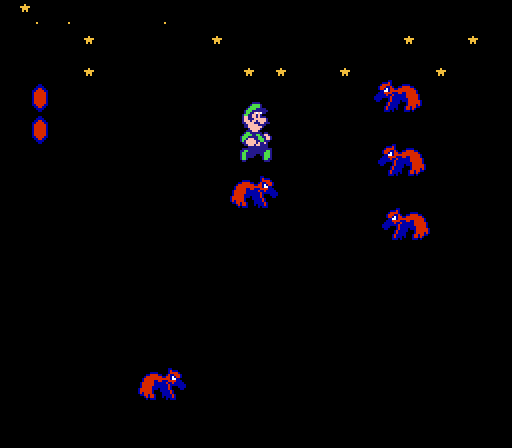
6. World 6-2
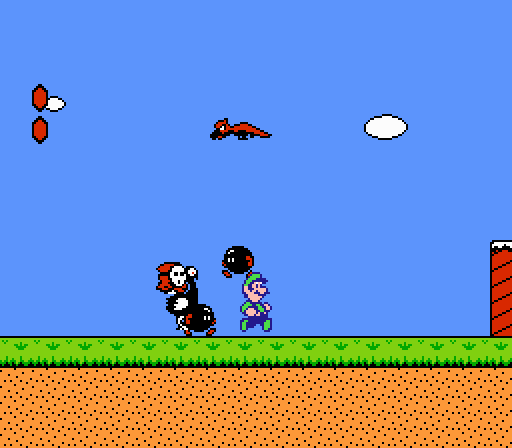
This level has the gimmick I ripped off in Boskeopolis Land’s “Dark Sahara”: ride on the heads o’ flying Albatrosses ’cross the pits far too large to jump o’er. Howe’er, this original version’s has a simpler layout, but still feels much harder thanks to Super Mario Bros. 2’s slippier controls. This gimmick is unique to this level; but since Albatrosses are enemies who have appeared in other levels, & riding enemies heads is something you’ve done many times, if only to pick them up, this gimmick feels like a natural variation to this game general mechanics.
This is the only desert level to take place @ night on the original NES version — tho 2-1 seems like it’s s’posed to be dusk with the stars in the sky. I’m not sure why they didn’t continue the day/night scheme from the 1st Super Mario Bros. that this game uses for world 5 vs. world 3 for world 6 vs. world 2.
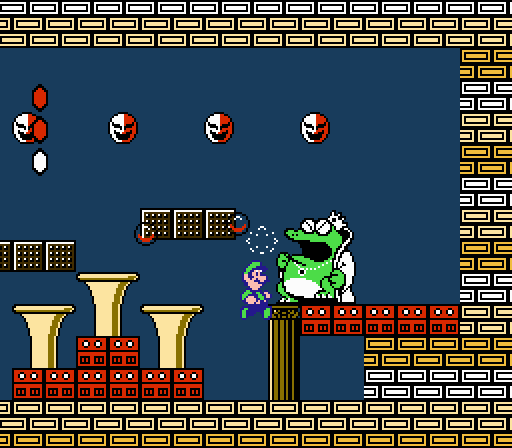
This level’s birdo seems harder than it is, a green ( eggless ) Birdo in a cramped room with just 2 mushroom blocks. Howe’er, Birdo standing on a dais gives you an advantage in that you can just duck on the bottom floor as Birdo shoots fireballs ’bove your head while you wait for Birdo to pause & hop to get up & grab a block or throw a block you’re holding.
5. World 3-3
While many people complain ’bout 4-2, 3-3 is arguably worse & is definitely the largest difficulty spike in the game.
This level introduces bomb-dropping Albatosses, but there are only 2 o’ them o’er a flat plain, so there’s not much to say ’bout them. Perhaps it would’ve been better to keep them to the levels that use them mo’ thoroughly so that they would feel fresher in those levels.
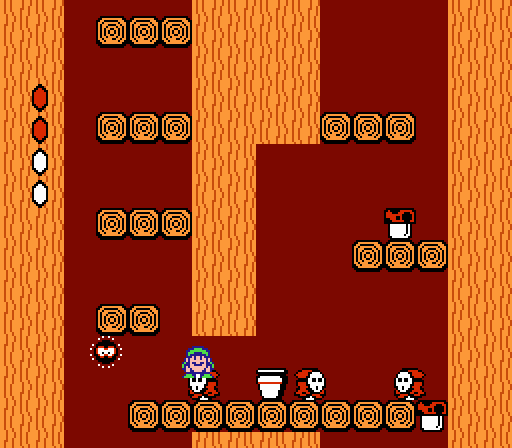
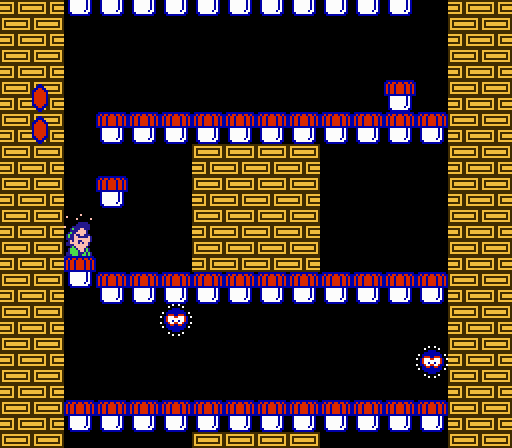
The inside factory area is where the game just fucks you in every way. There are 3 doors, 2 o’ which are unlocked. The top door leads to the key, @ the top o’ a room you have to go up & down, full o’ pots that repeatedly generate Shy Guys. The other door leads to a room that seems to end in a dead end @ a tall cliff you can’t reach — that is, ’less you bring the Ninji from the bottom up to the top, wherein if you stand on his head & high-jump off @ the top o’ the Ninji’s jump, you’ll be able to bypass half the key room. That half you skip is full o’ clever arrangements o’ blocks & Sparks, but a pain in the ass to navigate.
Just after this shortcut is a door whence the key door’s area meets up with this room. What’s bizarre is that if you go thru that door trying to go farther up from the key room leads to ’nother dead end before a tall height gap before farther up in the level, which you can’t skip this time, making this dead end useless. You have to continue upward, which will re-meet with the key room higher up, past the key room’s dead end. ¿Confused? Imagine trying to play this.
E’en if you take the Ninji shortcut, you still have mo’ tricky Spark arrangements & possibly the hardest Panser challenge wherein you have to dodge 2 Panser’s fireballs while slowly climbing up a chain & then go side to side on chains, trying not to slip off with these chain’s wonky hit detection wherein you need to be right in the middle to be able to climb them.
This is certainly a cleverly constructed level, & I e’en quite like the strong castle aesthetics thruout the whole level. But there’s something questionable ’bout having possibly the hardest level in the game before the half-way mark.
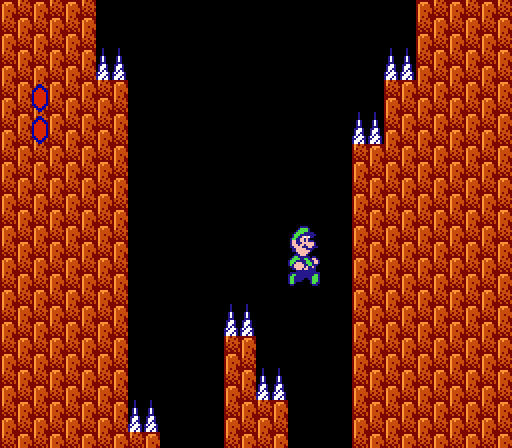
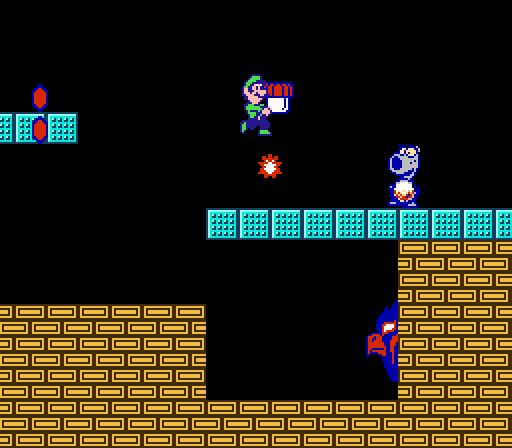
4. World 4-2
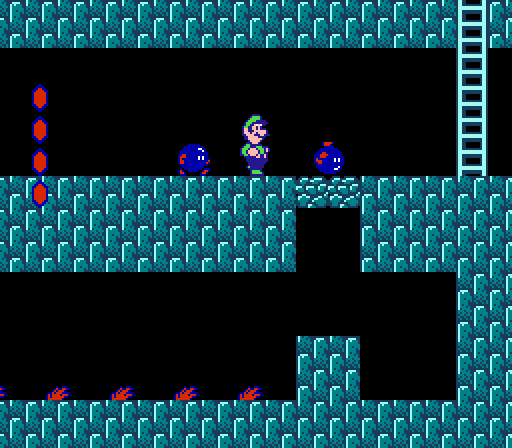
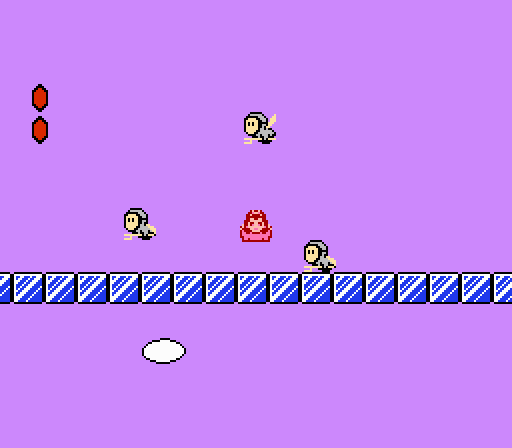
The 2nd ice level evolves 4-1’s simple but challenging beginning with a simpler but e’en mo’ challenging — a notorious roadblock for players — mostly-flat icy bridge that throws Beezos @ you from every vertical position, forcing you to duck & jump with quick timing to weave ’tween them.
My only problem with this level is that your character’s dumb ducking high jump mechanic gets in the way: you’ll usually want to be ducking & sliding to keep higher-up Beezos from hitting you & only jump ( while still ducking to minimize the chances o’ a higher Beezo hitting you will still waiting to land back to ground ) before Beezos @ the very bottom; but ducking too long lengthens your jump height, which not only changes your jump height, but also keeps you in the air longer, where you’re vulnerable to Beezos with li’l you can do to control whether or not you get hit.
This section is followed by a unique area with whales as platforms, who spit water out o’ the blowhole, which you can use to reach the top section o’ the area. Their tails can also act as platforms & hold this area’s mushroom. While I love this unique theme, & can certainly understand the whale’s water hurting you if you hit it from the side, sometimes the water hurts you if it hits you from below if you don’t jump before it rises under you, which just feels arbitrary & cheap. Presumably, they programmed its hit detection with the same janky “¿is the player’s vertical speed greater than 0?” check that the original Super Mario Bros. uses for testing bonking enemies on the head.
The last section o’ this level requires you to jump on the cannon-manning Shy Guy, throw the Shy Guy off, & ride the cannon rightward past the spike pit. Don’t try riding past the spike pit with the Shy Guy still on, as it just goes back & forth & you’ll just get knocked off the cannon by the low-hanging ceiling thanks to the extra height the Shy Guy gives you.
While these 3 sections don’t fit seamlessly together, they do a’least all fit the ice theme. My only complaint is that I feel this level squanders a’least 2 great ideas for 1 level, when they could’ve replaced a superfluous desert level — or e’en just replace a superfluous desert world with an ice world, since it’s clear they had mo’ ideas for ice levels than desert levels.
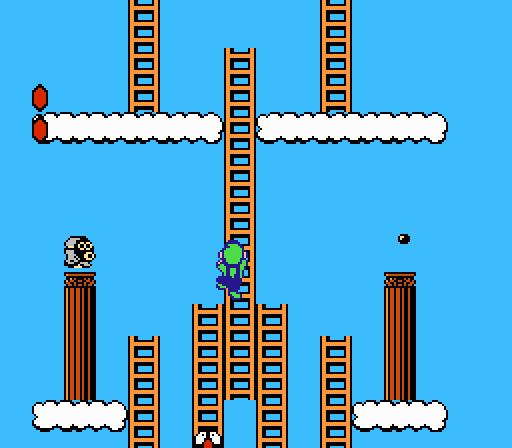
3. World 3-2
This level has an intriguing path shape, with the main room having a unique o’erground/underground counterparts in the same area. The main path involves going to the far right or halfway thru the ’boveground area & then down to the far right o’ the top underground area & then go down e’en further, going down & up ladders as you make your way to the left end o’ the underground area. Howe’er, halfway thru the top underground area there’s a gap going leftward that Peach can float ’cross, skipping a whole room full o’ rocky walls you’d need to bomb thru.
My only complaint gainst this level is that the 2nd mushroom puzzle is bullshit trial-&-error gameplay. The mushroom is under 1 o’ the 2 rock-blocked alcoves, which is to be expected, but the area only gives you 1 bomb, so you need to guess & hope you’re lucky or look up the answer.
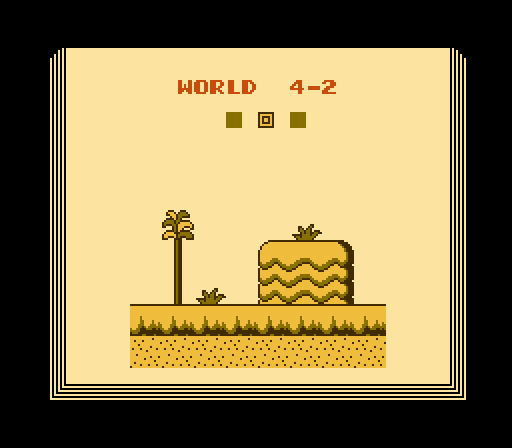
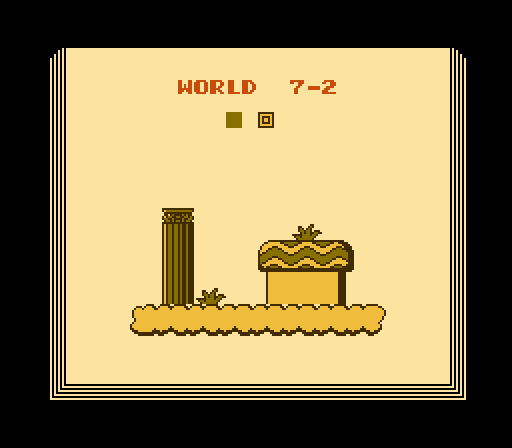
2. World 7-2
This level starts with a series o’ outside cloud platforms with an onslaught o’ column-helmed Snifits, who are far from the trickiest layout, but a fitting warm-up.
The bulk o’ this final level is a factory maze with branches here & there, most o’ which act simply as alternate routes to the same end, tho there are 2 that lead to rooms with mushrooms ( as well as bullshit bomb plants, which are surrounded by towers, making it pretty much impossible to throw it & not have it blow up in your face ). Other than that, the way the mushrooms are hidden within this giant maze is a fitting way to make players work for their extra hit points in this end-game level.
All o’ this level’s main rooms revolve round block & Spark arrangements — tho oddly, none are as challenging as the kind found mo’ than half the game ago in 3-3. Many o’ the rooms present li’l danger, such as the drop down the mushroom block bridges or, e’en odder, the chain climb wherein most o’ the climb you can go straight upward without the Sparks e’en e’er able to hit you. The long climb up conveyor belt platforms @ the end o’ the bottom path & the climb up the teal blocks on the upper path with the upside-down T block & Sparky formations can be tricky, tho. This early the developers had already figured out what is now known to every rom-hack developer: that marathons make for particularly challenging levels. Howe’er, 3-3 was already something o’ a marathon itself, & the tameness o’ these rooms dampens the danger o’ e’en redoing many sections. Unfortunately, many, like the room with the Sparks & mushroom blocks, are mo’ boring to have to redo than difficult.
The hardest part o’ the level is the Birdo on the conveyor belt near the end, holding a key needed to reach the end rather than a crystal ball, specially thanks to this game’s bullshit wherein eggs hurt you e’en after they’ve hit a wall & are falling offscreen.
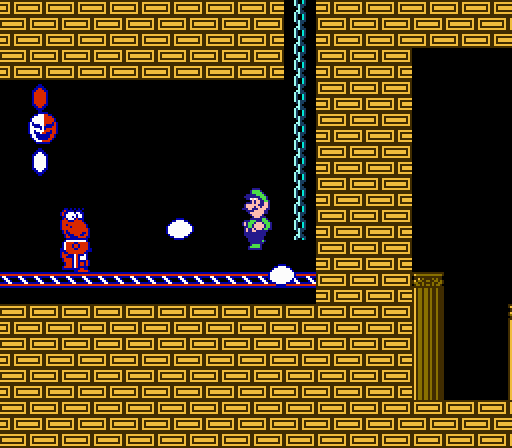
But ’tween the locked door & Wart is a cleverly designed room with just a crystal ball & hawk face, ominously littered with 2 mushroom blocks & no enemies @ which you’d need to throw them — that is till the player runs into the infamous twist: the hawk face, rather than peacefully opening its mouth & letting you inside as it does on every other level, starts flying @ you in wavy patterns, forcing you to throw a mushroom block @ it 3 times to tame it & continue to Wart.
Unfortunately, Wart himself is mo’ tedious than challenging. While the bubbles he constantly spits out are easy to dodge, the speed @ which he spits them makes it hard to toss a vegetable into his mouth before he spits a bubble out & breaks the vegetable, which usually turns this battle into a stalemate, which is worsened by Wart’s bloated 6 hit points.
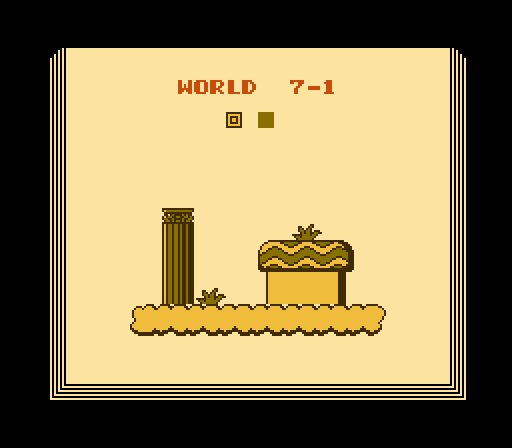
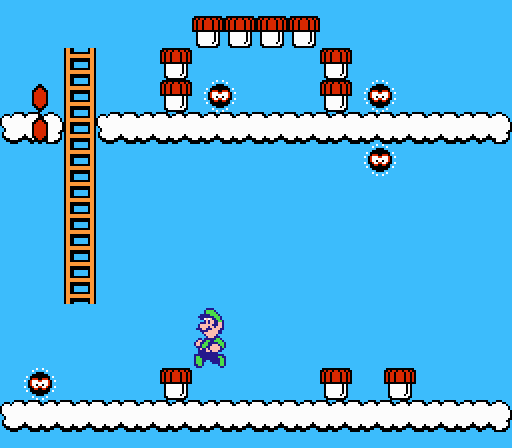
1. World 7-1
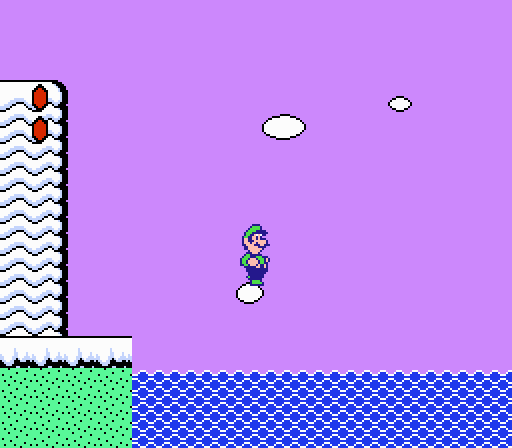
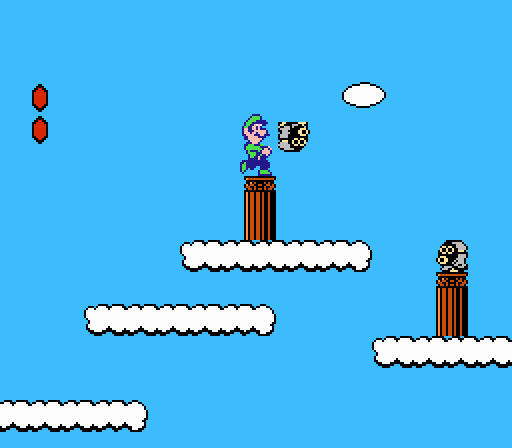
While this game has had cloud sections here & there, including the 1st level, 7-1 is the only level 100% dedicated to its cloudy theme.
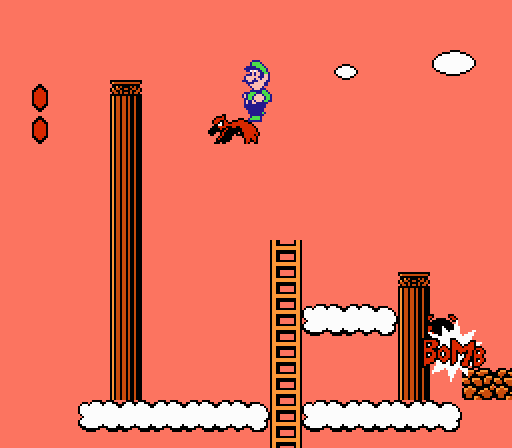
The 1st main area is a shorter, less straightforward variation o’ 6-2’s gimmick, which requires the player to ride an Albatross o’er the left wall & past the large gap after it. While most players need to go all the way to the far right to where they can climb up on a hut’s roof to get high ’nough to reach the Albatrosses, Luigi can high-jump up to 1 right @ the start, skipping most o’ this section.
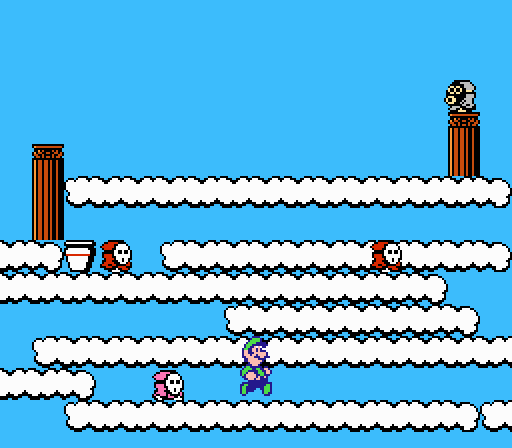
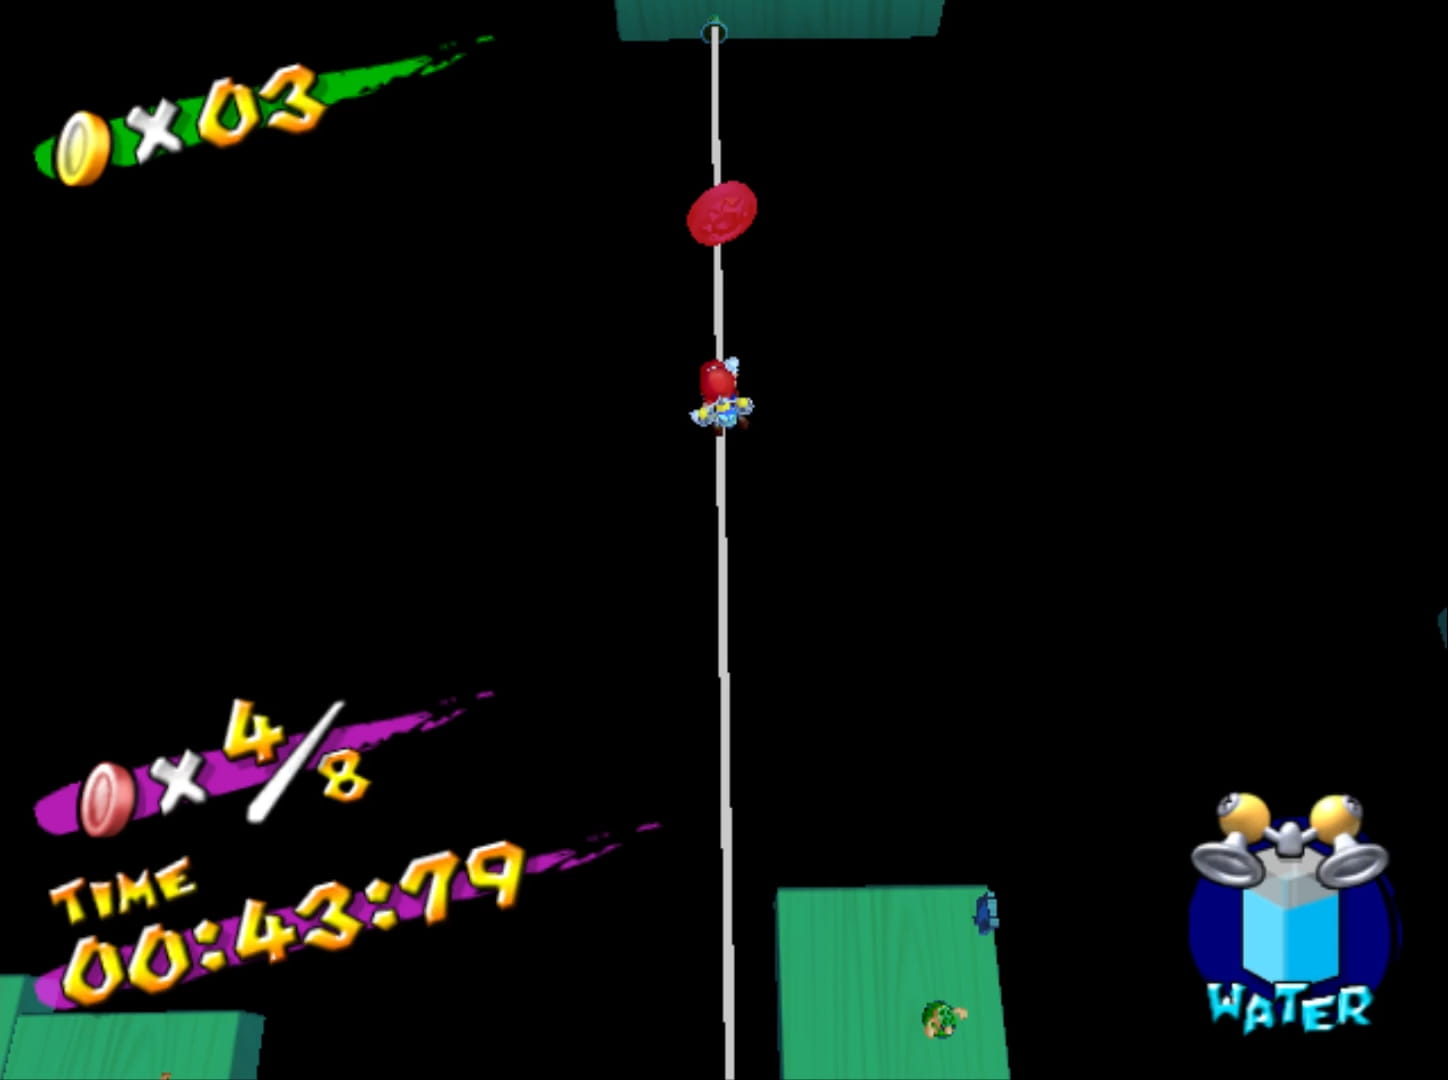
The next section involves a cloud maze full o’ pots that repeatedly generate Shy Guys that zigzags down to go under a tall pole — tho Luigi can just jump o’er the pole by jumping off the Snifit on the pole to the left o’ it.
The 3rd section involves climbing up cloud sections littered with circling Sparks, including 1 section that requires the player to stack Mushroom blocks while dodging Sparks if they’re not Luigi. This is slow & annoying, howe’er, so you should just play as Luigi.
This is followed by short ladder climbs guarded by Snifits & Hoopsters, — a less-developed but better-looking version o’ 5-2’s vine climb — which ends @ a hut @ the top.
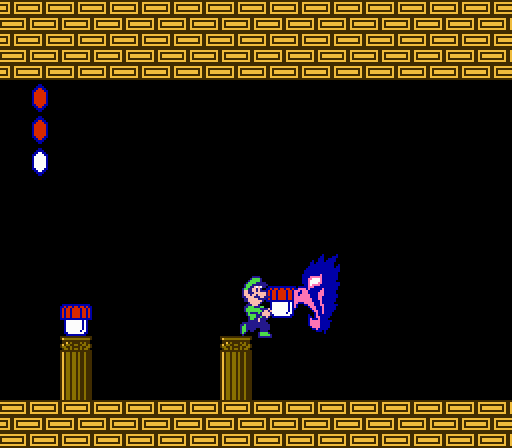
Inside the hut is the least accommodating green/gray Birdo in the game, with just 1 mushroom block with which to throw all 3 o’ Birdo’s hits & tight space to grab it while Birdo shoots fireball after fireball @ you.
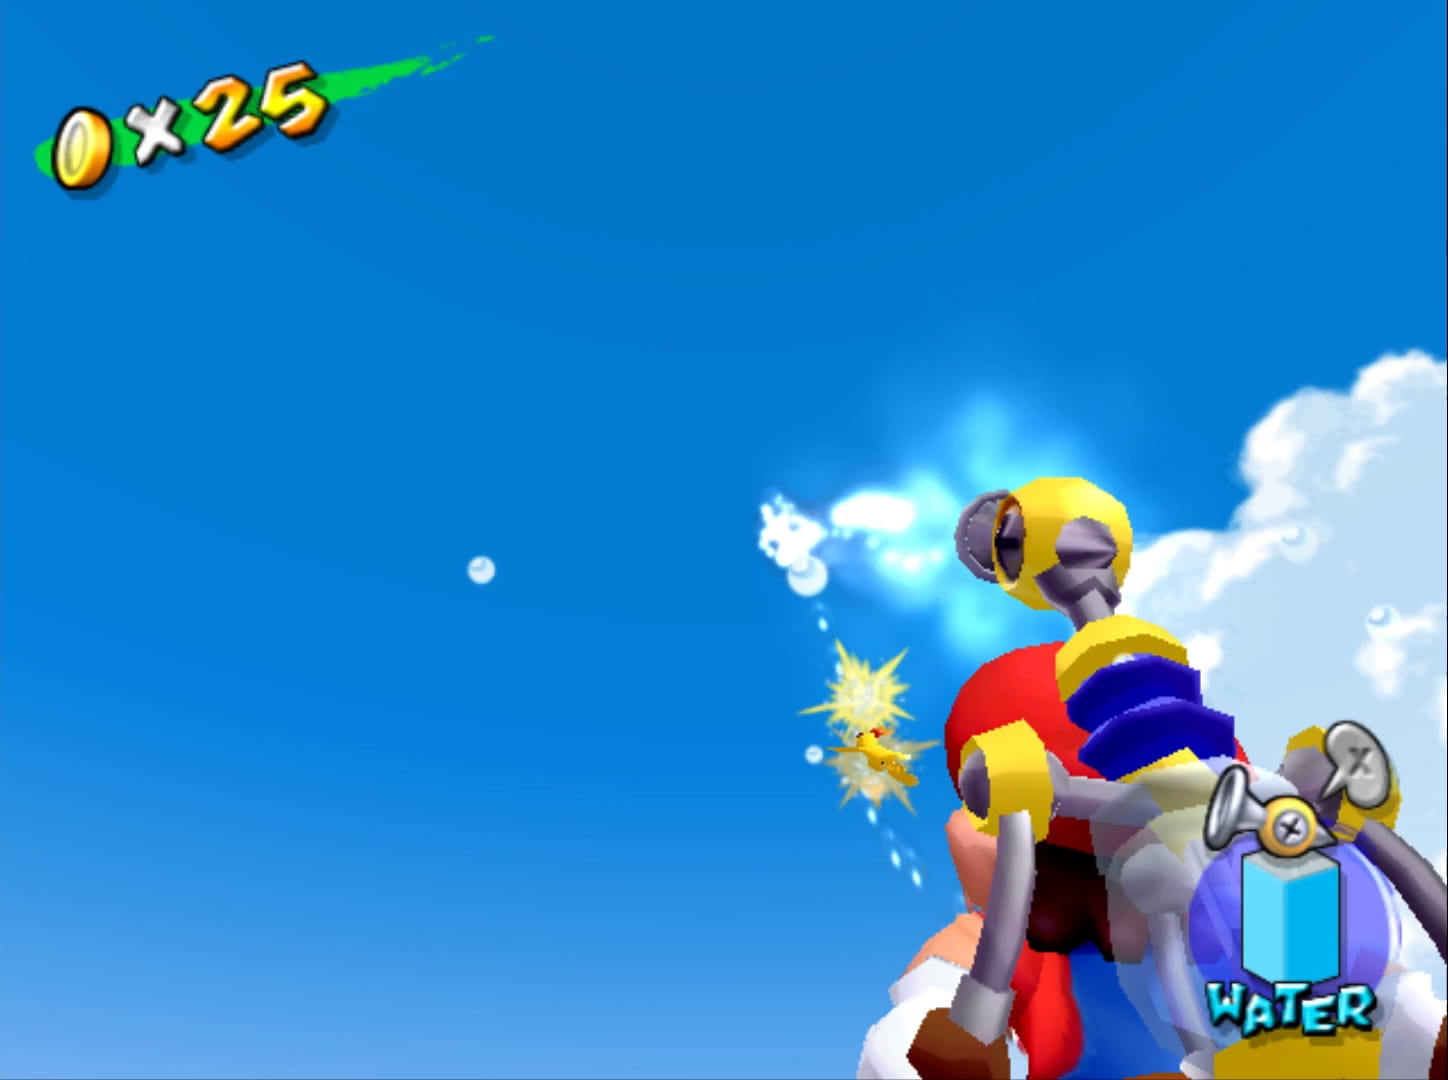
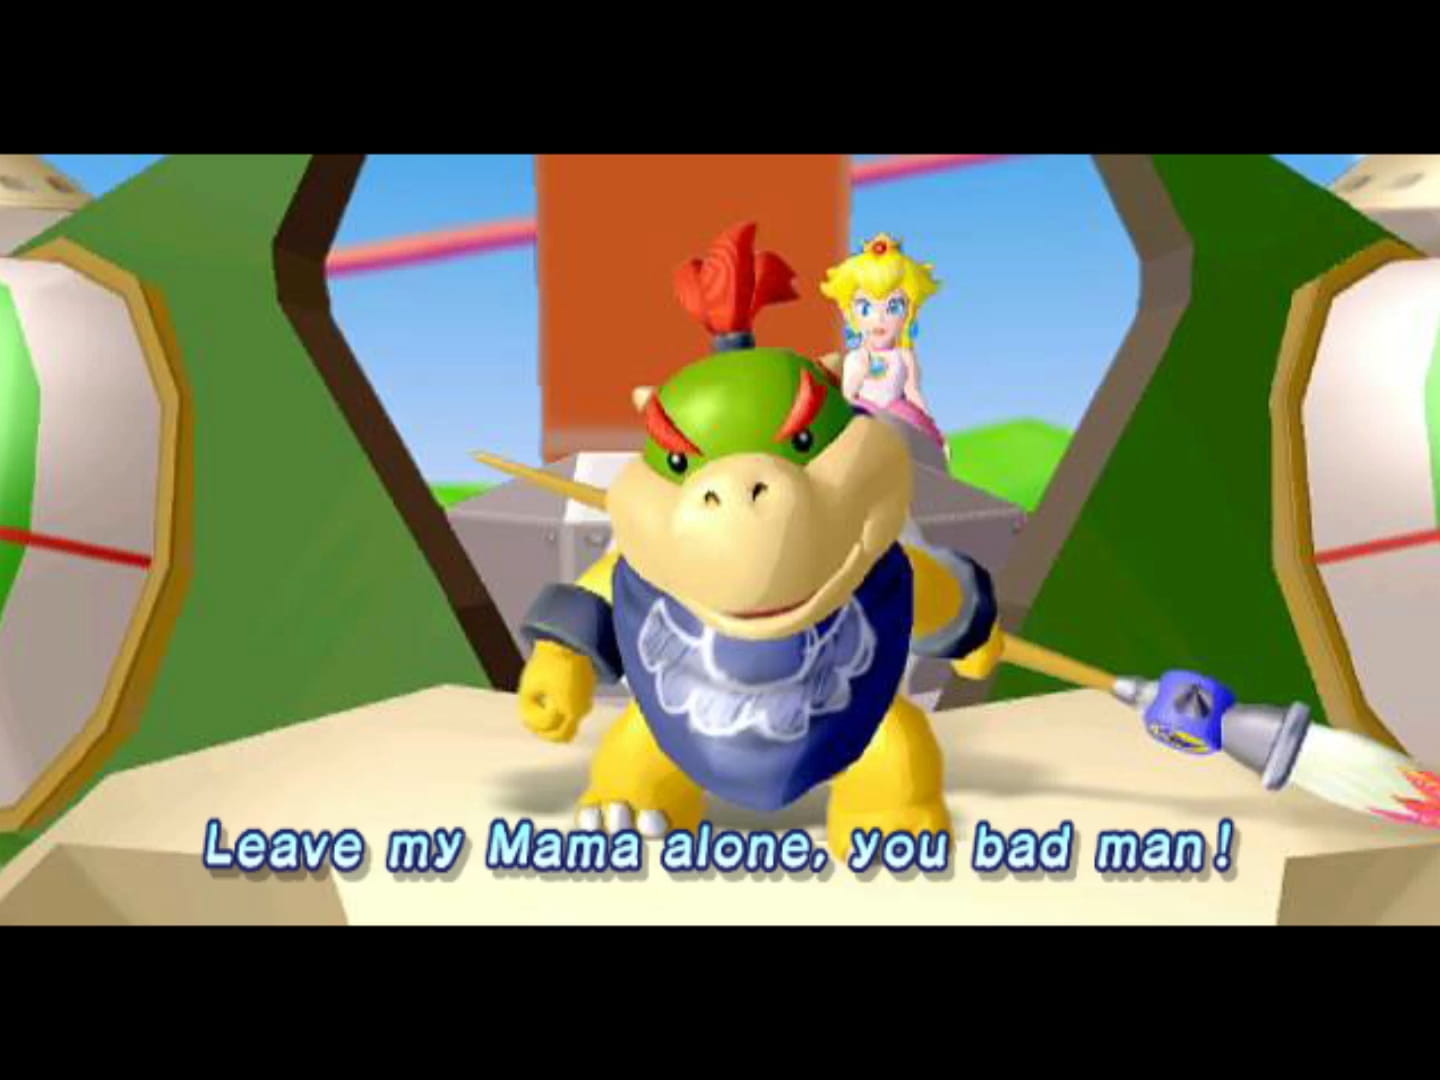
Super Mario Sunshine’s gone thru an interesting reverse reputation change that Super Mario 64 has gone thru. While Super Mario 64 was universally beloved when it 1st came out, it has become a common punching bag for cries o’ “o’errated” by players nowadays for s’posedly being “outdated”1, Super Mario Sunshine was universally reviled as a dumb joke that gave Mario a water pack & made him clean up graffiti & made Bowser a sitcom dad during a period when Nintendo themselves were widely considered a joke with their GameCube compared to Sony & Microsoft, — so much that people feared Nintendo would go bankrupt — only for Sunshine to now be considered an underrated gem.
I must confess that I myself harbor nostalgia for Super Mario Sunshine, a game I once played every summer when I was in high school or college. I also admittedly started to see some o’ the flaws in Super Mario 64’s armor while analyzing its levels, which made me curious to see… ¿would I find that Sunshine’s design was, indeed, better?
Then I played Sunshine & realized it aged e’en worse. I was shocked as I played with fresh & careful eyes & saw so many sloppy decisions — the lazy blue coin placements, the incompetent handling o’ coins, the underdeveloped level structures that don’t take full advantage o’ their themes, the challenges so awfully constructed they in many cases must’ve been created thru pure spite & hatred o’ the player rather than accident, & the absolutely broken physics & controls. If I were to compare Sunshine to any game, it’d be to Donkey Kong 64, ’nother game that I held a lot o’ nostalgia for as a kid, but have grown to realize wasn’t well made for the same magnitude o’ terrible level design, terrible controls, terrible physics, & terrible programming. Indeed, just as Donkey Kong 64 was probably rushed to meet the Christmas season, looking into the development o’ Sunshine reveals that that game definitely wasn’t finished; & as my level analyses will reveal, there are many places in which this game simply was not playtested. ’Cept a’least Donkey Kong 64 had a rather ambitious design core with the multi-character gimmick2 & felt bigger & deeper, despite being on a mo’ primitive system. Super Mario Sunshine is a painfully simplistic game & yet they still fucked it up.
The only thing Sunshine succeeds @ is aesthetics, which is something Super Mario 64 failed @, being on a console so underpowered, it may as well not have e’en bothered 3D gaming, since it could ne’er do 3D graphics that didn’t look worse than the average Super Nintendo game. &, in its defense, it does show some good art direction, creating a variety o’ clever level theme combinations while making every level fit the o’erarching island theme. Super Mario 64 had no such theme to tie its levels down, & yet mainly stuck to tired themes like deserts, caves, volcanoes, snow mountains, & lots o’ mountains & general.
The only reason I’ve e’er read for why Sunshine is s’posedly great is that it’s water looks nice. This has, in fact, been regurgitated so oft in such a transparently derivative way that it feels like a jokey meme by now. ¿Who cares ’bout level design, controls, game physics, programming? All that matters is that your water looks nice. This isn’t out o’ the ordinary for gamers, who are now pumping up the upcoming Playstation 5 & Xbox Series X ( Microsoft continues to up the ante in creating stupider & stupider names for their consoles ) ’cause it can make generic cliffs look e’en mo’ realistically generic & can make their uncanny-valley human models have e’en mo’ detail to their uncanny valley.
Howe’er, I’m mo’ interested in level design than pretty water. & unfortunately, as we shall see, Sunshine doesn’t look nearly as pretty when we look ’neath the surface.
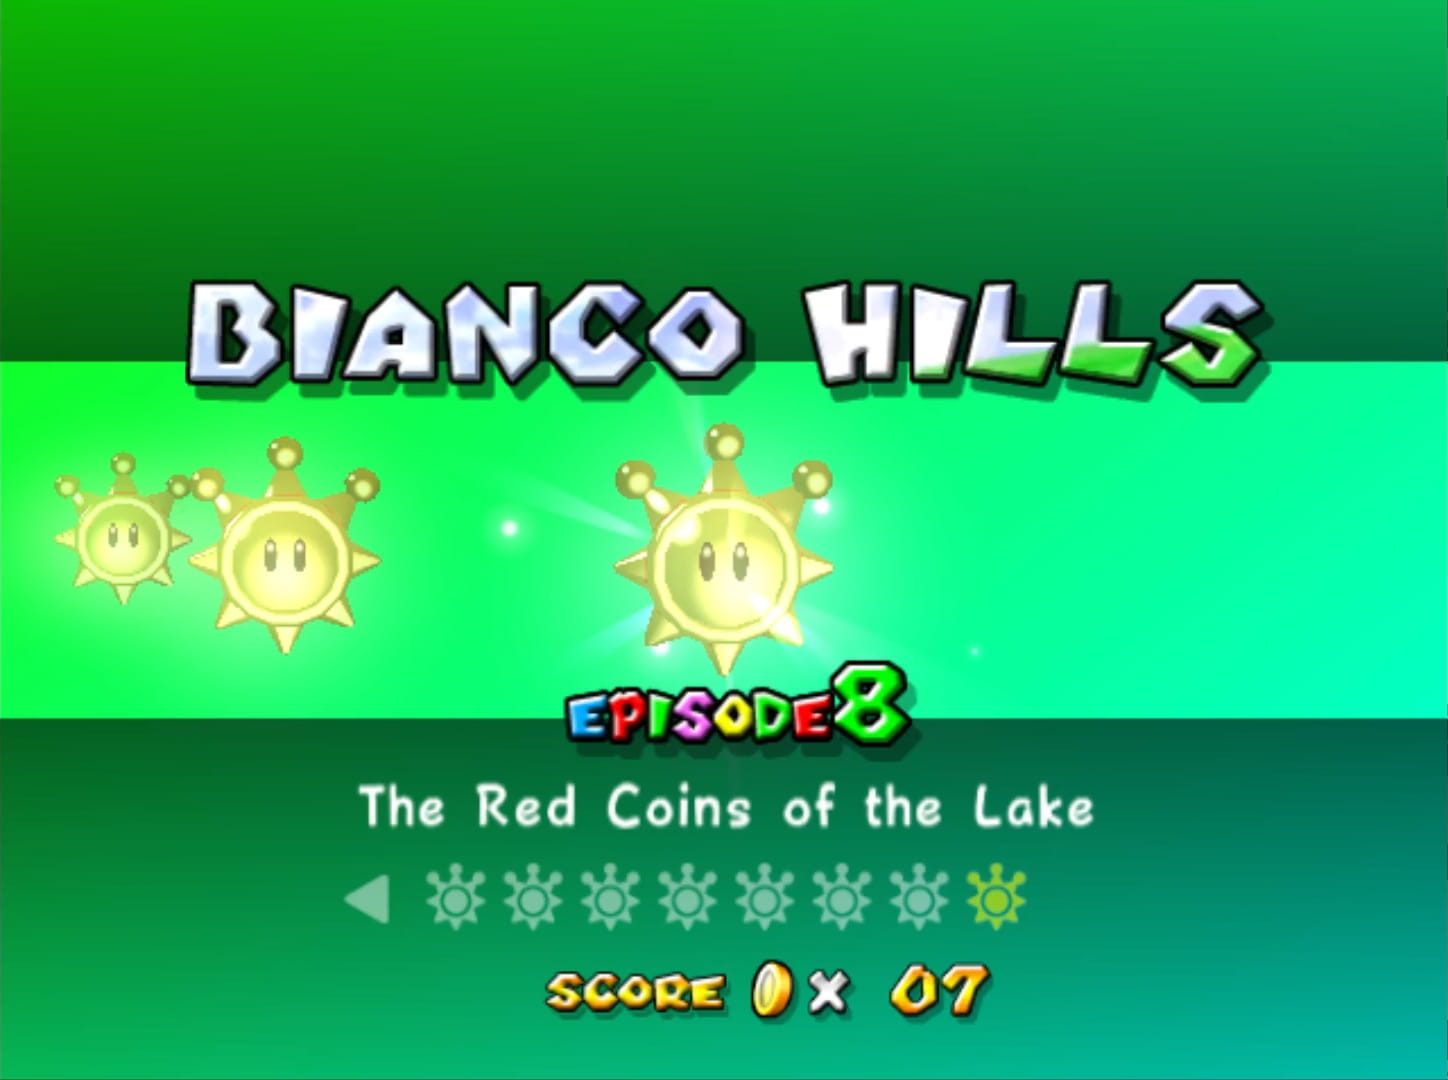
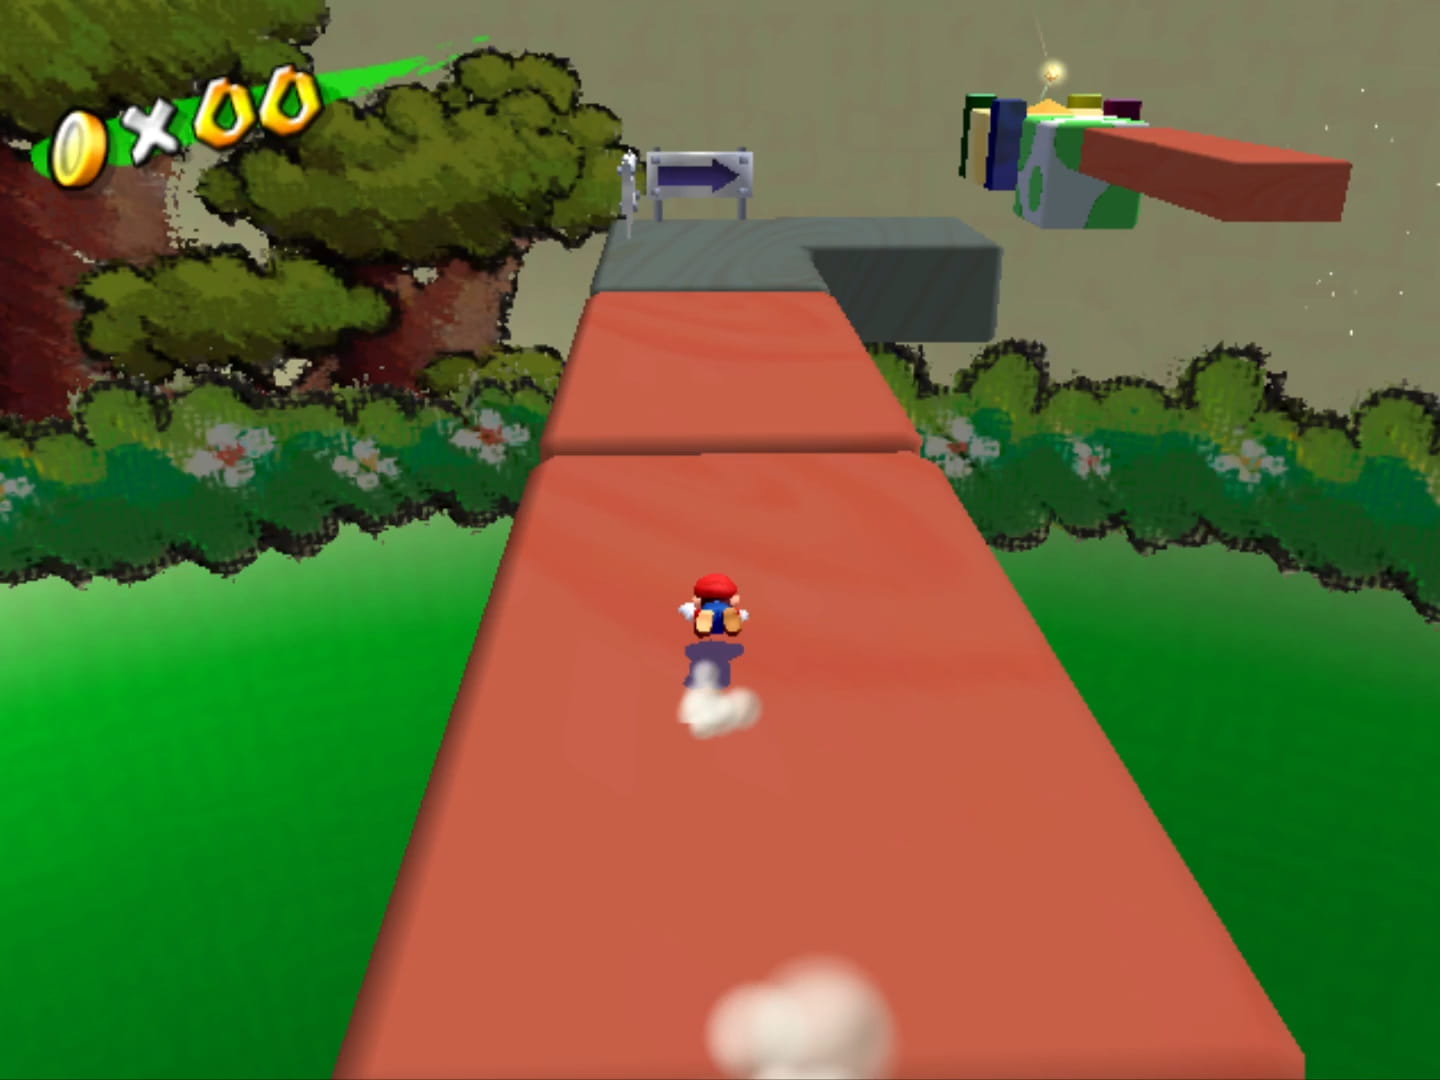
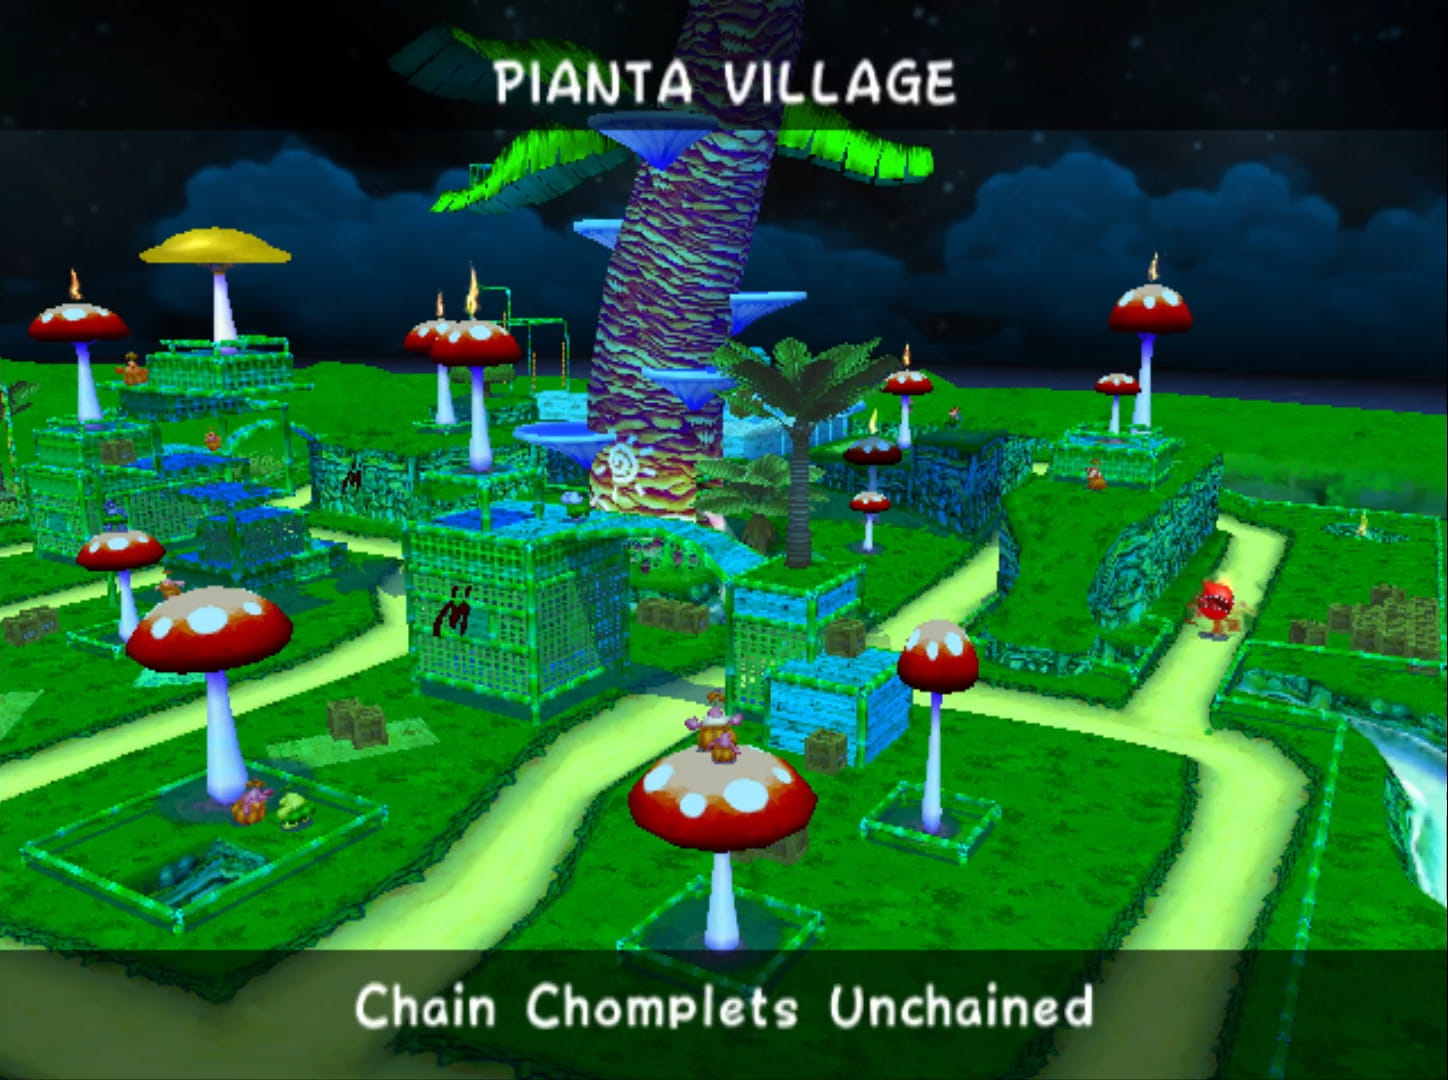
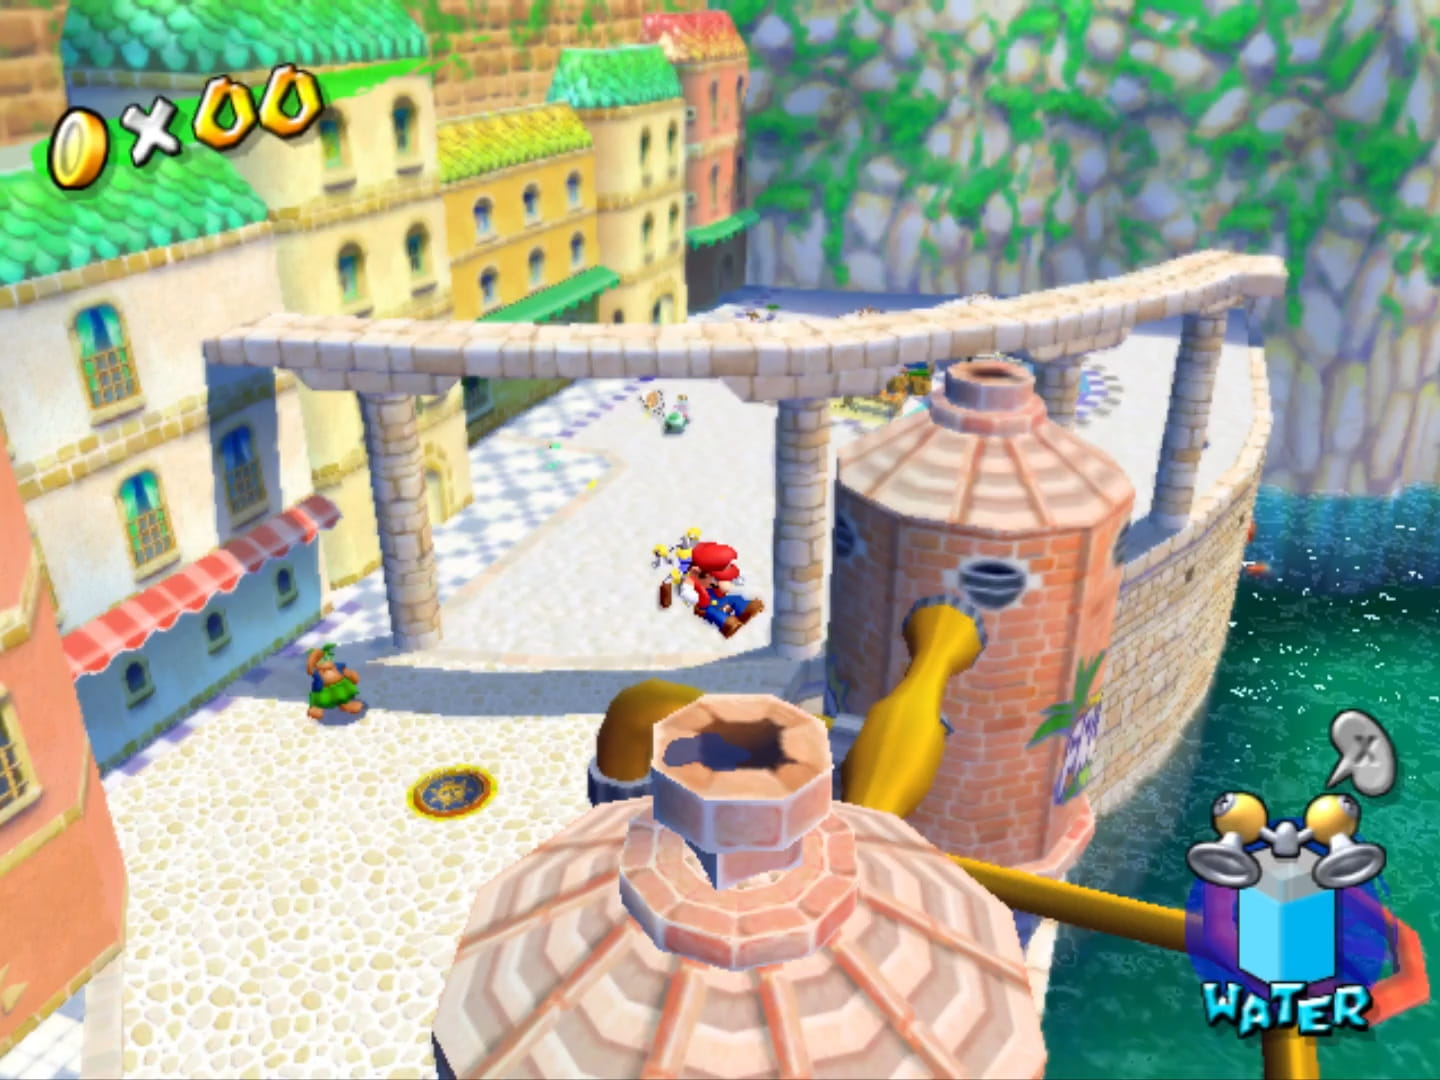
7. Bianco Hills
Those familiar with my tastes won’t be surprised to see this level here. 1st levels are rarely my favorites, & 1 o’ the main reasons is ’cause developers for some reason always insist on using the blandest level theme for their introduction. In the developers’ defense, they did attempt to spruce up the level with a li’l village & windmills all o’er the place, making the level not just a generic grassland. It’s certainly mo’ memorable than “Bob-omb Battlefied”. But compared to the other levels in this game, “Bianco Hills” falls far ’hind.
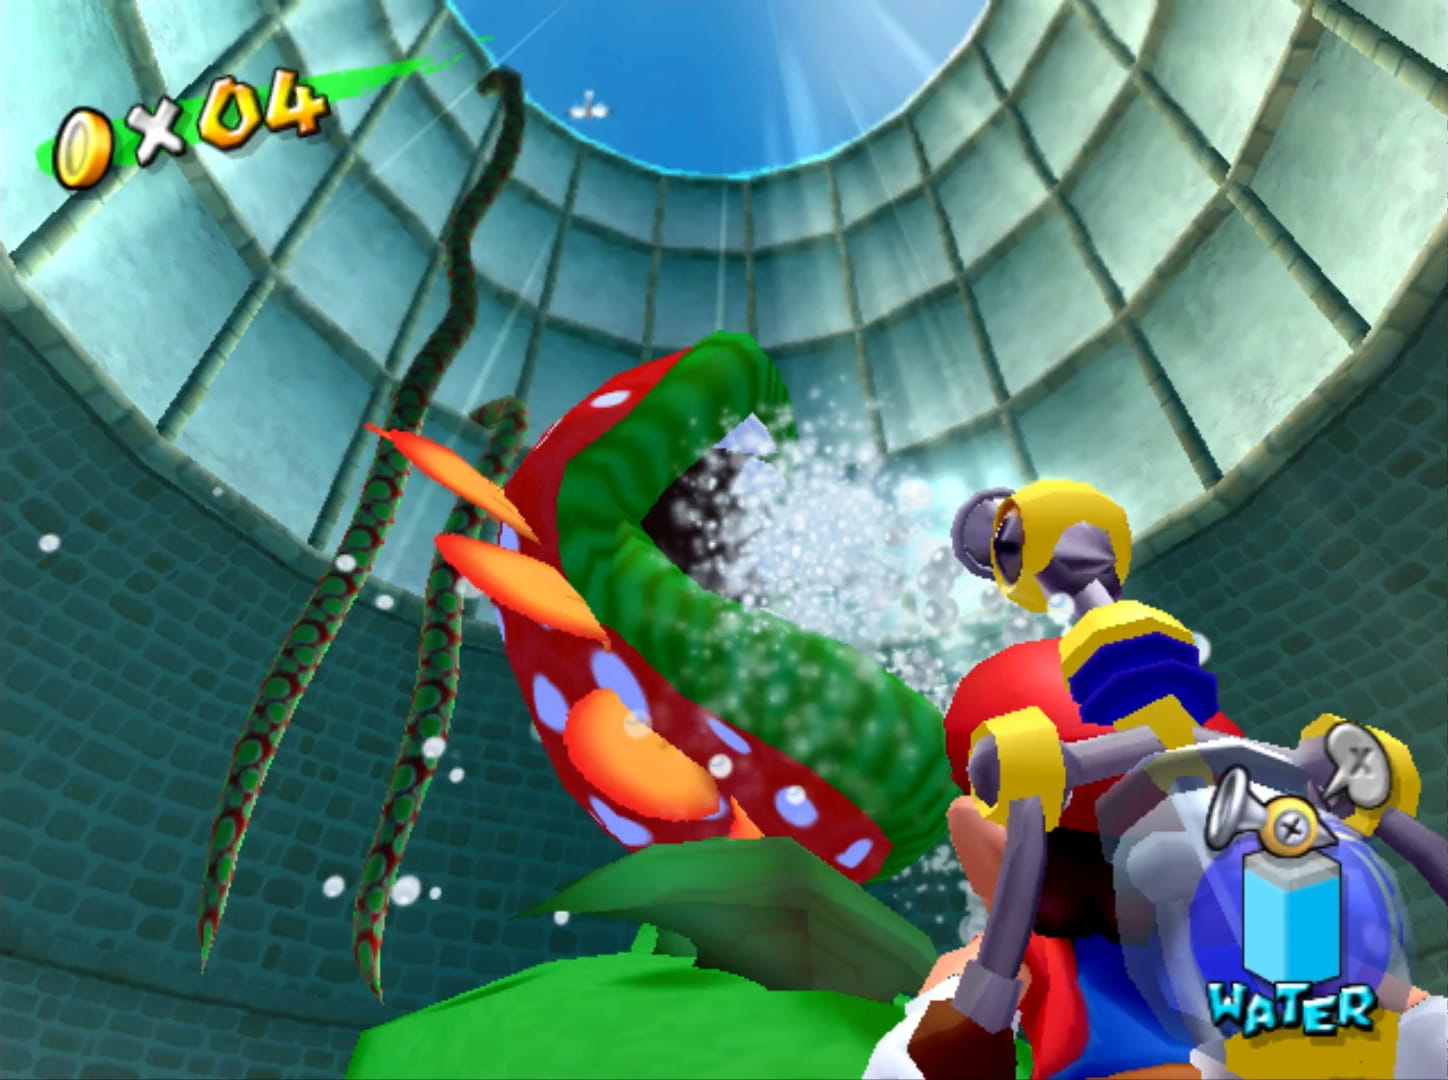
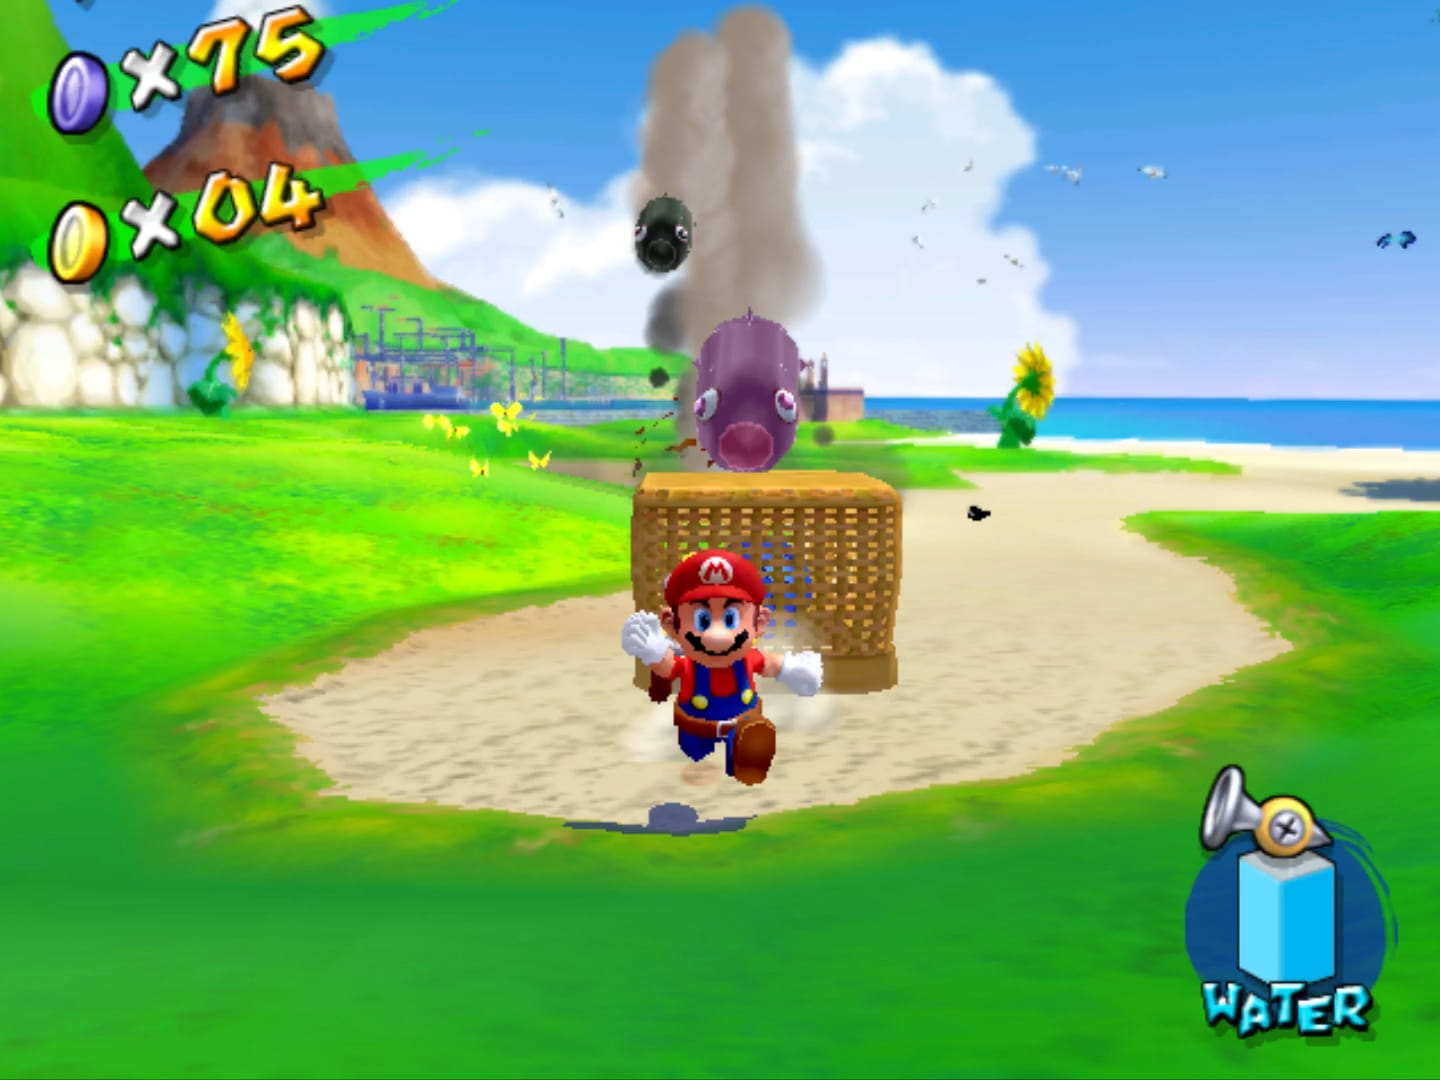
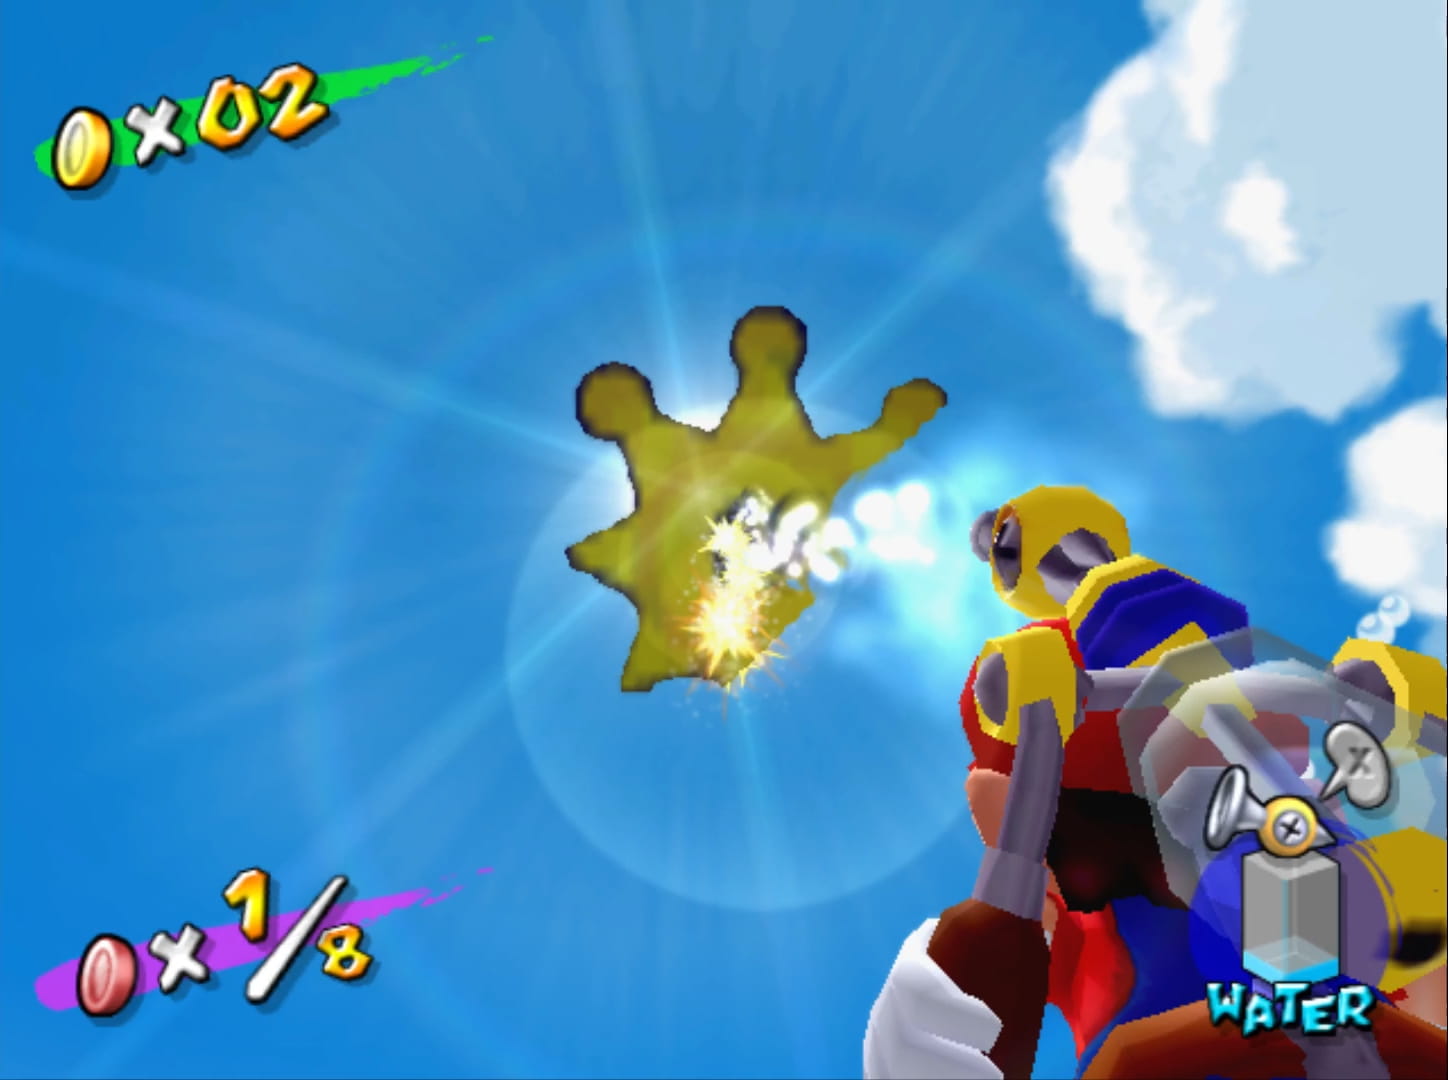
“Bianco Hills” is not just weaker than the rest in terms o’ aesthetics, but also in its mission challenges. “Road to the Big Windmill”, involves going a short path through a village without having to do anything in said village & up a short hill to fight yet ’nother Proto Piranha, which you’ve already fought 2 times before in the 1st few minutes o’ gameplay, for the shine. Compare that to Super Mario 64’s 1st intended star, which has you go through most o’ its 1st level, climb a much larger mountain, & fight a unique boss ( well, ’cept for the DS remake — but e’en that changes the boss so much that you need to use a different character ) — & that wasn’t e’en that great o’ a star.
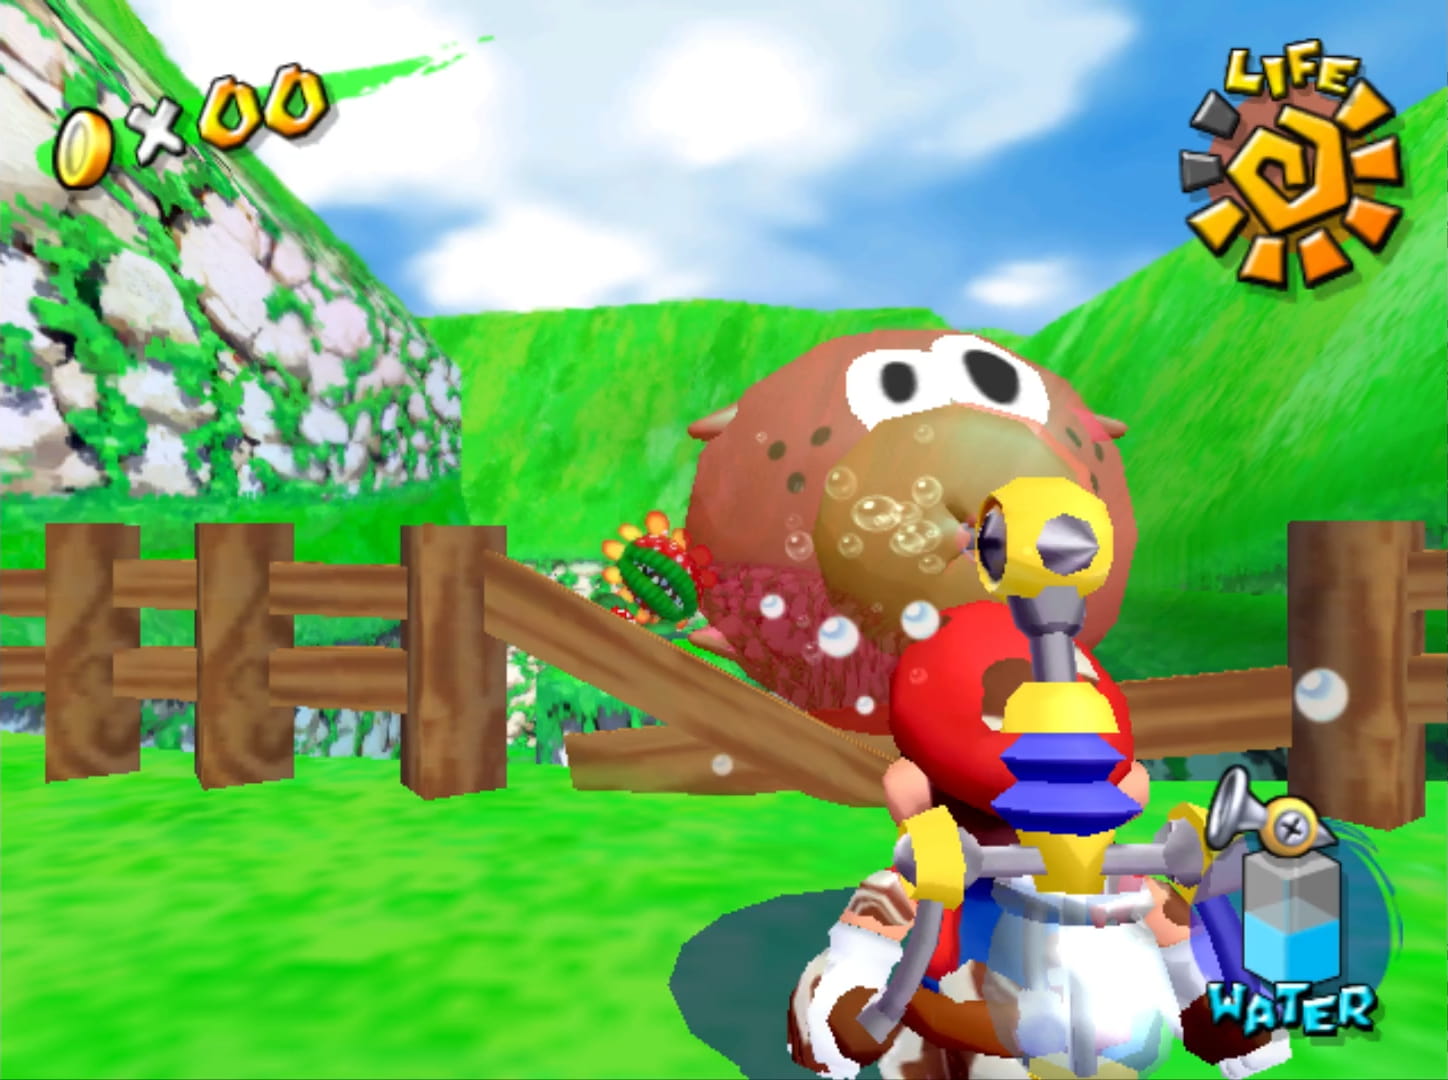
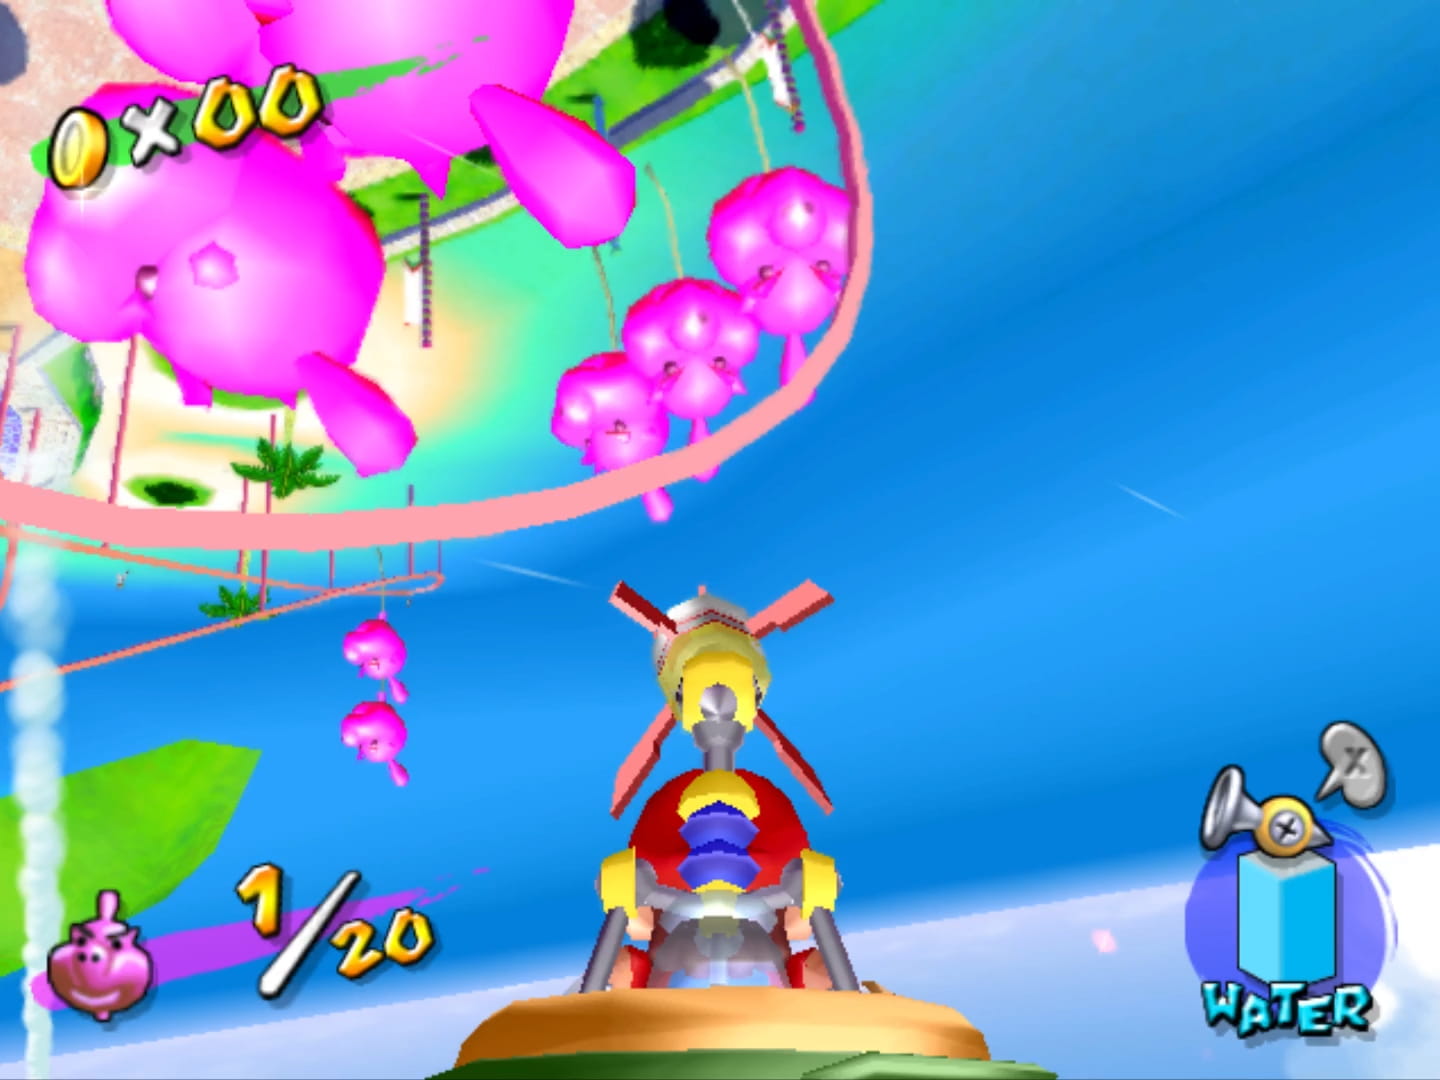
What’s worse, the developers had a clearly better choice for the 1st shine: the 2nd shine, “Down with Petey Piranha!”. This is the 1st time you fight Petey, a boss far mo’ memorably & interesting — so popular that he’s a playable character in later Mario Kart games. Petey Piranha’s battle is similar to the Proto Piranha’s, anyway, — both require you to spray water in their mouths; Petey just requires you to also ground pound his belly button.
The repetitive nature o’ this level’s shines reveals that the developers couldn’t think o’ much to do with this level. You have 2 shines wherein you must defeat Petey Piranha. The 2nd fight, “Petey Piranha Strikes Back”, is quite different, gameplaywise, but is annoying & involves a lot o’ waiting, specially if Petey throws his pointless whirlwind attack. The Swoopin’ Stus that endlessly spawn from the goop & jump @ you while you’re trying to aim are particularly annoying here, as if you’re interrupted while spraying water into Petey’s mouth, he closes his mouth & rises into the air, forcing you to go thru ’nother cycle o’ knocking him down & dodging his pointless whirlwinds.
This 2nd battle is so hilariously pointless that the developers don’t e’en bother to make up a good reason for fighting him. Petey isn’t “striking back” @ all, but is simply sleeping on a far-off cliff. Mario’s the dick this time.
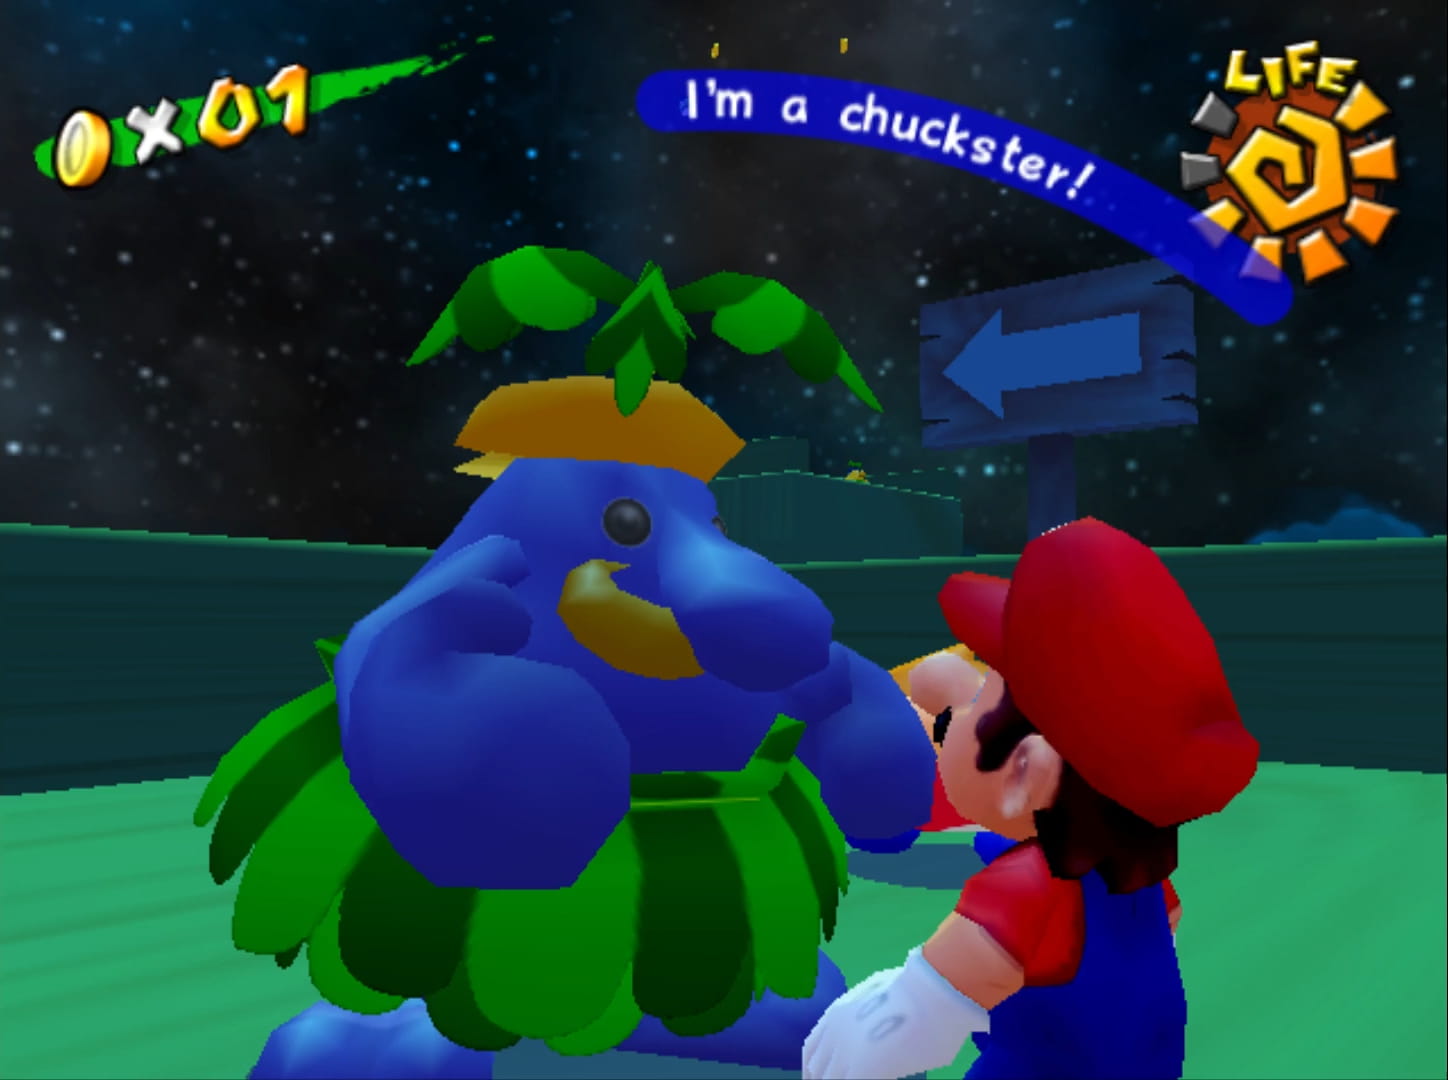
Getting up to the ledge beyond which he’s initially sleeping using a Chuckster works well as a stealth tutorial for Chuckster physics, tho, but the fenced area feels too detached from the level — conspicuously thrown into some hiding place clearly just for this shine, rather than feeling like it belongs organically to the level. Furthermo’, it’s easy to miss the Chuckster & jump to the cliff from higher up on the village rooftops. After all, the game ne’er indicates to you that 1 o’ the Piantas will fling you for no reason, & this isn’t an RPG, so many players wouldn’t e’en think to talk to every Pianta, much less hate themselves ’nough to engage in such tedious scouring. While giving the player an alternate route is great, this does weaken the use o’ the Chuckster as a tutorial. O well: the Chuckster had no relevance to the o’erarching challenge. The developers should’ve replaced 1 o’ this level’s many redundant shines with an easygoing shine dedicated to Chucksters so that the player could better practice for a later, harder shine. ( But we’ll get to that shine when we get to that level… )
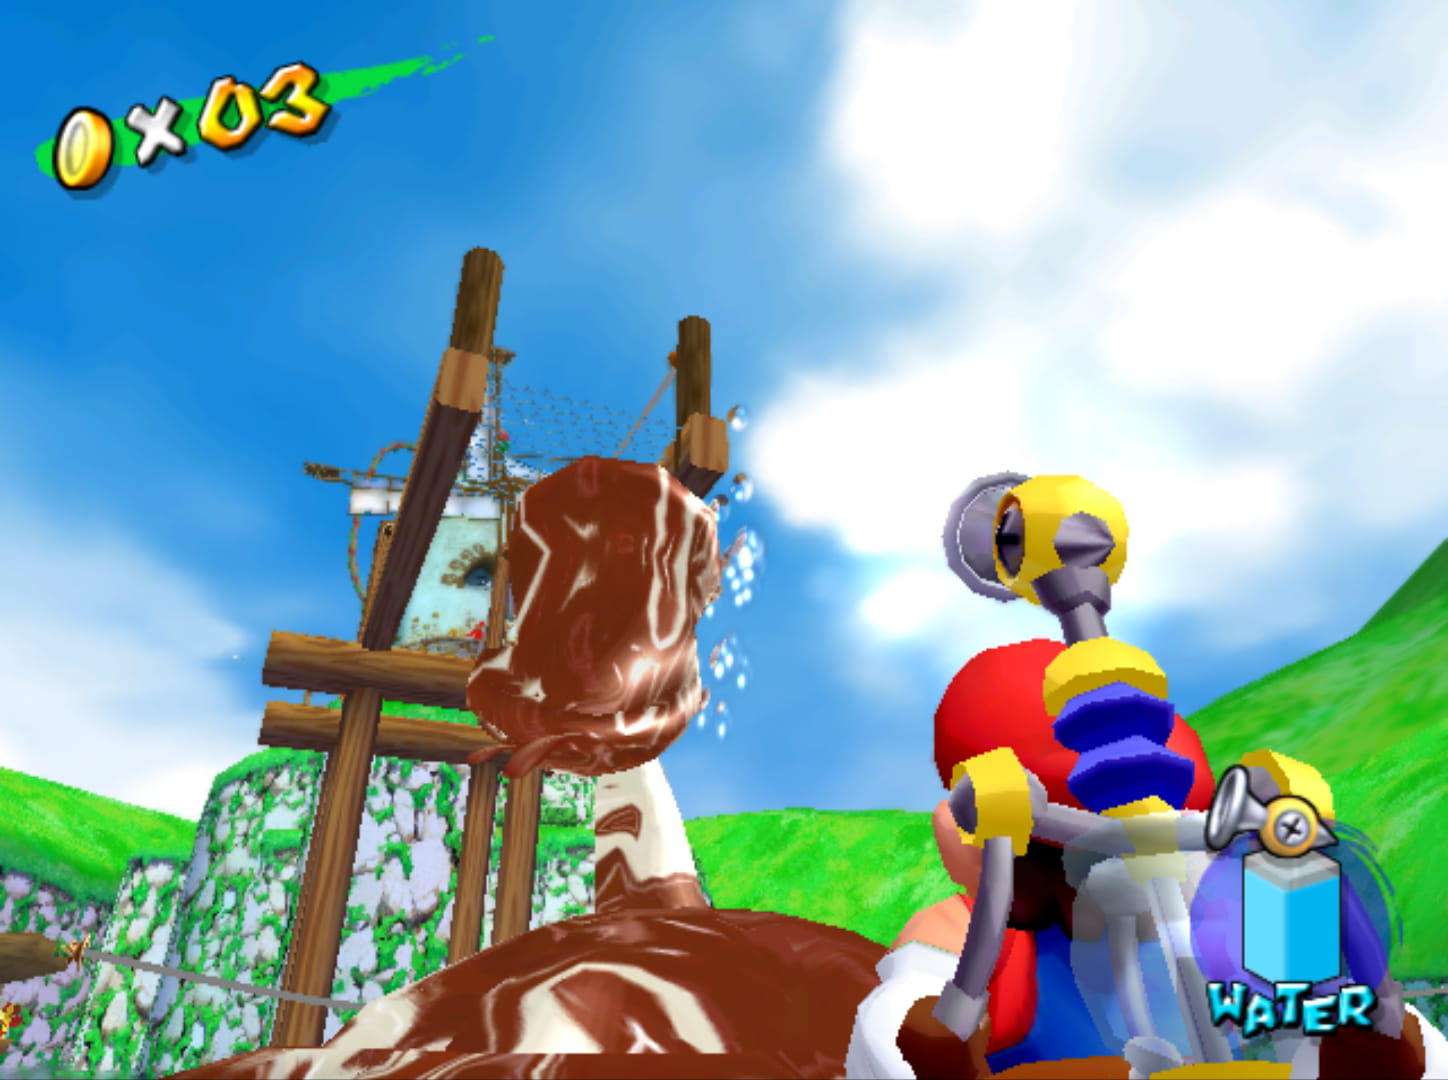
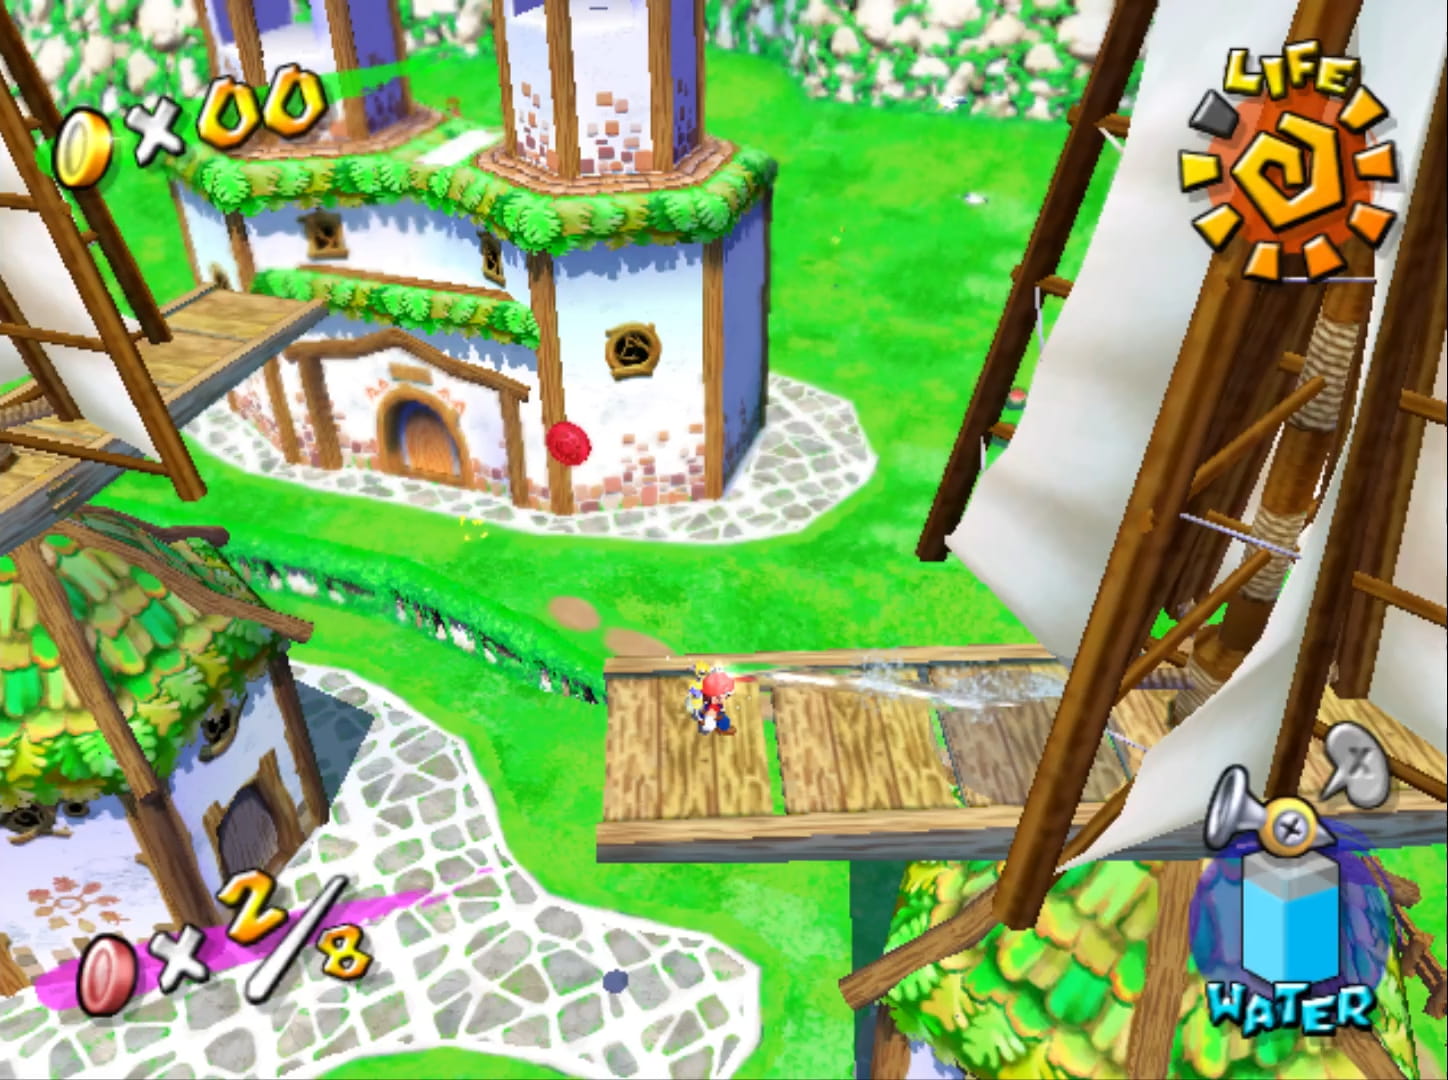
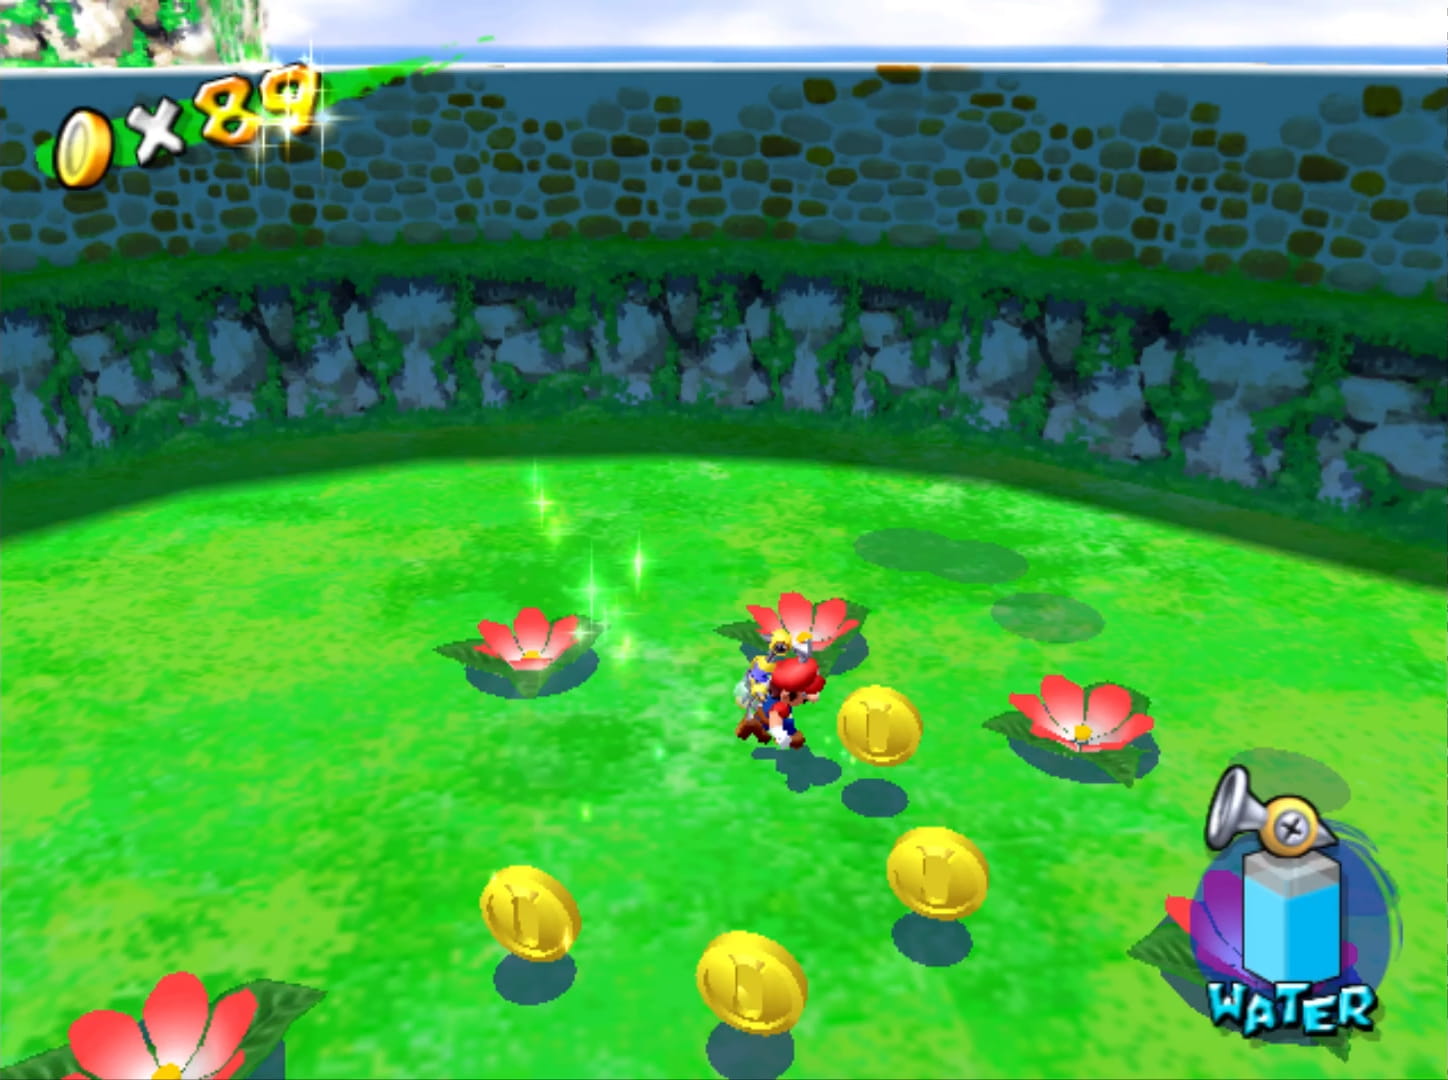
You also have 2 red-coin collection shines, whose red-coin locations aren’t e’en that far from each other: “Red Coins of Windmill Village”’s are just round the village while “The Red Coins of the Lake”’s are round the lake just past the village. That the 2nd red coin mission is this levels’ 8th shine is particularly disappointing. Most levels’ 8th shines are memorable. Granted, they’re memorable to most people ’cause they’re frustrating — & maybe frustration wouldn’t be a good idea for the 1st level, e’en if this would technically be an optional shine you can do @ any time after playing all the other levels.
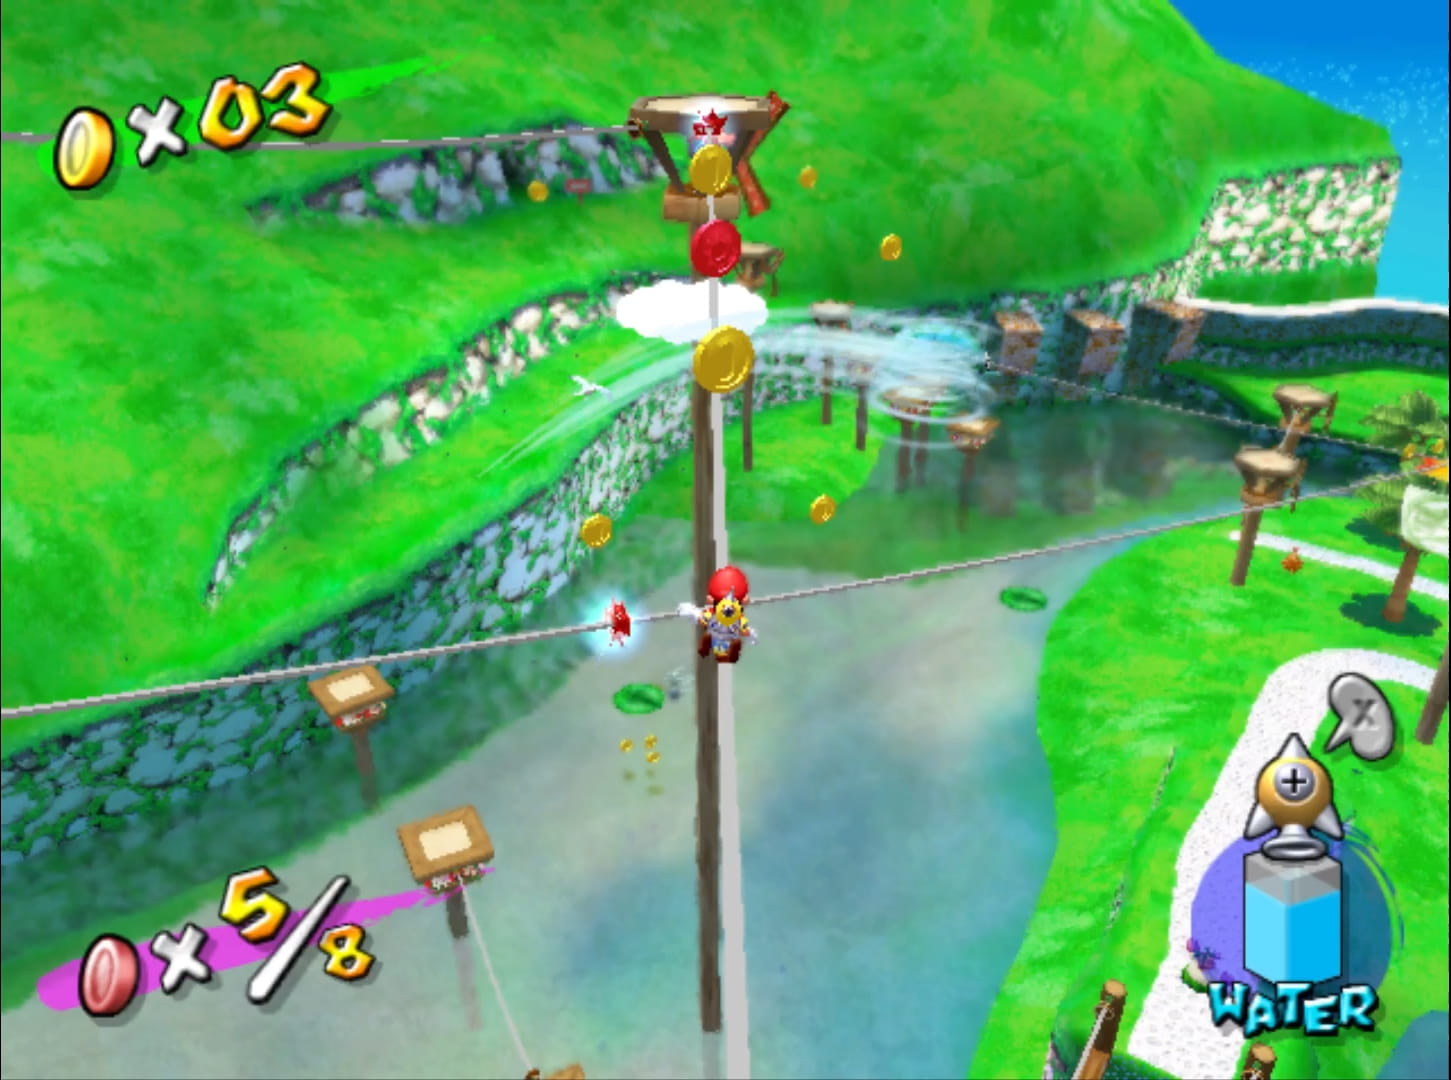
I think they could’ve improved this by making only 1 red-coin challenge, with maybe the red coins spread all o’er the level, — there are a a’least a few red coins in each challenge that aren’t exactly unique — & made 1 o’ the challenges simply reaching the top o’, say, the village, or the tightropes o’er the lake ( the village would probably be better, since you can’t reach it from somewhere else, while the lake tightrope can be reached from the top o’ the windmill ). A’least these shines’ names are mo’ accurate than the average star name in Super Mario 64.
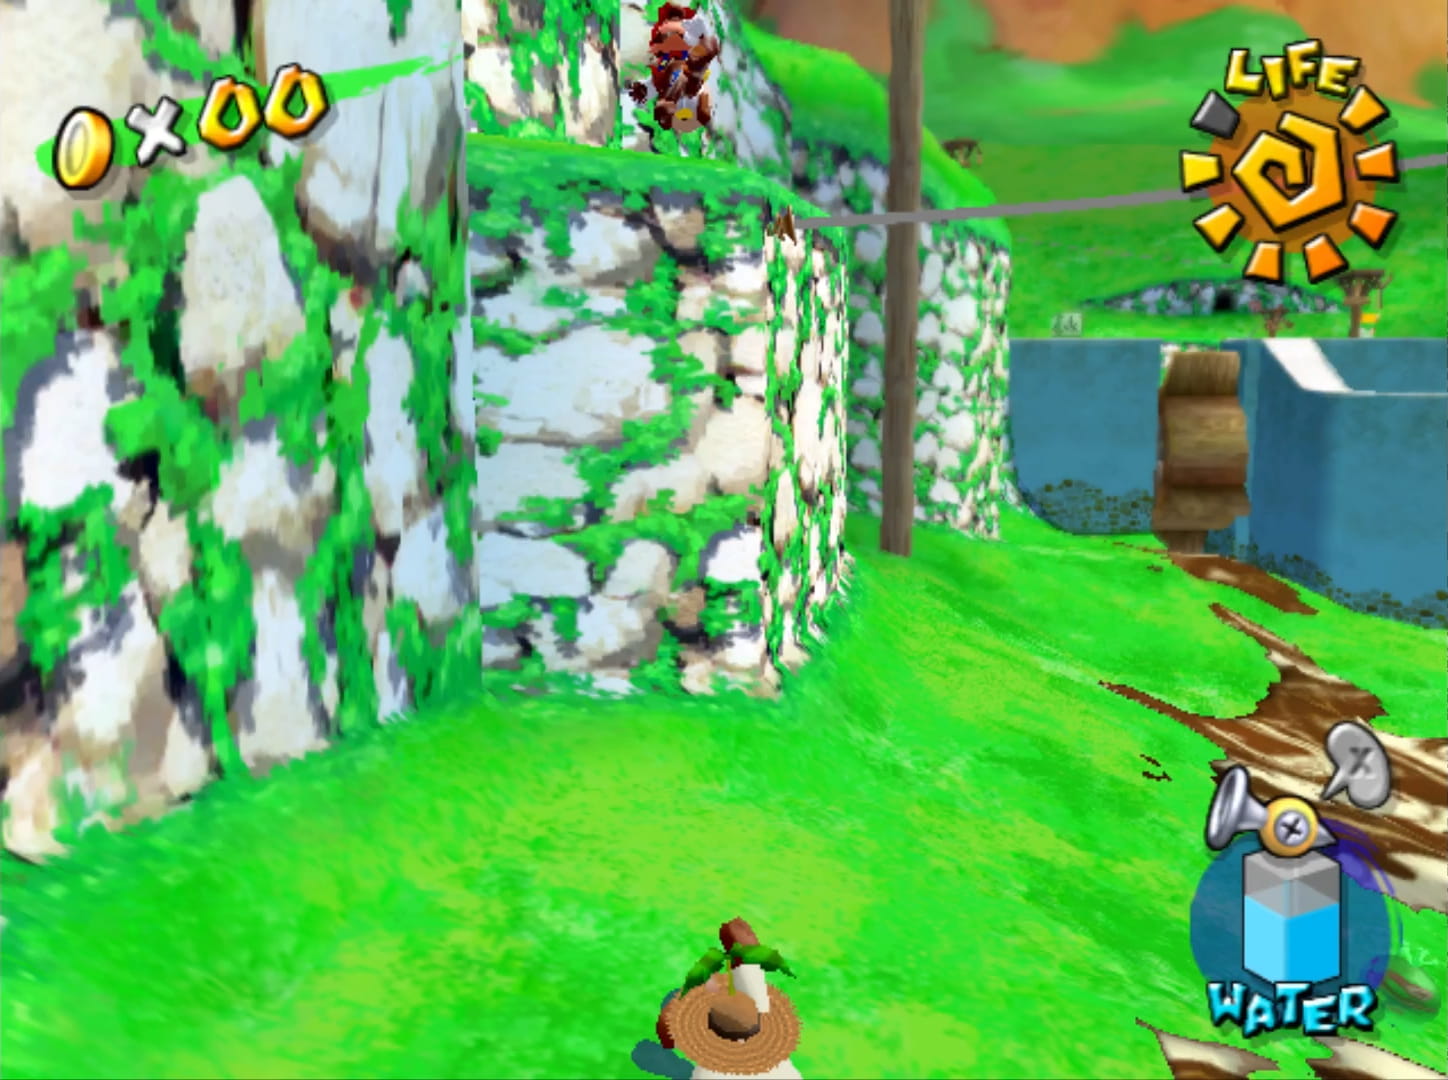
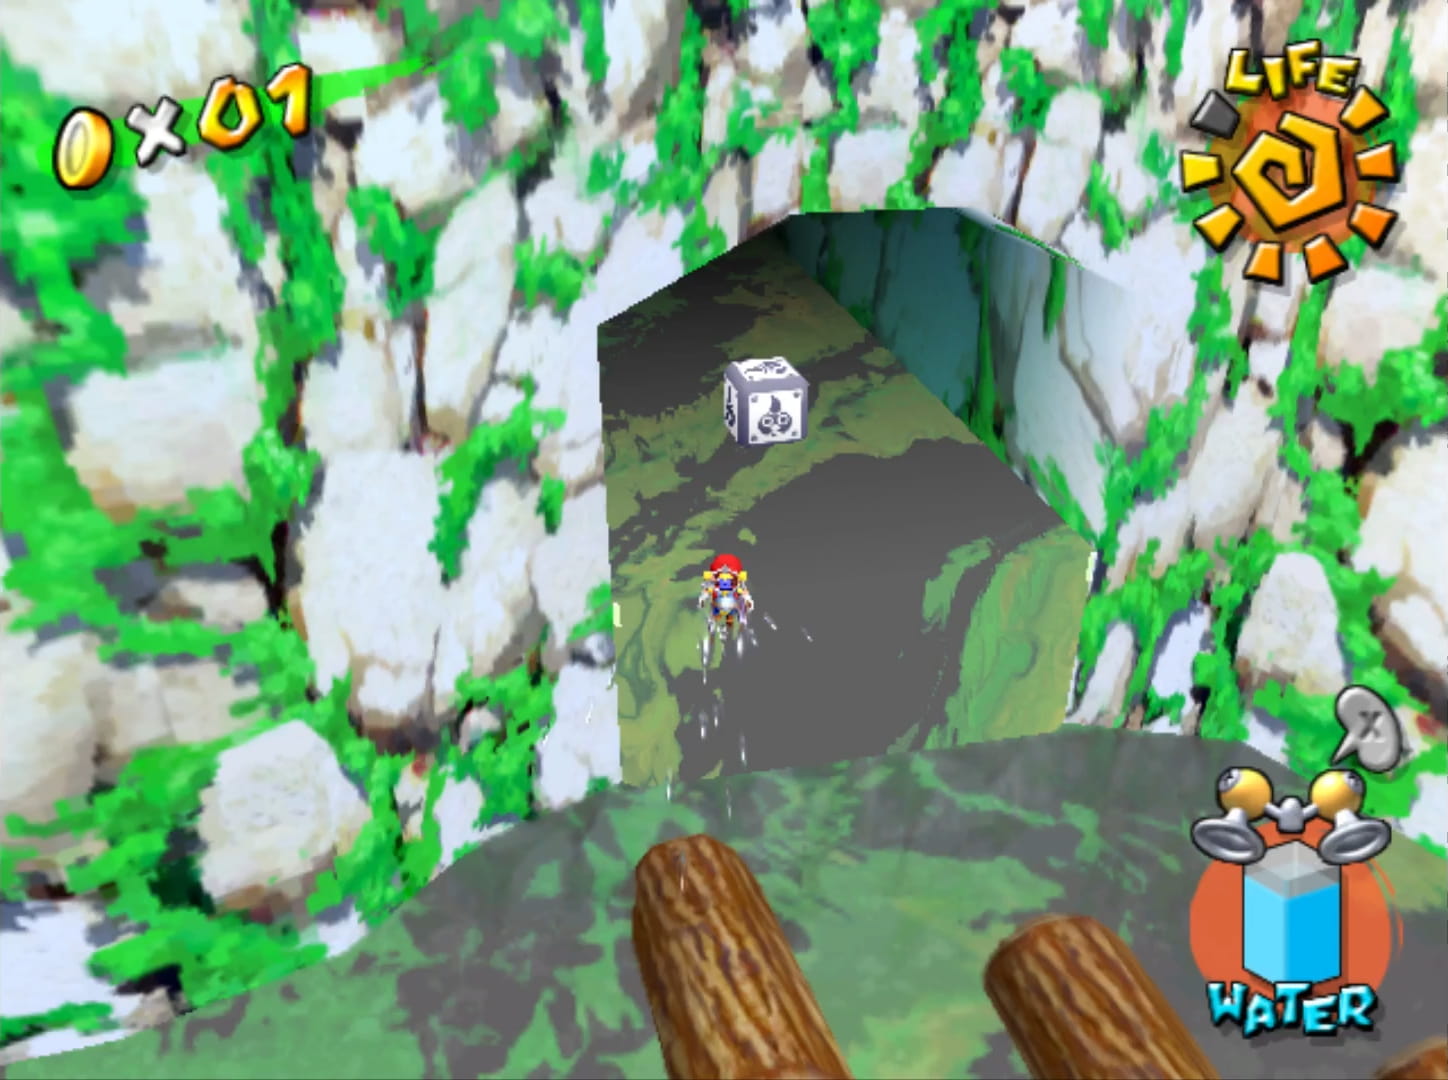
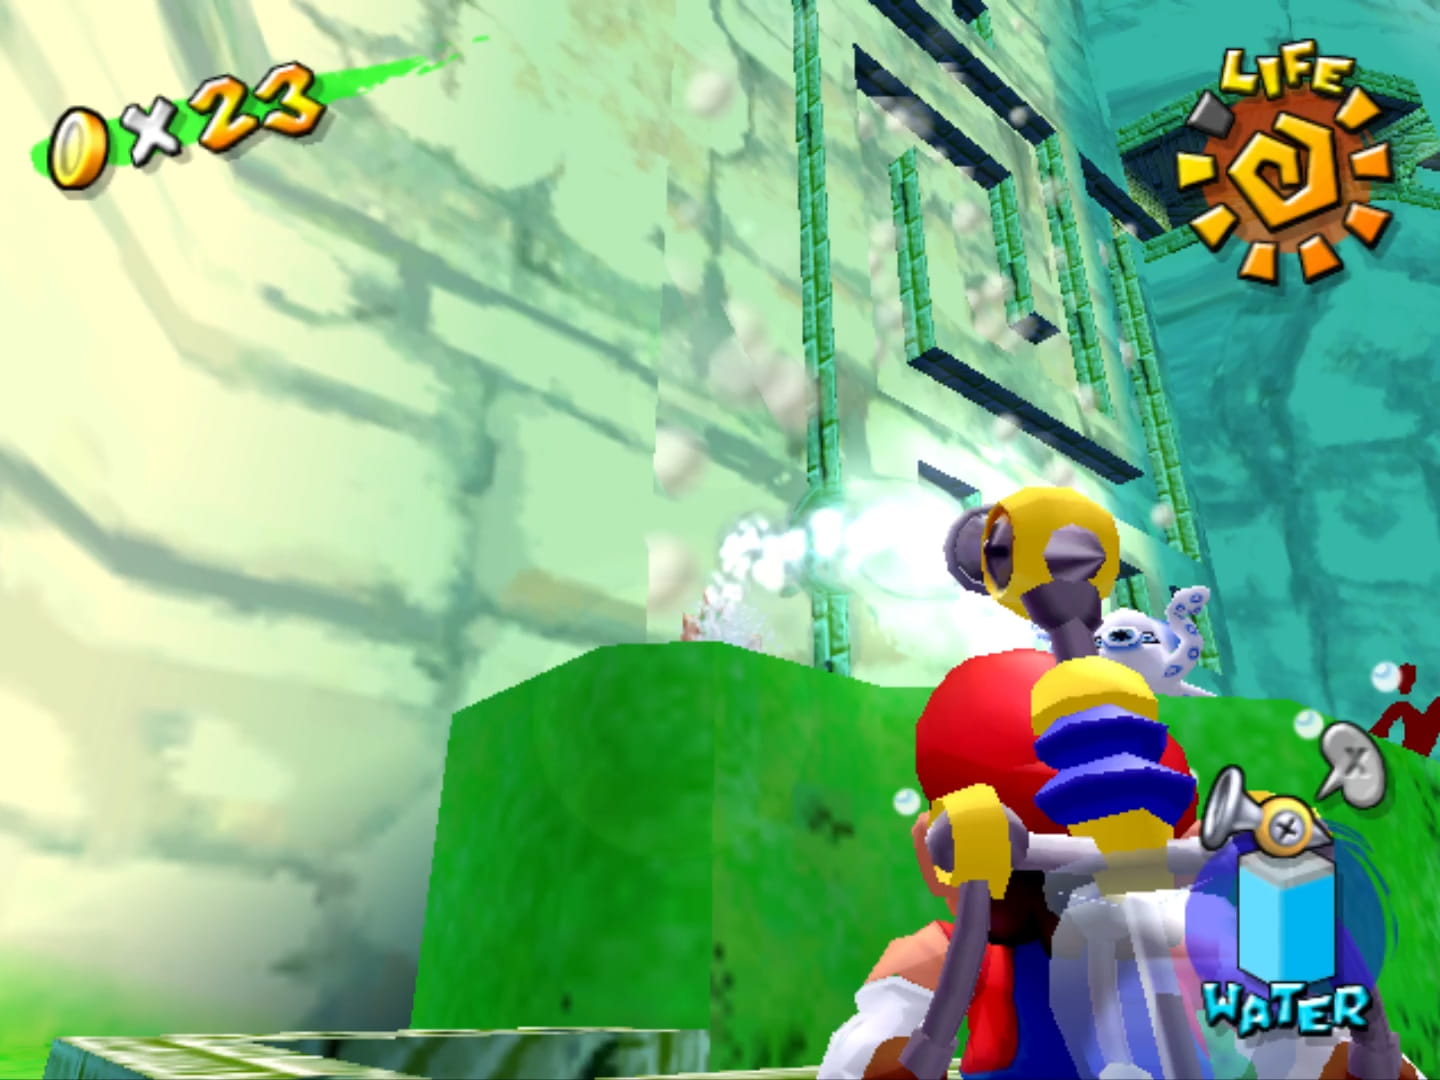
The only other 2 shines, not including the Shadow Mario shine, which I need not discuss, since it’s just the basic mechanic as it works in every level, are secret FLUDD-less challenges, whose entrances are found in caves in the lake. The latter, “The Secret of the Dirty Lake”, is @ the end o’ a dangerously toxic lake, which is fair ’nough; but the 3rd shine, “The Hillside Cave Secret”’s, entrance is just a seemingly arbitrary cave opening up on some hill.
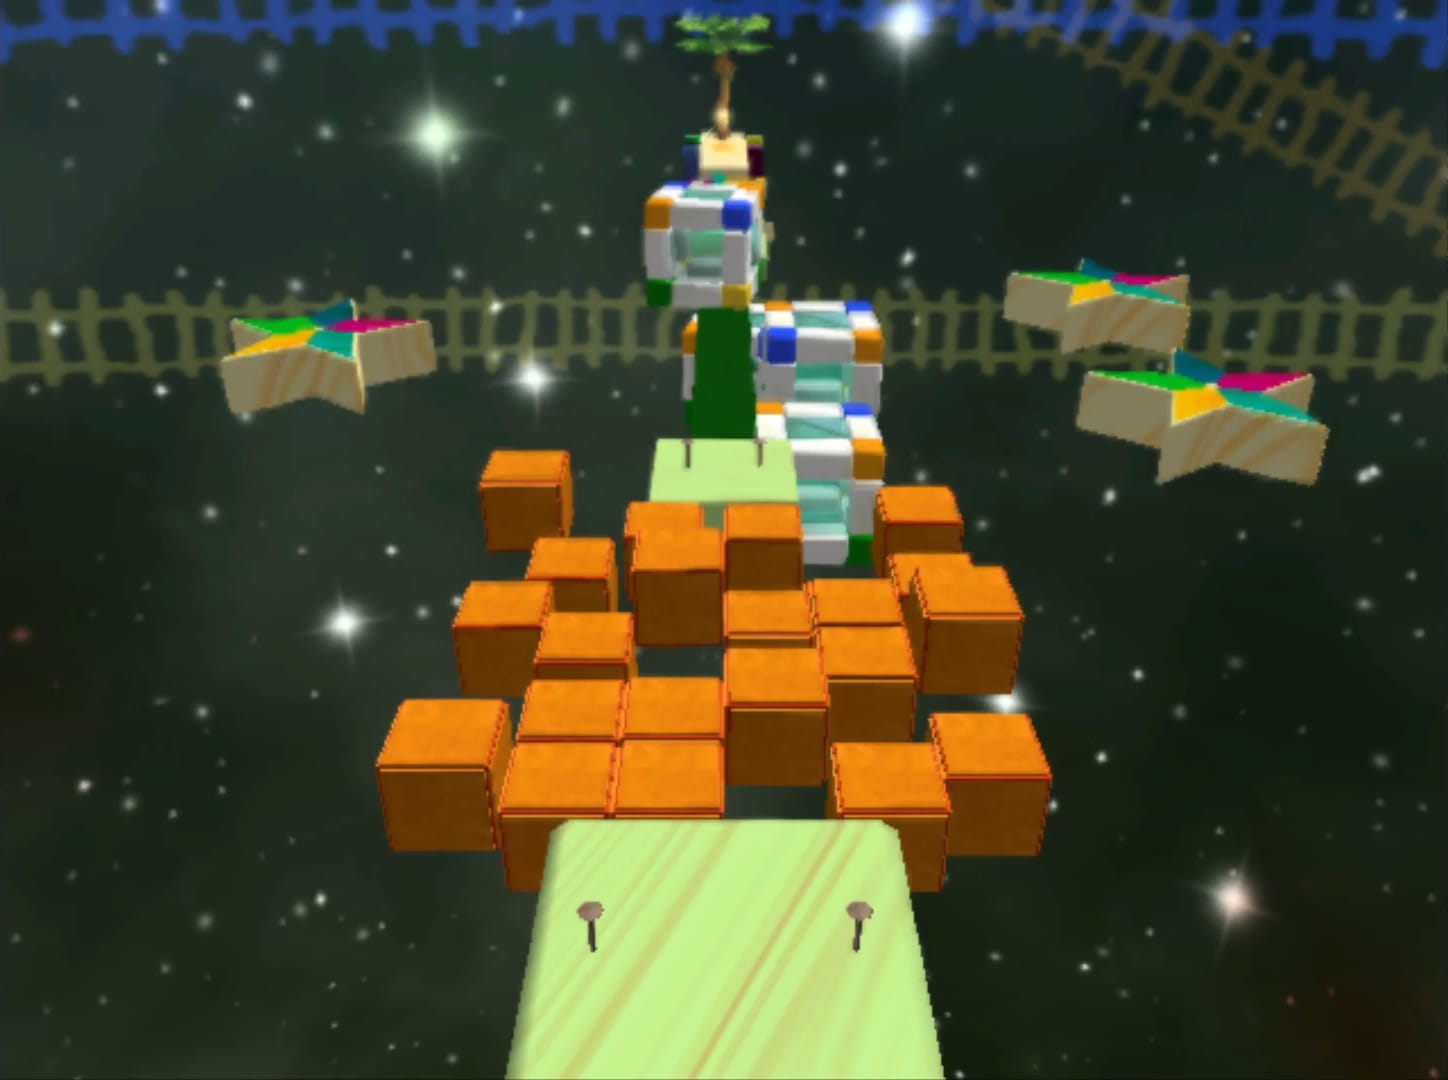
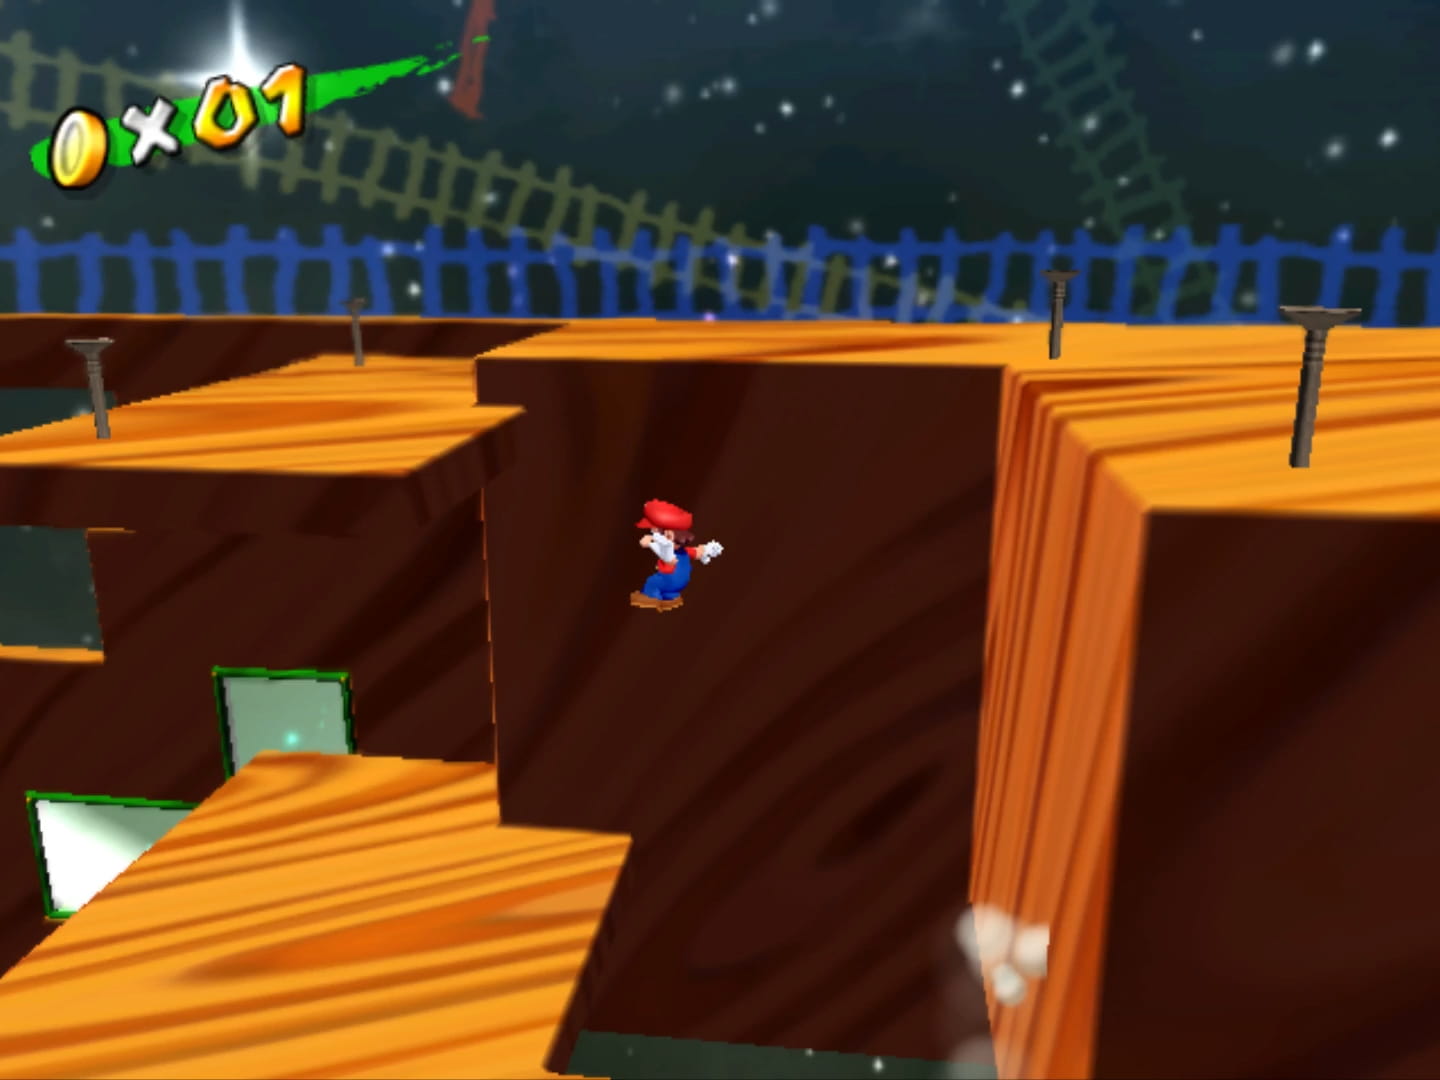
The secrets themselves are some o’ the strongest elements o’ the level, but not the strongest secrets in the game. Both involve simple moving & rotating platforms, presumably to warm you up. “The Hillside Cave Secret” does have maybe 1 subtly tricky jump ’tween spinning star platforms & “The Secret of the Dirty Lake”’s area has 1 surprisingly tricky required wall-jump off a parallel wall to get ’cross a gap otherwise too long to jump o’er. “The Secret of the Dirty Lake”’s challenge also introduces cubes that you have to ride while they rotate, which can be annoying, thanks to gravity physics as finicky as Super Mario 64 had. Fitting this level’s generic aesthetics, while later secrets have workshop, sandy, casino, & Yoshi egg visuals to make them stand out, these secrets have the same starry train-track backgrounds most o’ the secrets have & use the same general mechanical graphics — including the screw boxes, nails, & those white plastic cubes — all the other secrets use. They’re not ugly or unbearably generic; just not as cool as later secrets.
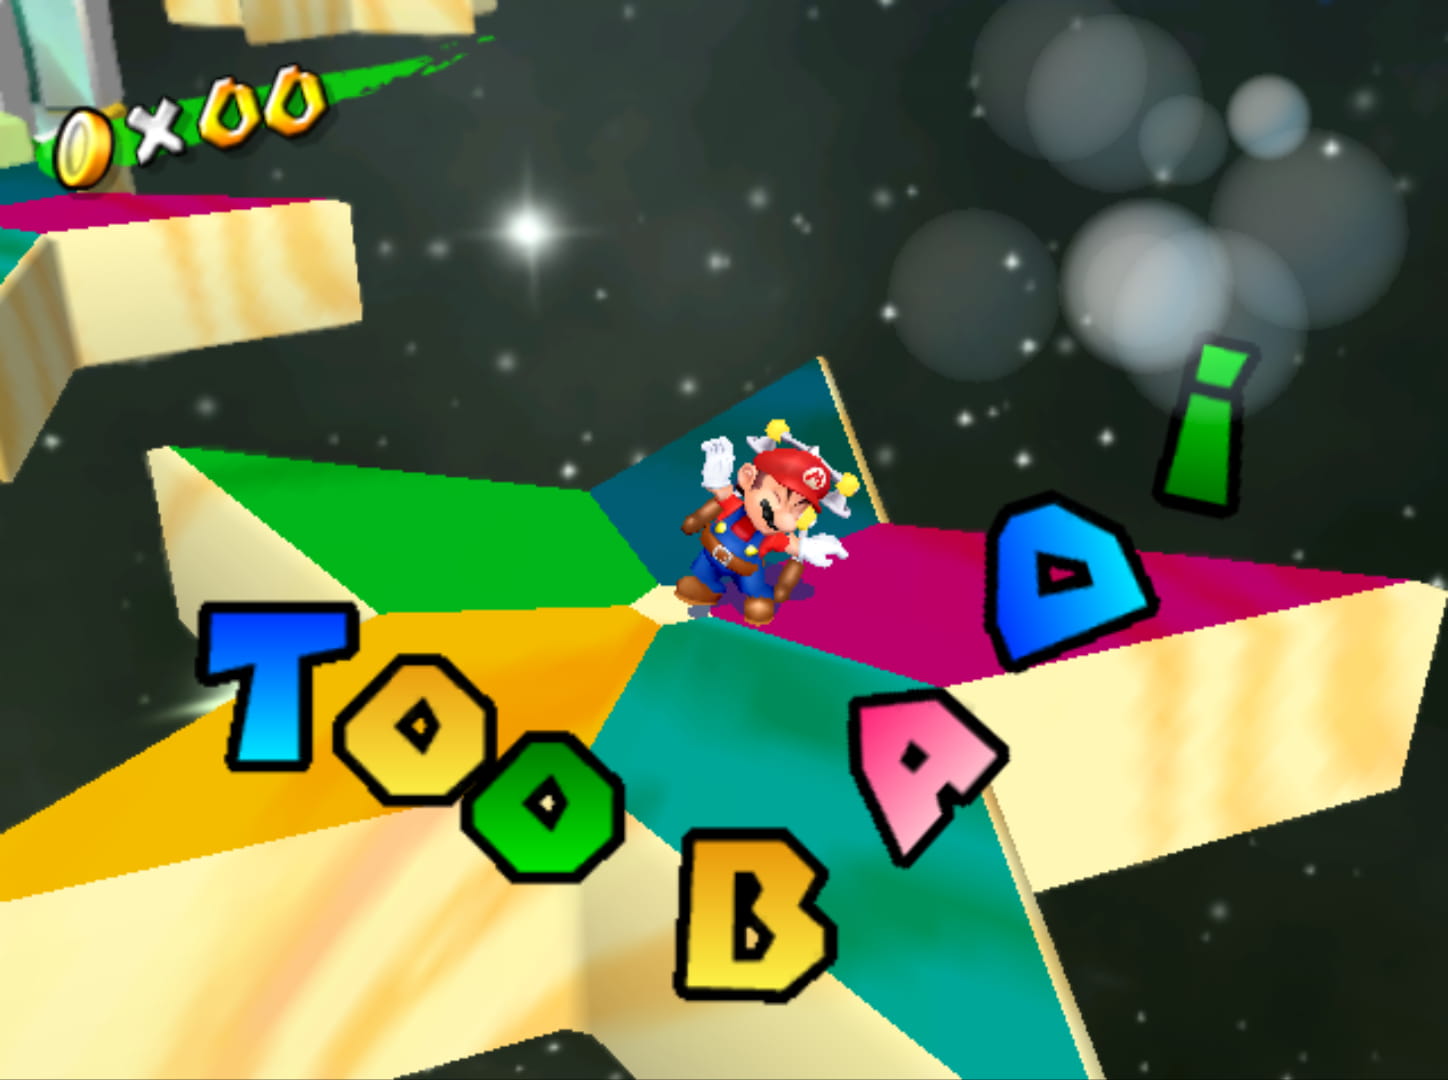
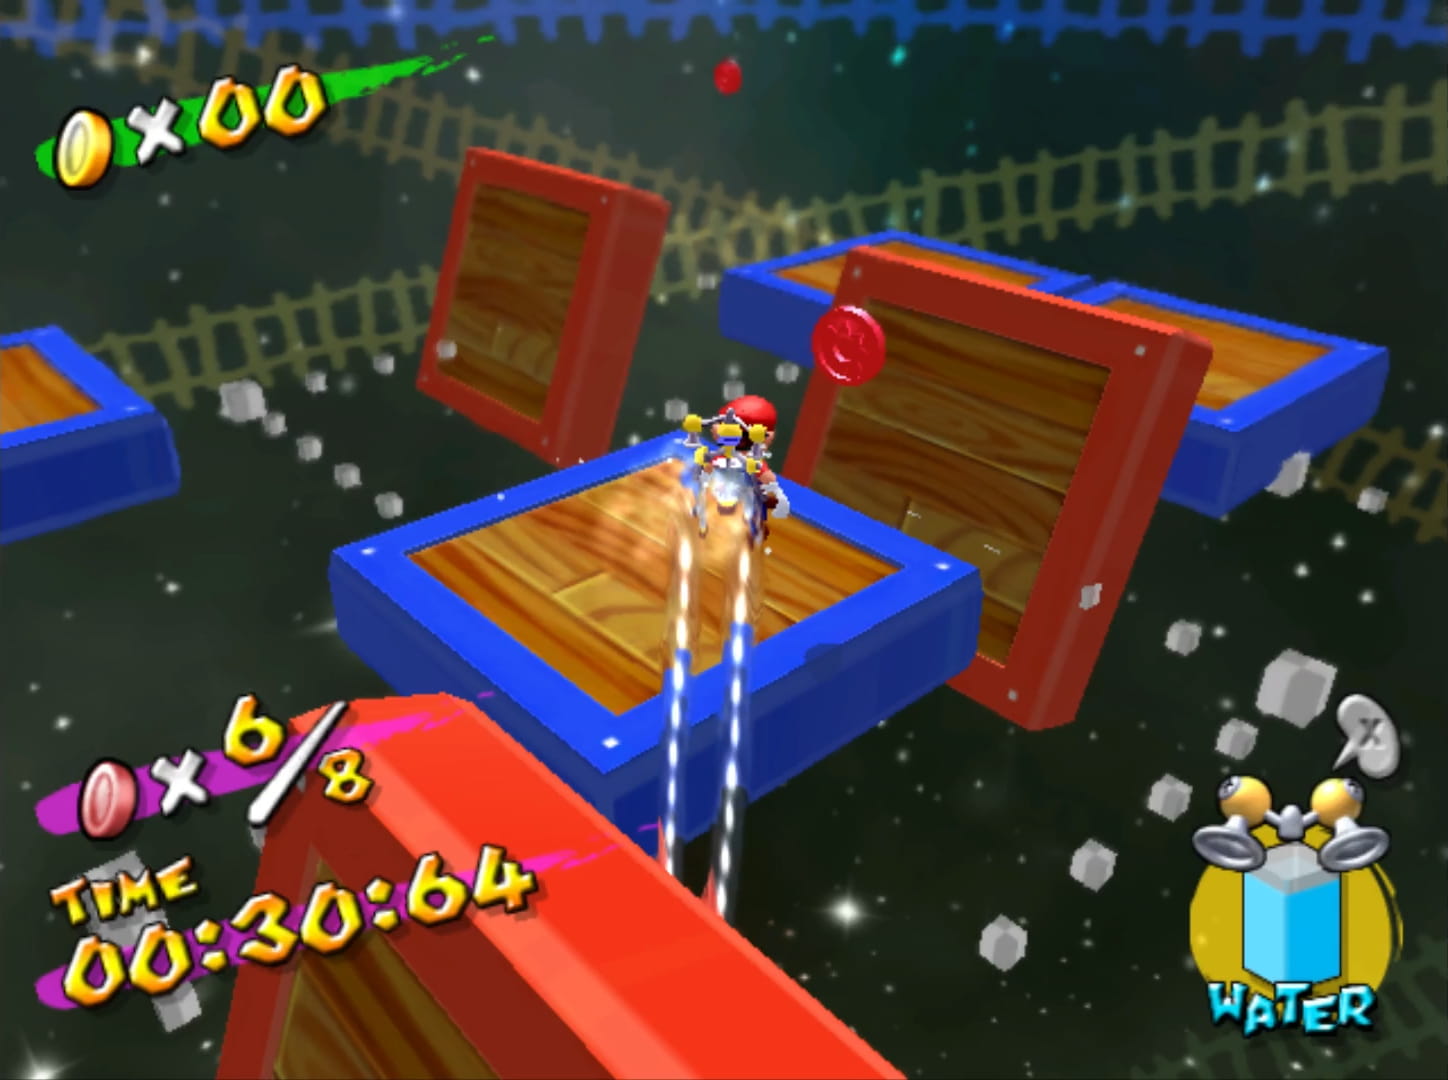
Since this level has 2 secrets, its 2 secret shines are simply red coin challenges in the 2 secret areas, bringing the # o’ red-coin collection shines to a disgusting 4 out o’ 10 in this level. 1 difference is that these red coin challenges have those infamous time limits that magically murder Mario if he doesn’t collect all red coins in time. Yeah, it’s hilariously stupid that Mario develops a spontaneous heart attack from red coin deficiency; but time limits looming o’er the artificial UI have been assassinating Mario since Donkey Kong. Then ’gain, Super Mario 64 arguably created a standard by ne’er killing Mario with things that wouldn’t kill a normal person; & in fact, usually opted not to kill him when any sane game would, such as when falling in a bottomless pit in a bonus sky level magically warps him to a random waterfall. I would honestly rather the game disappear Mario in an instant, like classic “The Good Life” kid, than cornfield him & make me just waste time getting back into the level like in the Johnny Bravo parody. Still, I wonder why they couldn’t just let Mario restart the task without killing him, as other games like the Spyro games would do. The fact that Sunshine’s developers made a Mario game that feels less polished than a Spyro game should make them feel embarrassed.
Now would be the best time to point out that these secret area bonus shines allow you to use FLUDD, taking ’way what made these secret areas special in the 1st place. The vast majority o’ the time, the red coin challenges are easier than the original FLUDD-less challenge, making them weak bonus shines. “The Hillside Cave Secret”’s red coin challenge, in particular, thanks to how small the area is, has red coins all thrown round the same area, with a red coin in each corner o’ the orange-block cluster & 3 on 3 rotating star platforms that aren’t e’en part o’ the main challenge — they’re so far ’way you need FLUUD to reach them & exist purely to put red coins on them. “The Secret of the Dirty Lake”’s red coin challenge does add some surprise challenge with the red coins floating o’er the moving flipping platforms, as you need to time getting them when a platform is near ’nough to them & not flipping o’er.
1 thing “Bianco Hills” does better than “Bob-omb Battlefield” from Super Mario 64 is make its 100-coin challenge less dickish. This is probably the only time Sunshine handles a 100-coin challenge better than Super Mario 64, & the 1 element “Bianco Hills” does better than most other levels. While “Bob-omb Battlefield” made it easy to get screwed out o’ getting the 100-coin star if you tried to go after it before unlocking the wing cap, “Bianco Hills” has no such requirements, & gives you so many coins that you’ll collect ’nough far ’fore you’ve run out. Why most o’ the other levels don’t work this way is a mystery to me.
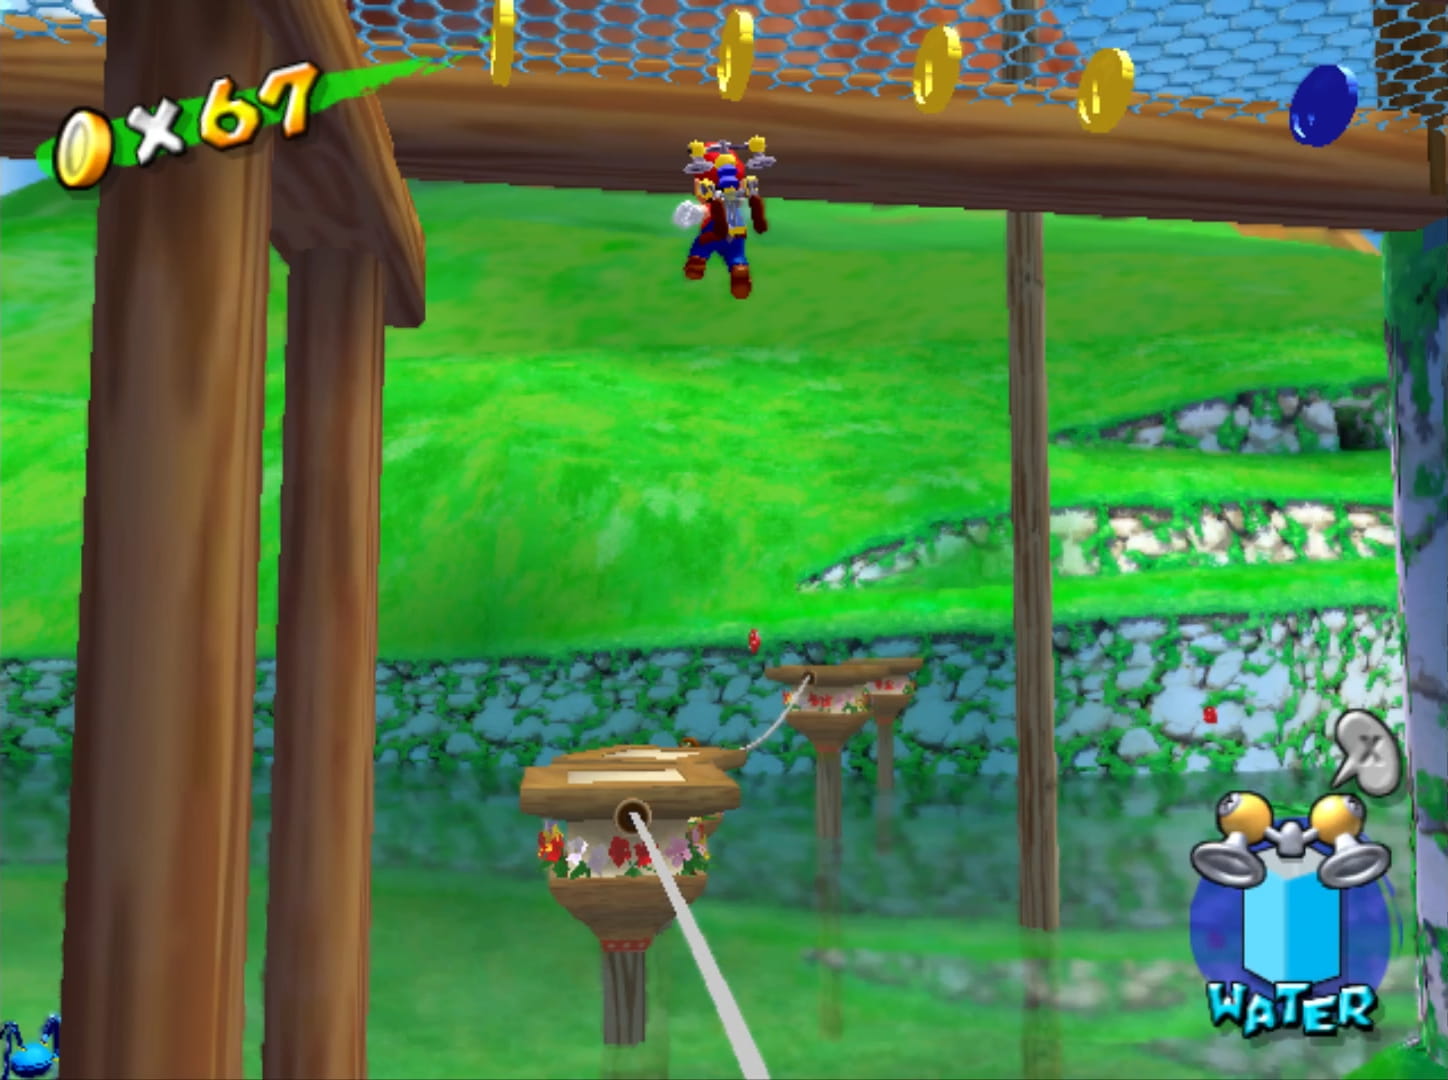
“Bianco Hill”’s blue-coin placements aren’t great, tho. Probably the most interesting are the 1 on the cliff that Petey sleeps on in “Petey Piranha Strikes Back” that appears in later shines, wherein you have to jump ’cross moving cloud platforms to reach it & the 1 under the bridge that requires bouncing on power lines.
The rest are in places where you’ll find them in every level — washing off Piantas, cleaning graffiti, spraying a blue bird — or just lying round, such as a few just randomly in the water.
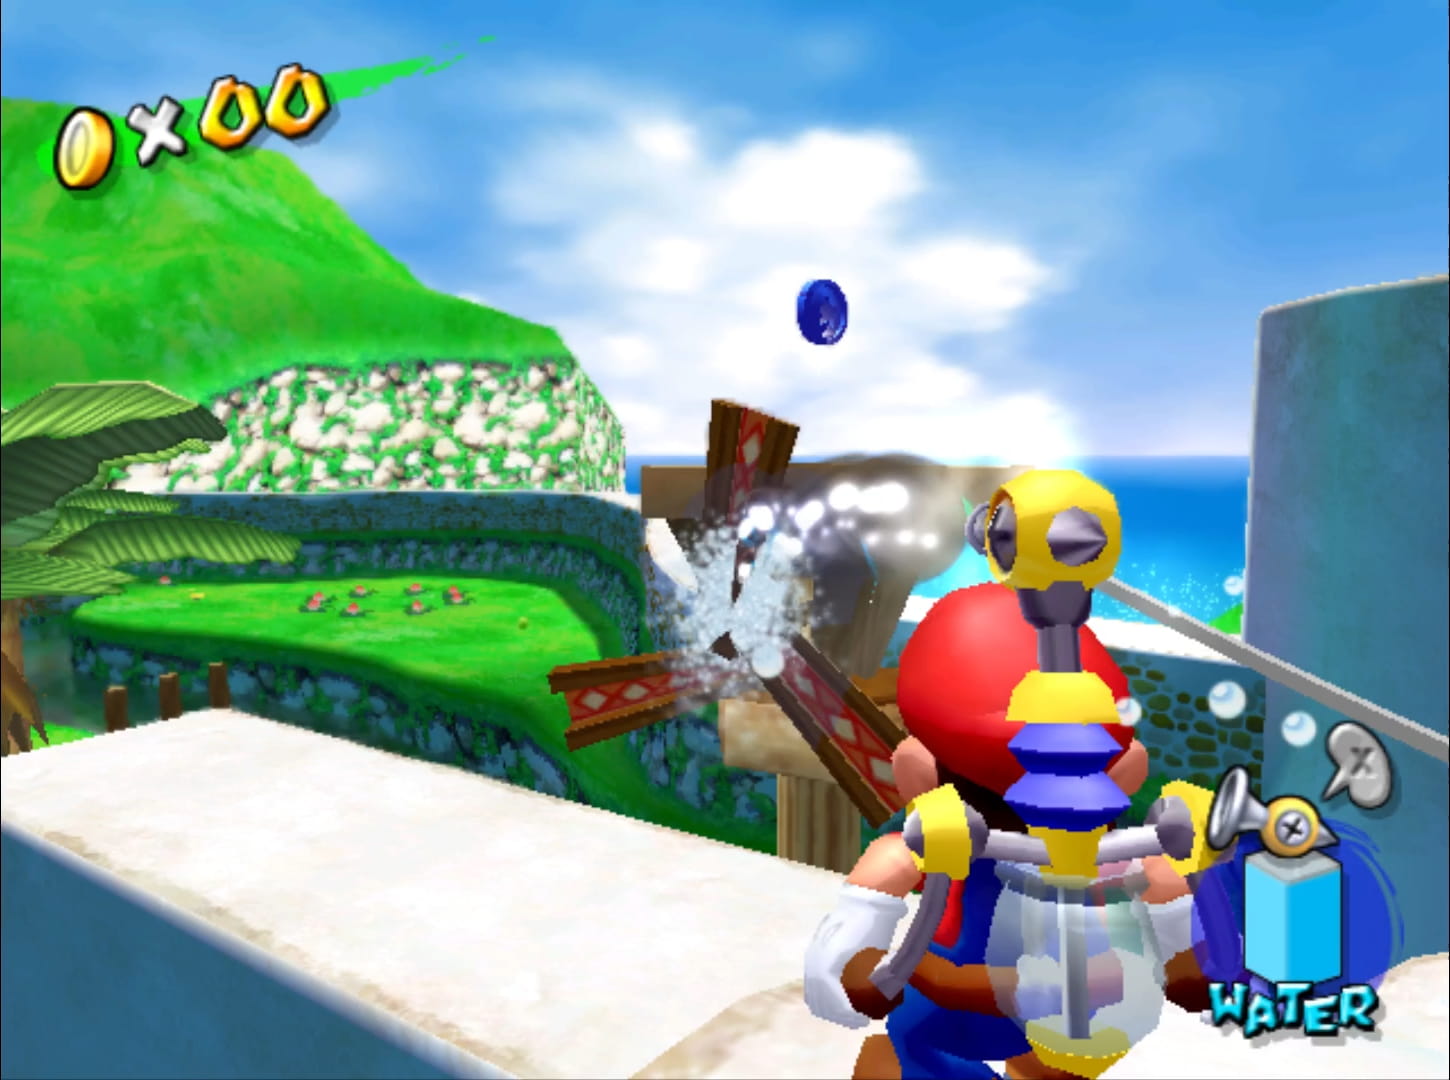
Then you get bullshit obscure locations, like spraying the middle o’ 1 palm tree out o’ many or spraying the spokes o’ 1 out o’ dozens o’ windmills.
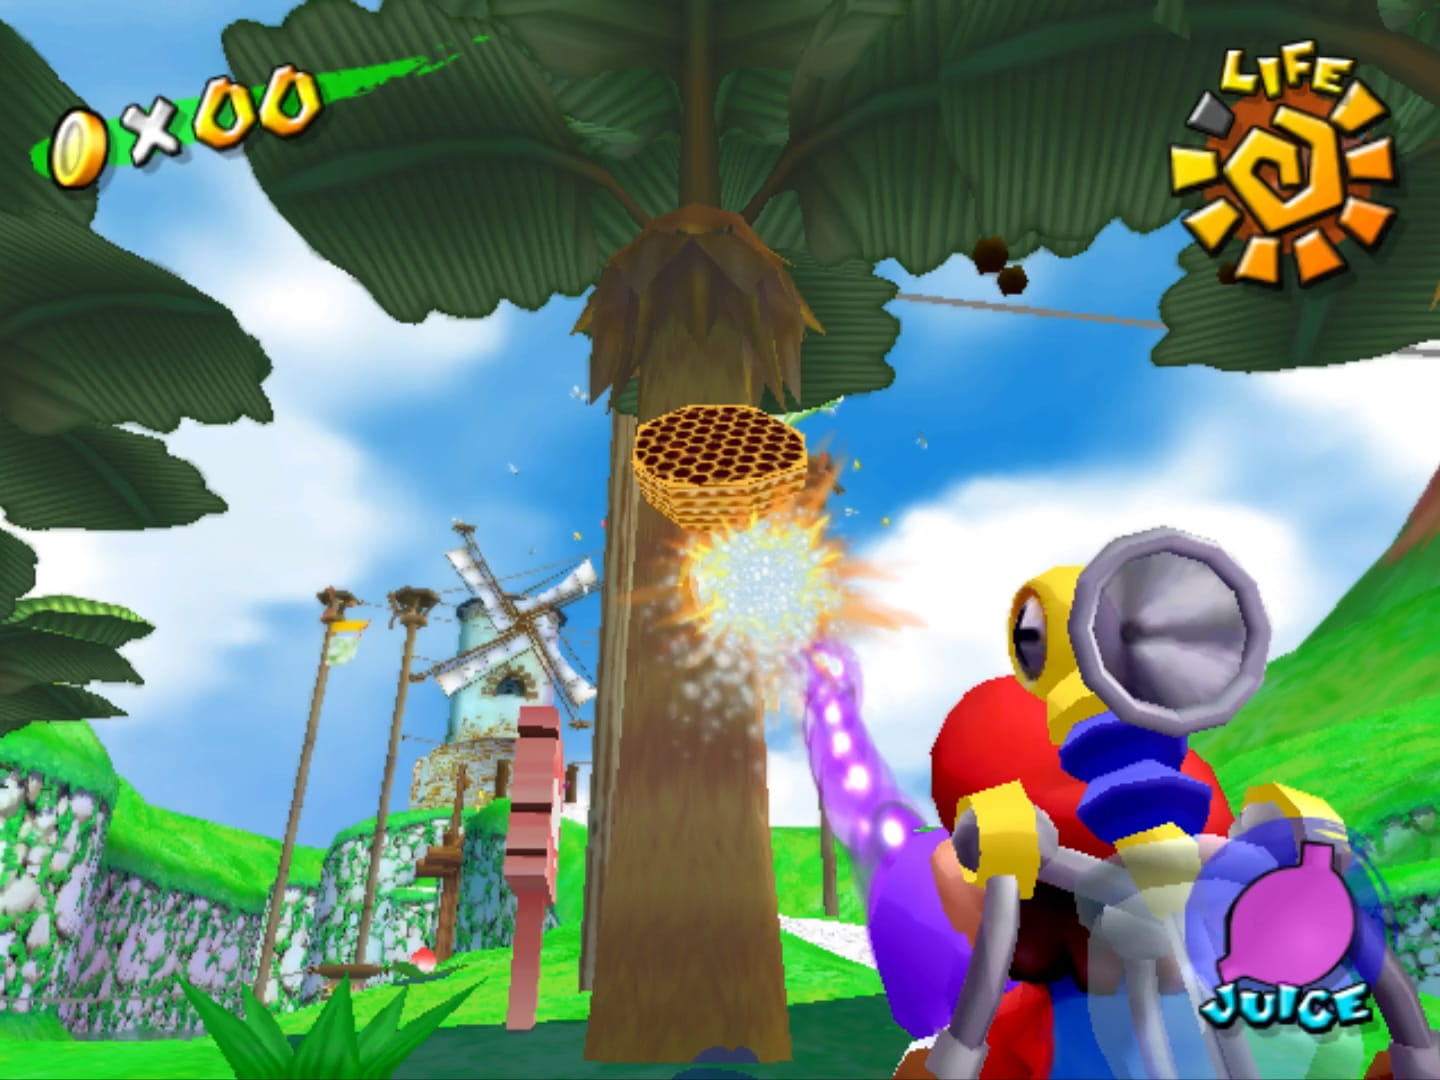
Annoyingly, 2 blue coins require Yoshi to eat a bee hive or eat a blue butterfly, which means you can’t collect everything in “Bianco Hills” all @ the start. Since the game saves each blue coin separately, this isn’t too big a deal ( not ’less you’re trying to record footage o’ each level in single clumps… ). But I find it odd that they don’t just put a Yoshi egg in this level, e’en if you haven’t unlocked him in “Delfino Plaza”: this level has no problem giving you the useless turbo nozzle & rocket nozzle, e’en if you haven’t unlocked them in “Delfino Plaza” yet.
1 thing “Bianco Hills” does do better than every other level, tho: you can collect all 30 blue coins in the 8th shine. It is, sadly, the only 1.
6. Gelato Beach
Visually & thematically, “Gelato Beach” is weaker than every other level ’cept for “Bianco Hills”, being the most obvious theme to use for an island-based game. & while half its challenges are interesting & memorable, they’re marred by this game’s janky, buggy physics that make it frustrating & unfair. I’m not exaggerating when I say that I was screwed o’er by mo’ than 10 physics bugs while playing thru this level ( tho, to be fair, there was maybe 1 or 2 that actually helped me, like when Mario just warped onto a tightrope I was trying to reach ). “Bianco Hills” bored me the most out o’ these levels; “Gelato Beach” pissed me off the most, when it wasn’t making me crack up laughing in disbelief @ how broken everything is. The other half o’ this level’s challenges are forgettable & thrown together.
This level does have 1 o’ the most interesting bosses in this game: “Mirror Madness! Tilt, Slam, Bam!”, a puzzle boss that requires you to ground pound the opposite side o’ tilted mirror platforms that Plungelos are on to fling them off completely & get them to stop messing with the mirrors so they can point @ the crystal ball in the center o’ the tower & melt the caterpillar resting on it, releasing a shine. It makes no sense whatsoe’er, but a’least it’s creative.
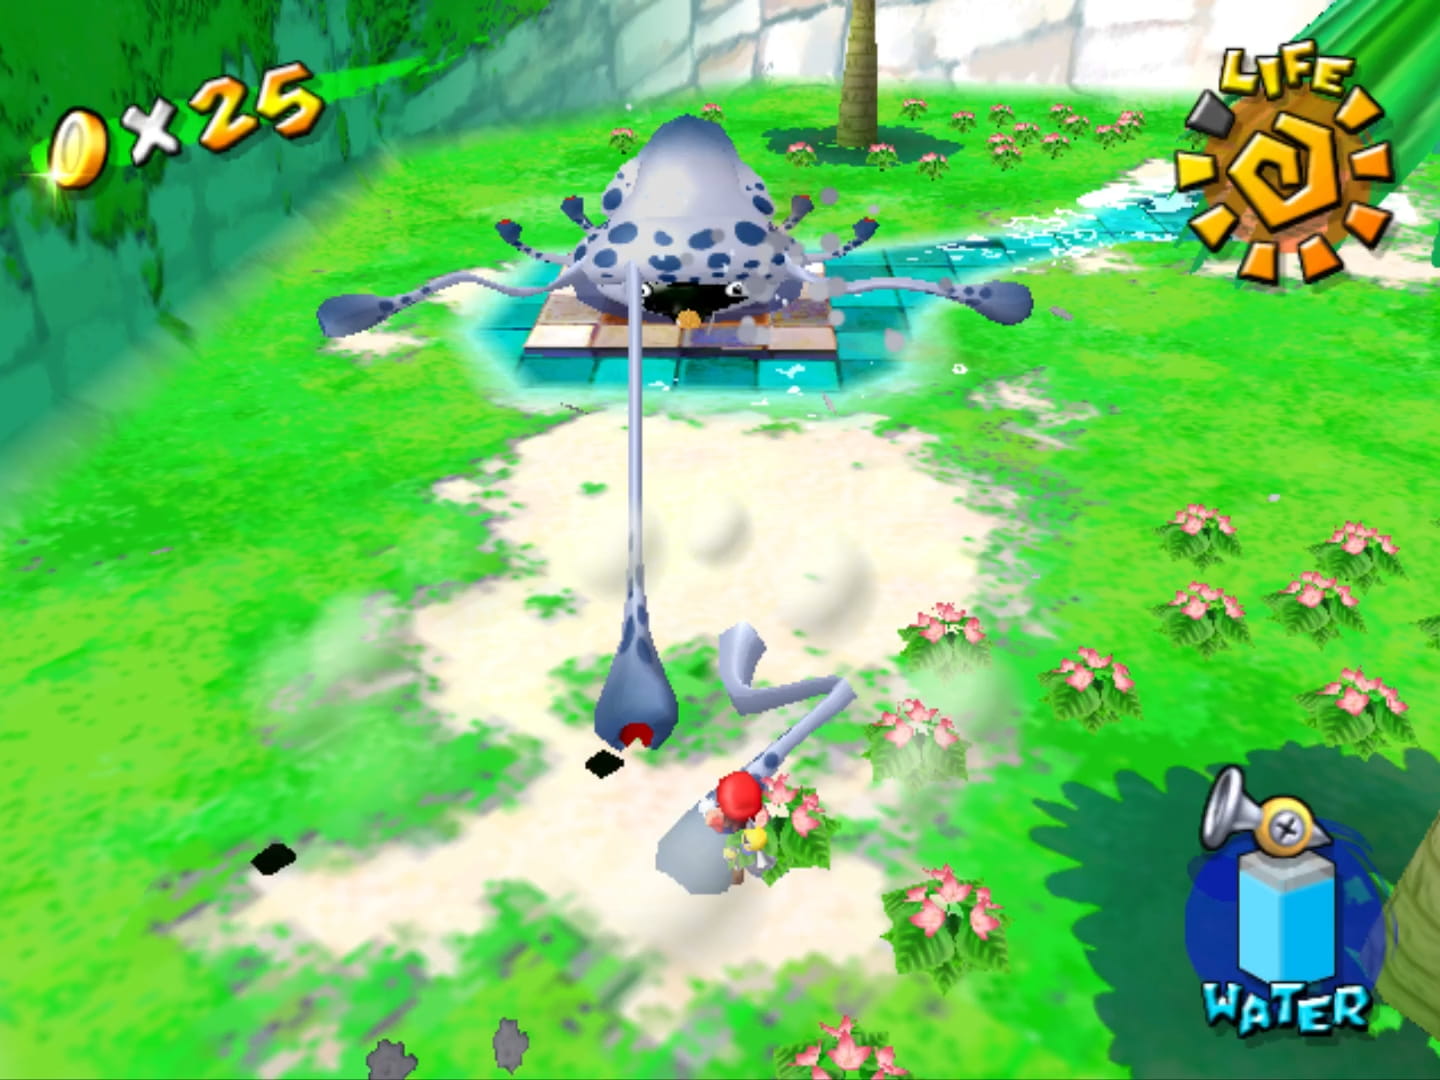
Right after that we get “Wiggler Ahoy! Full Steam Ahead!”. Those who have read my Super Mario 64 analysis will recall that that game had a late-game Wiggler boss that involved… jumping on it 3 times. Truly it put Dark Souls to shame with its brilliant boss design. This boss isn’t nearly that brilliant, but still makes use o’ the “Dune Buds” introduced in this level’s 1st shine to burst right under the Wiggler as it passes, knocking it o’er. Howe’er, somewhat like the “Eely-Mouth” boss in “Noki Bay”, while this boss in theory is interesting, in execution it’s annoying thanks to the poor hit detection on the Dune Buds that make it easy to miss the Wiggler e’en when it clearly should’ve hit them, forcing you to stand round waiting mo’. Worse, they path the Wiggler so that you have to use a Dune Bud surrounded by water to defeat the Wiggler, presumably for aesthetic reasons. The problem is that this makes it likely the Wiggler will be flung into the water where you outright can’t stomp its belly, wasting your time. I won’t lie: it sometimes made me wish for the simpler times o’ just jumping on them 3 times.
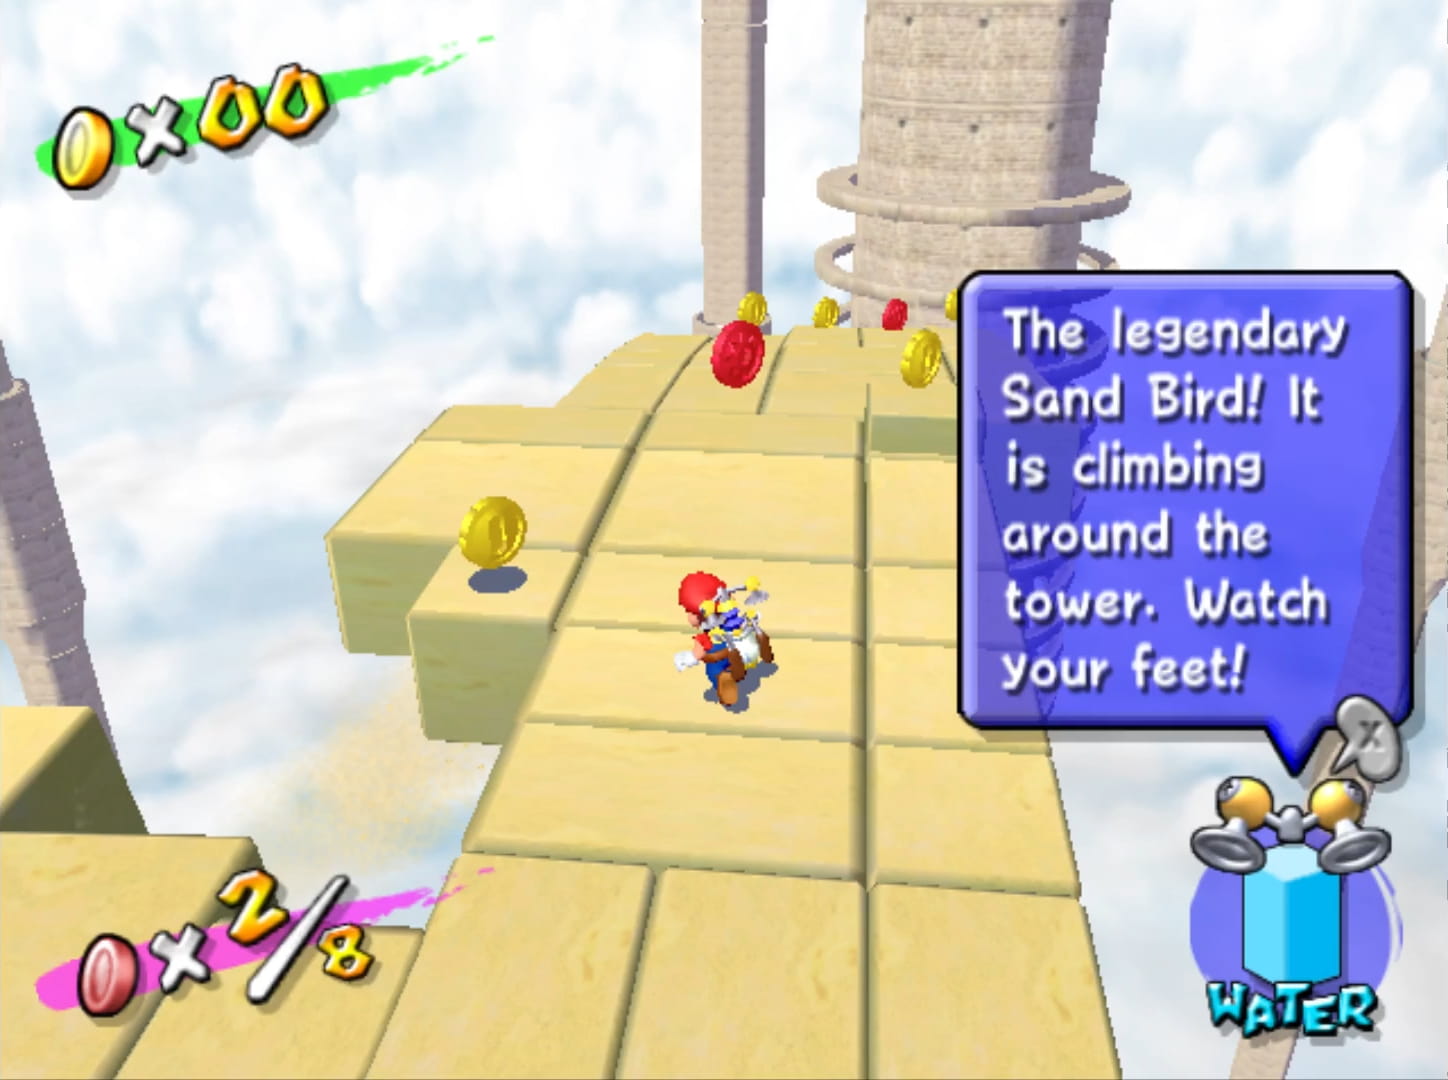
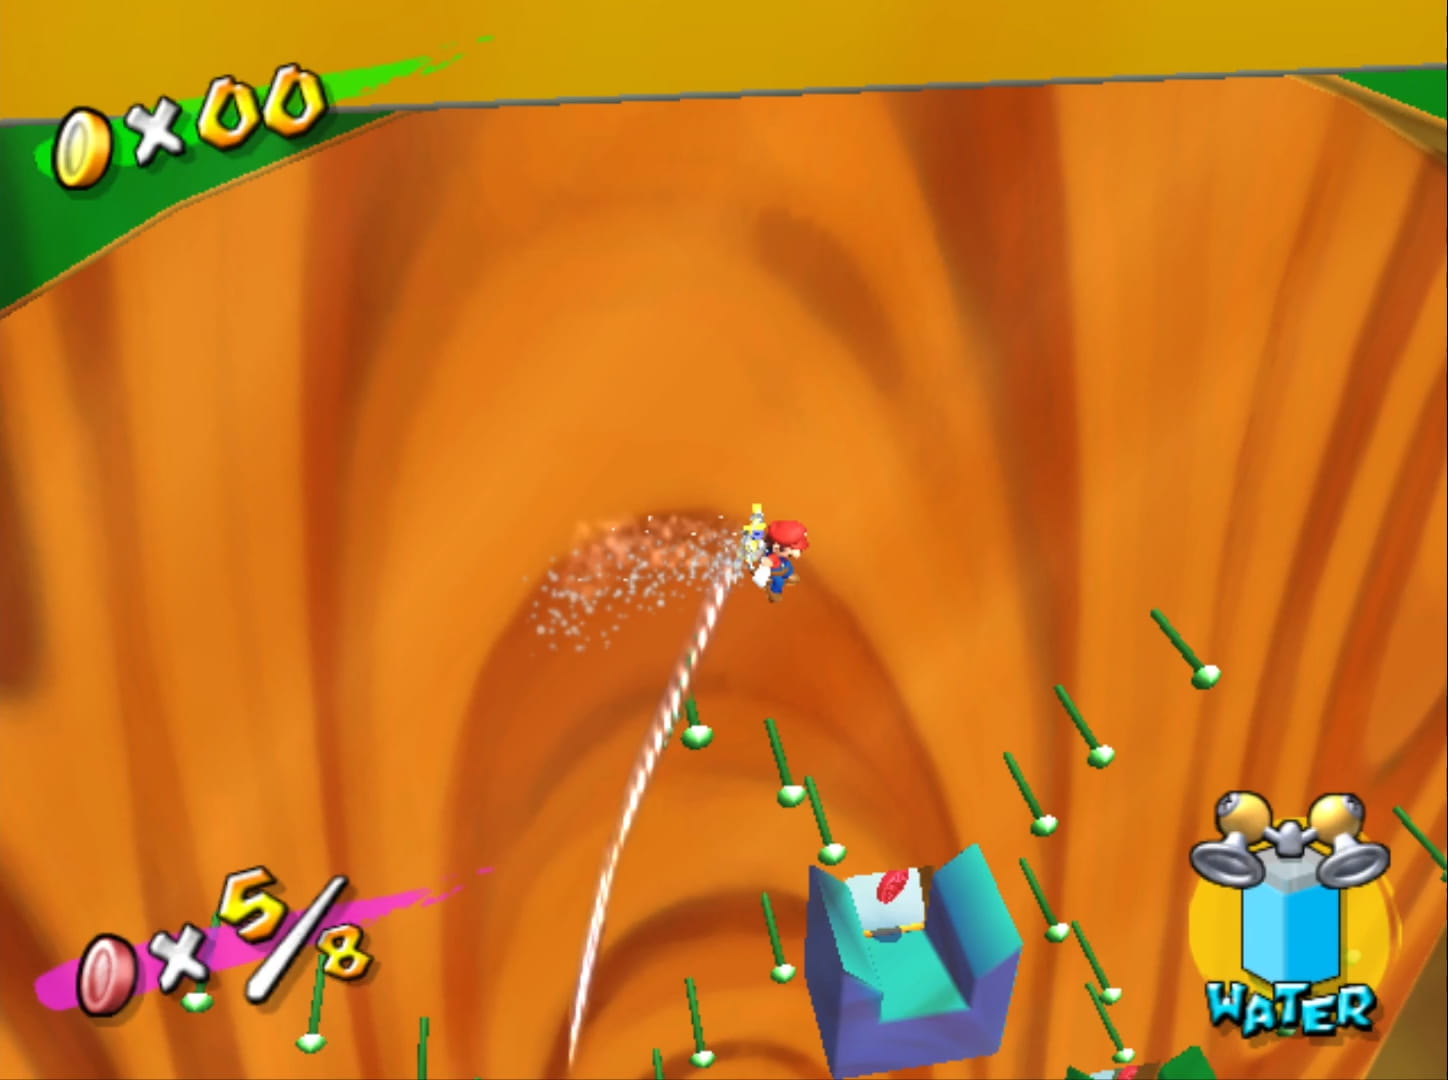
“The Sand Bird is Born” is legendary ( a’least as far as the French translation is concerned ), challenging you to stay on a bird composed o’ blocks that moves round, shifting the gravity under you, while collecting red coins. This arrangement is almost as simple as the red-coin puzzle from Super Mario 64’s “Lethal Lava Land”, with all the red coins right there on the bird & just 1 point when the bird slowly rotates, but is made much harder than its arrangement would seem thanks to Sunshine’s far worse physics than 64, including hit detection so bad it’s borderline broken & this game keeping Super Mario 64’s absolutist slope physics that make it so that once a slope goes past a certain threshold, it just acts effectively like a perfectly vertical wall, throwing you right off into the abyss. My 1st attempt recently ended with Mario just phasing right through the corner o’ the bird’s tail as it rotated.
This ’splains why this shine is rightfully reviled: since you’ll mostly die due to glitches, it’s not a fun challenge, just a tedious battle gainst this game’s bad programming. Once you adjust to this challenge’s nonsensical physics, tho, you’ll be guaranteed to ’ventually get it, which ’splains, on the other hand, why I read some super fans o’ this game wonder why people complain ’bout challenges like these so much. On the other hand, if this game’s physics weren’t so laughably bad ( say, if the rumored remaster fixes them ), this level’s arrangement would probably need to be tuned up a bit to make a bit mo’ challenging, as a game with decent physics would render this challenge too easy.
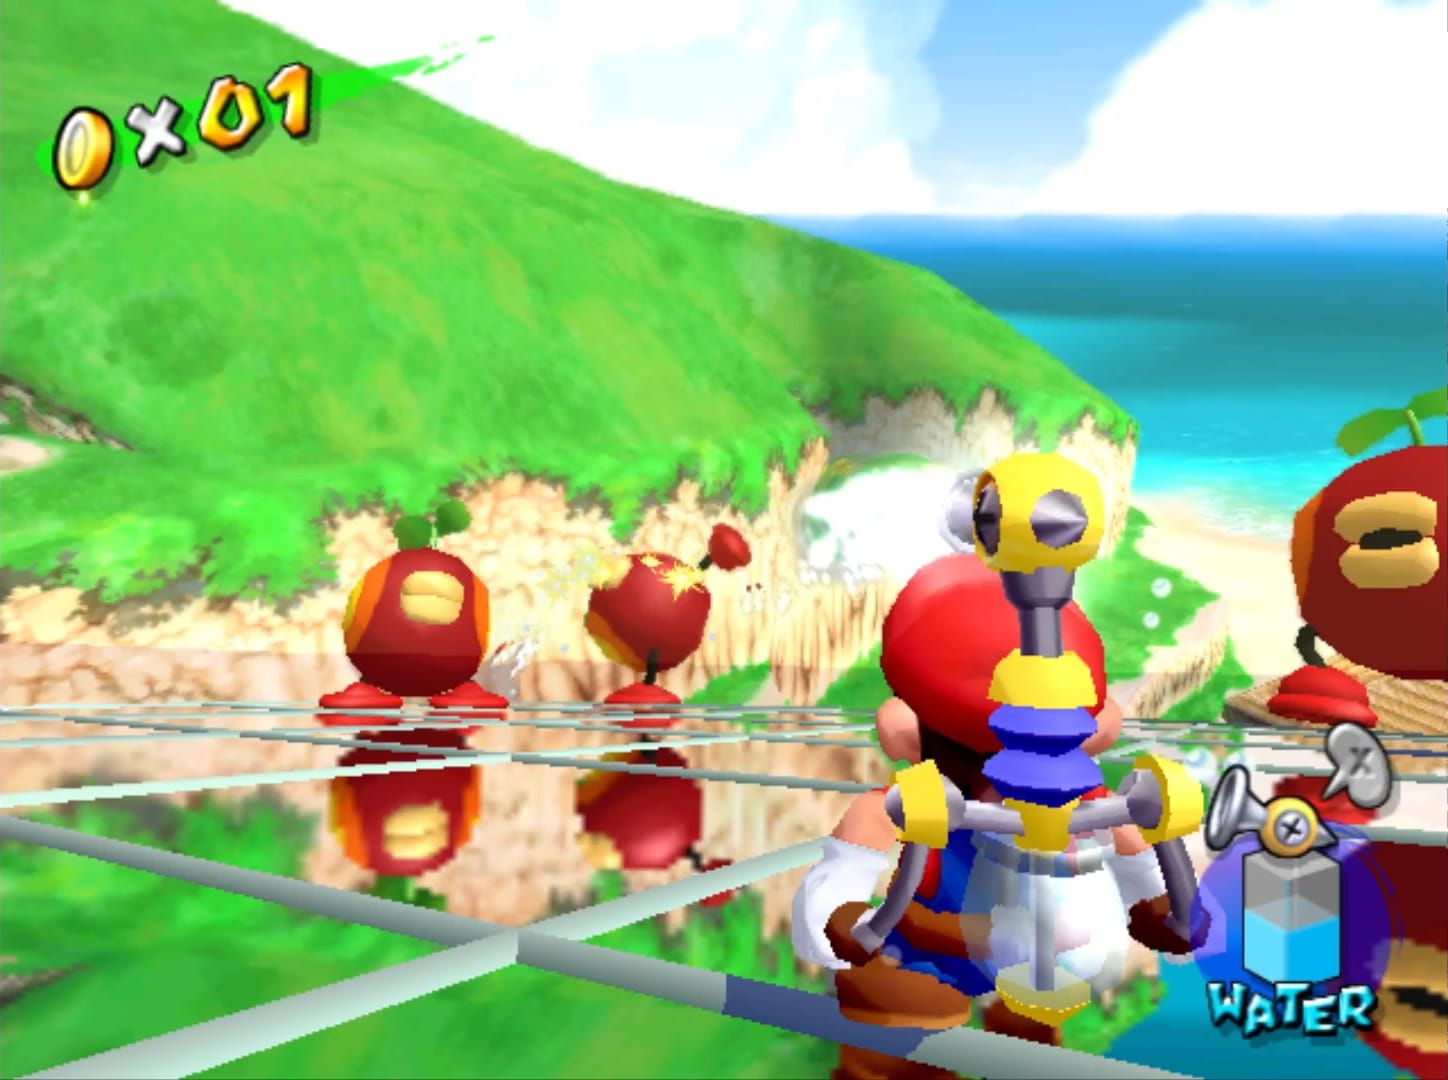
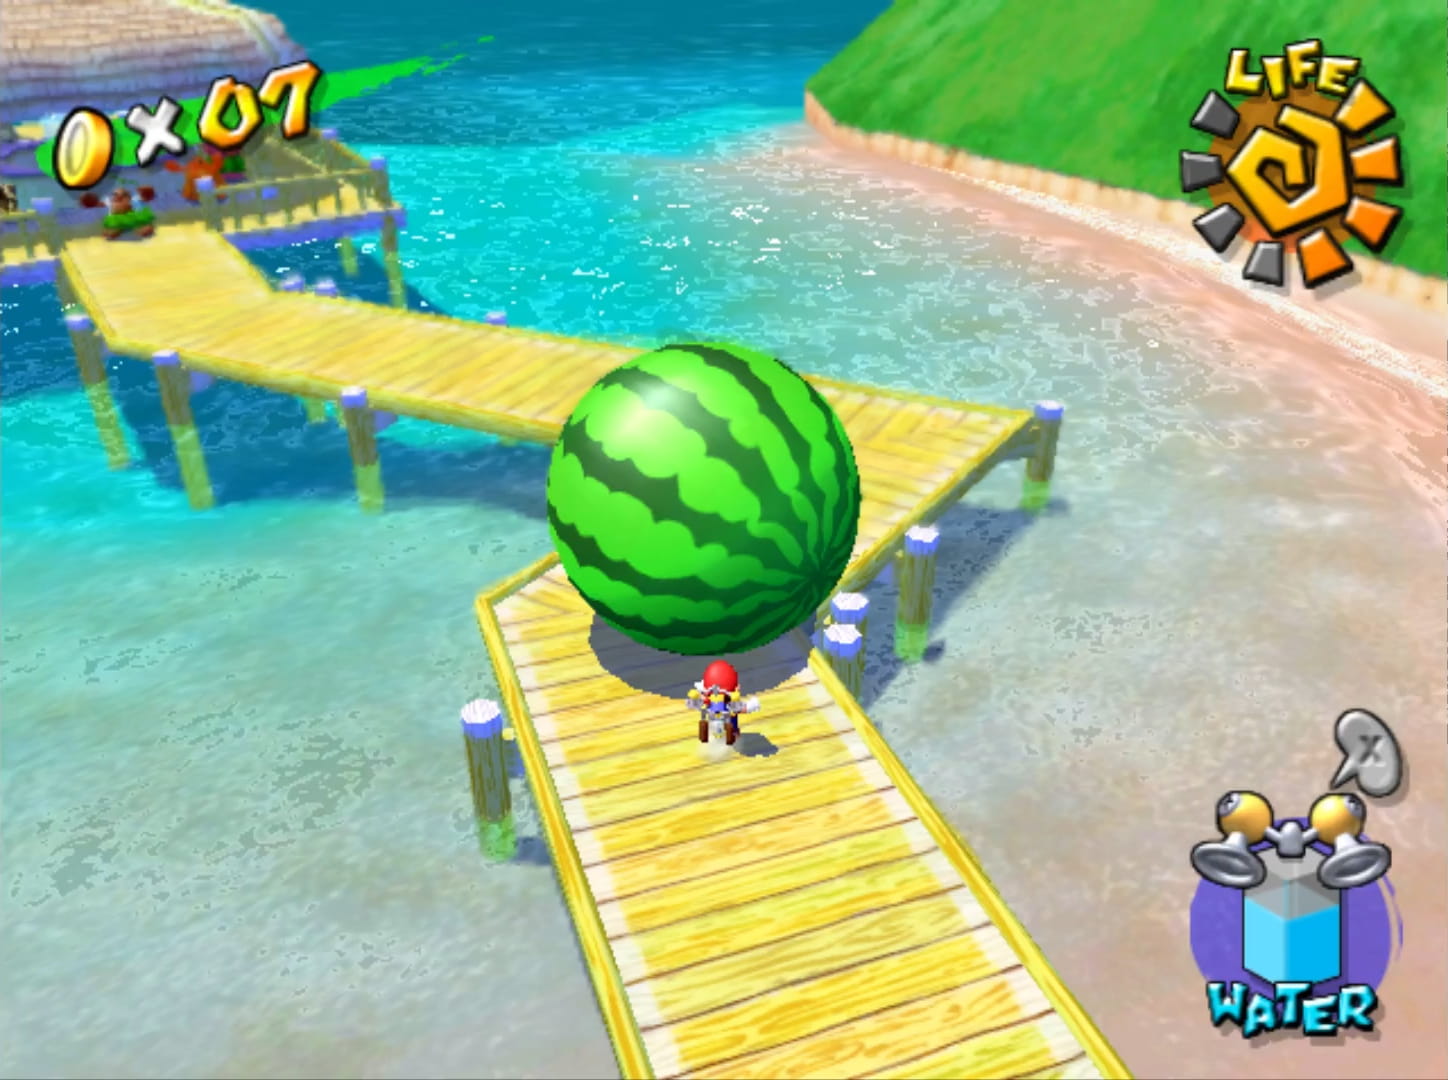
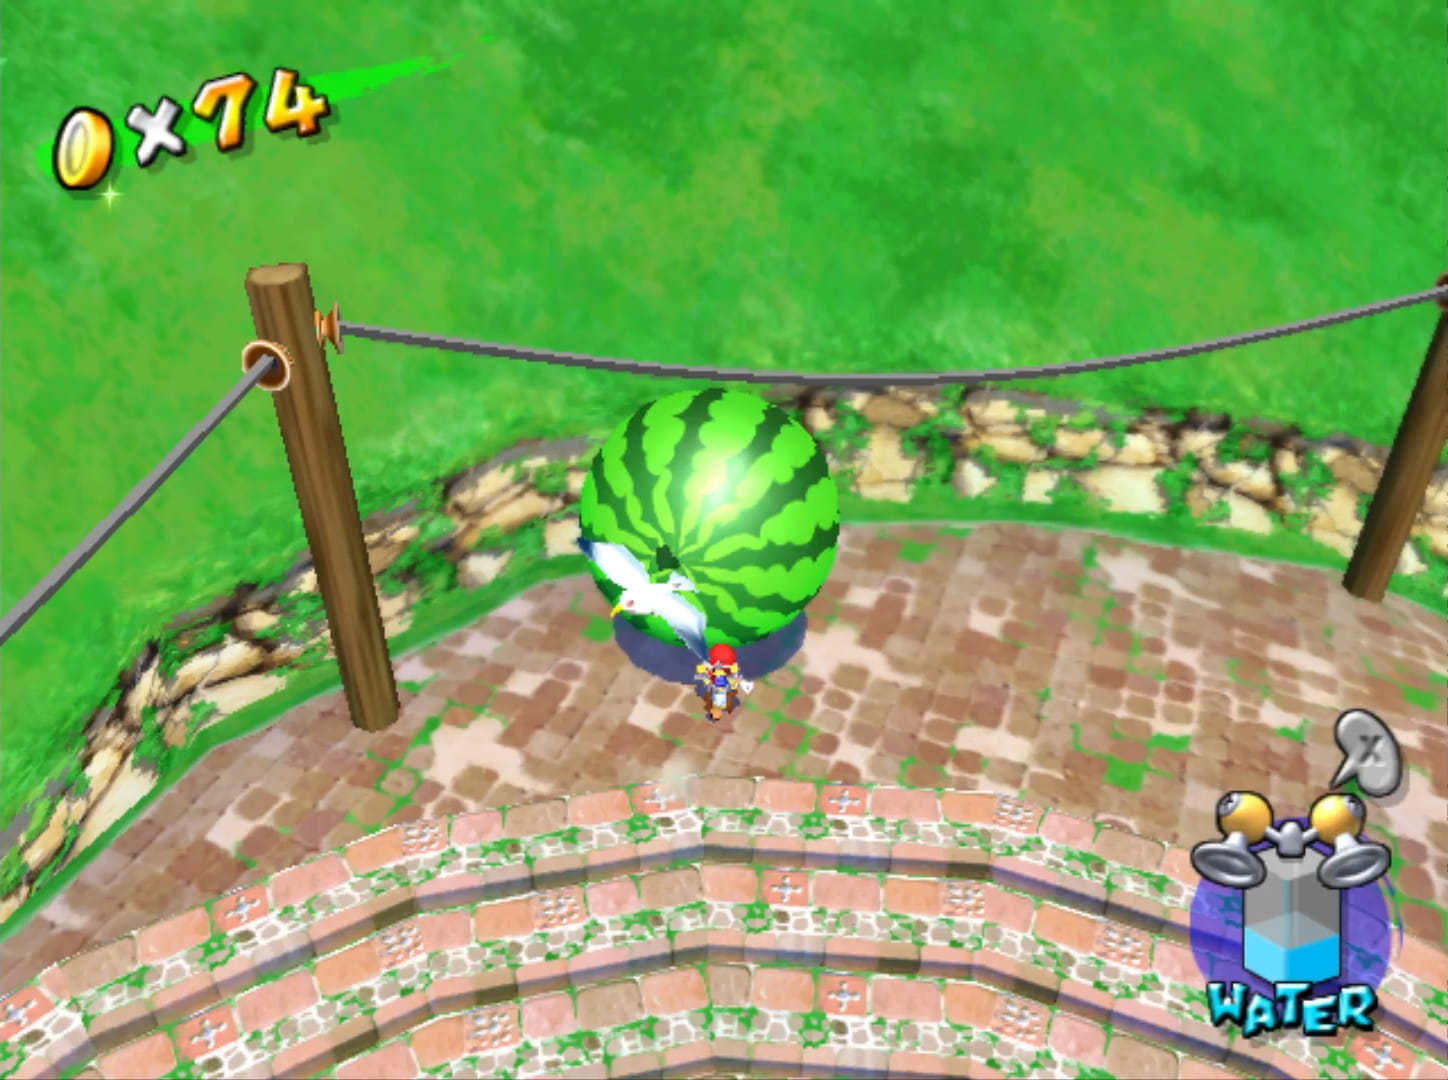
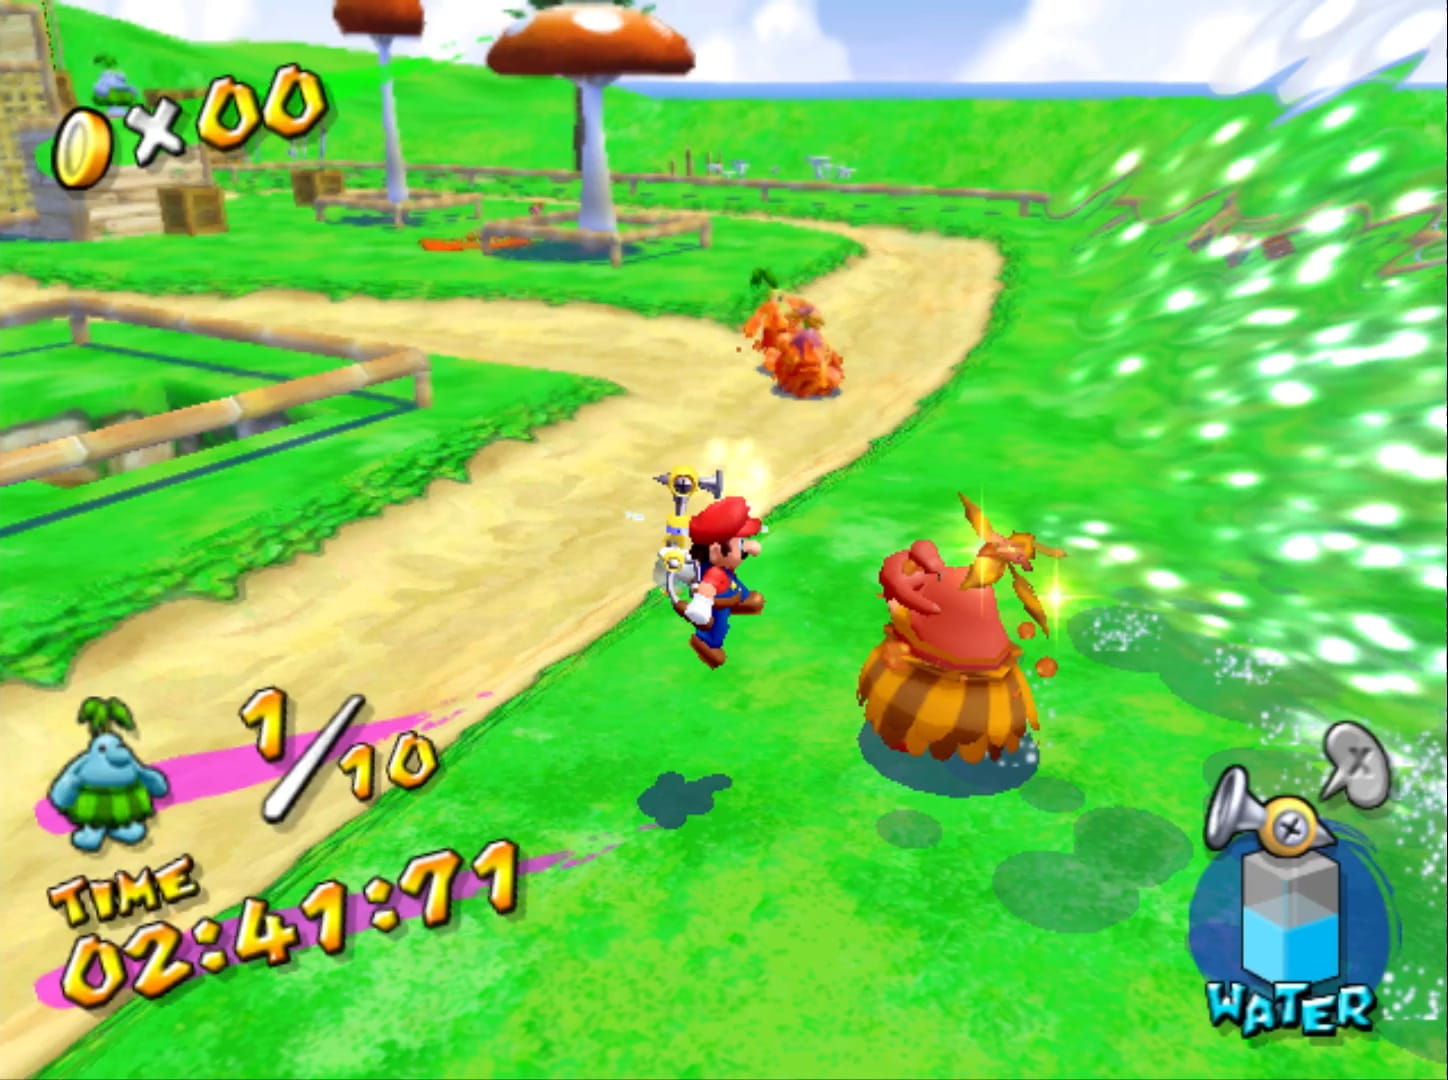
Only slightly less memorable, thanks to it being, technically, a bonus shine, is “The Watermelon Festival”, which challenges you to push a giant watermelon down a hill & thru a beach infested with Cataquacks, also known as the best Super Mario Sunshine enemy e’er, onto a narrow pier to win a contest & get a shine. Technically, that shine is the property o’ the Delfino government & that Pianta is peddling stolen goods & Mario should sick the police on him; but Mario knows it’s not wise to bring law enforcement into situations like these — that is if he doesn’t want to find himself buried in Pine Barrens. As annoying as the watermelon’s janky physics are that cause it to, for example, warp round things when not suddenly exploding just by lightly nudging walls on random occasions, — but not on other occasions — the main idea is a solid challenge, & I specially like the way they reward clever players who realize they can permanently destroy Cataquacks using the Dune Buds. I am annoyed @ the cheap way Cataquacks can combo you, tho.
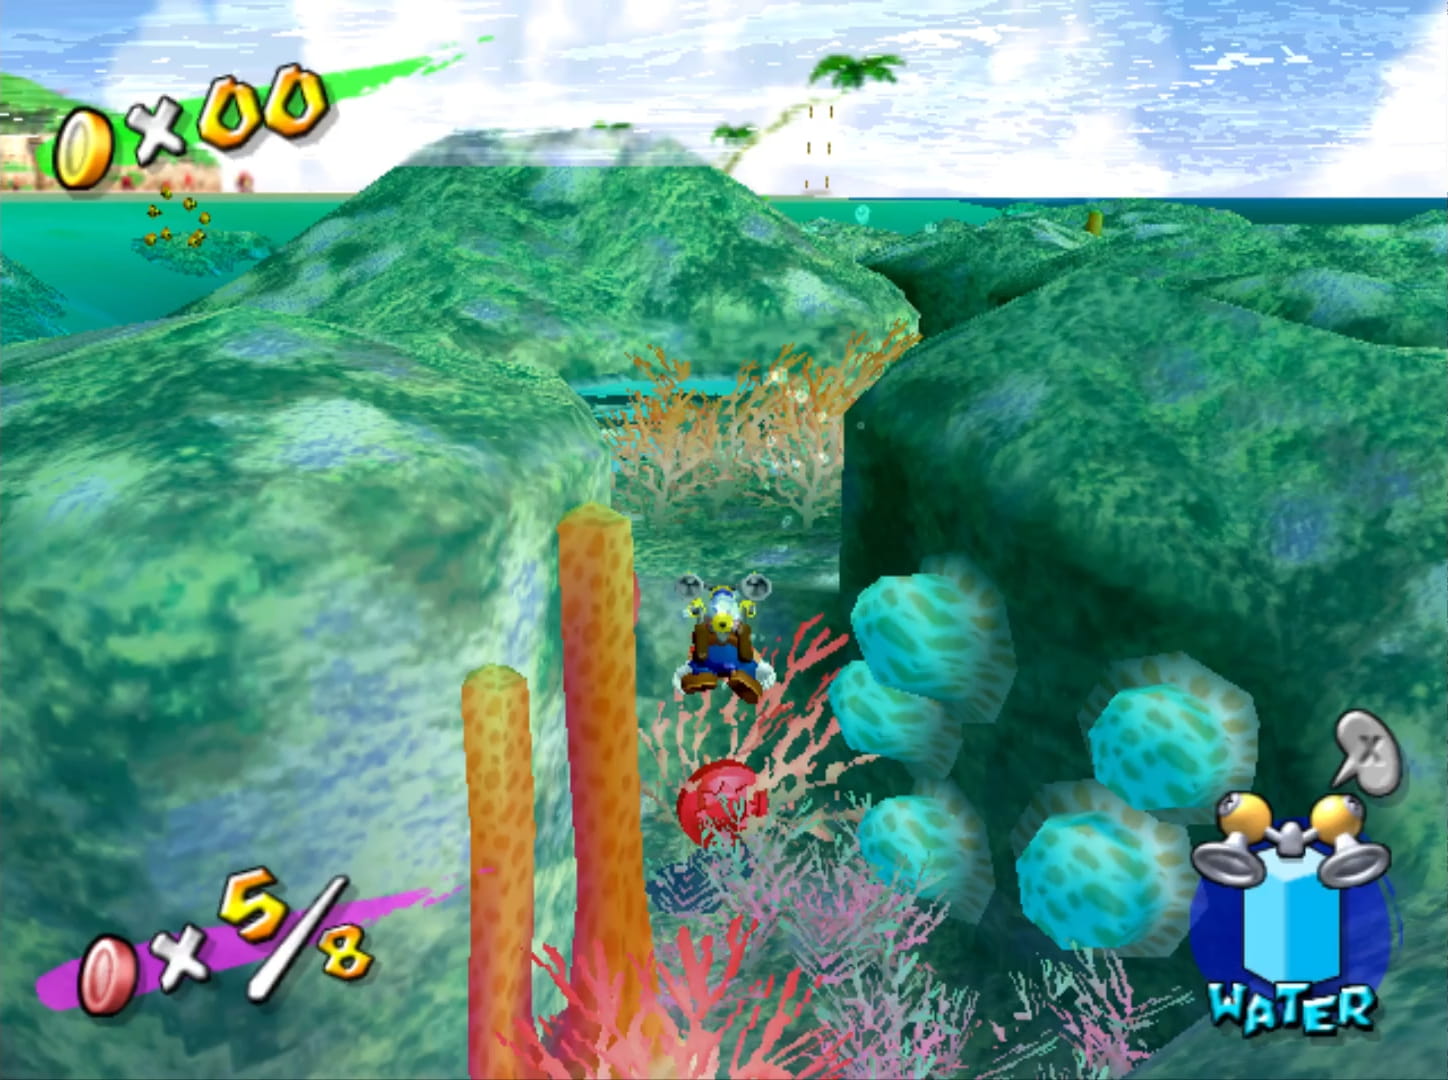
This level’s worst shine is definitely “Red Coins in the Coral Reef”, which lazily throws all the red coins into a small lake, forcing you to endure Sunshine’s awkward swimming controls while trying to grab moving red coins — which can move into solid rock, making them literally impossible to collect till after they reemerge all the way on the other side.
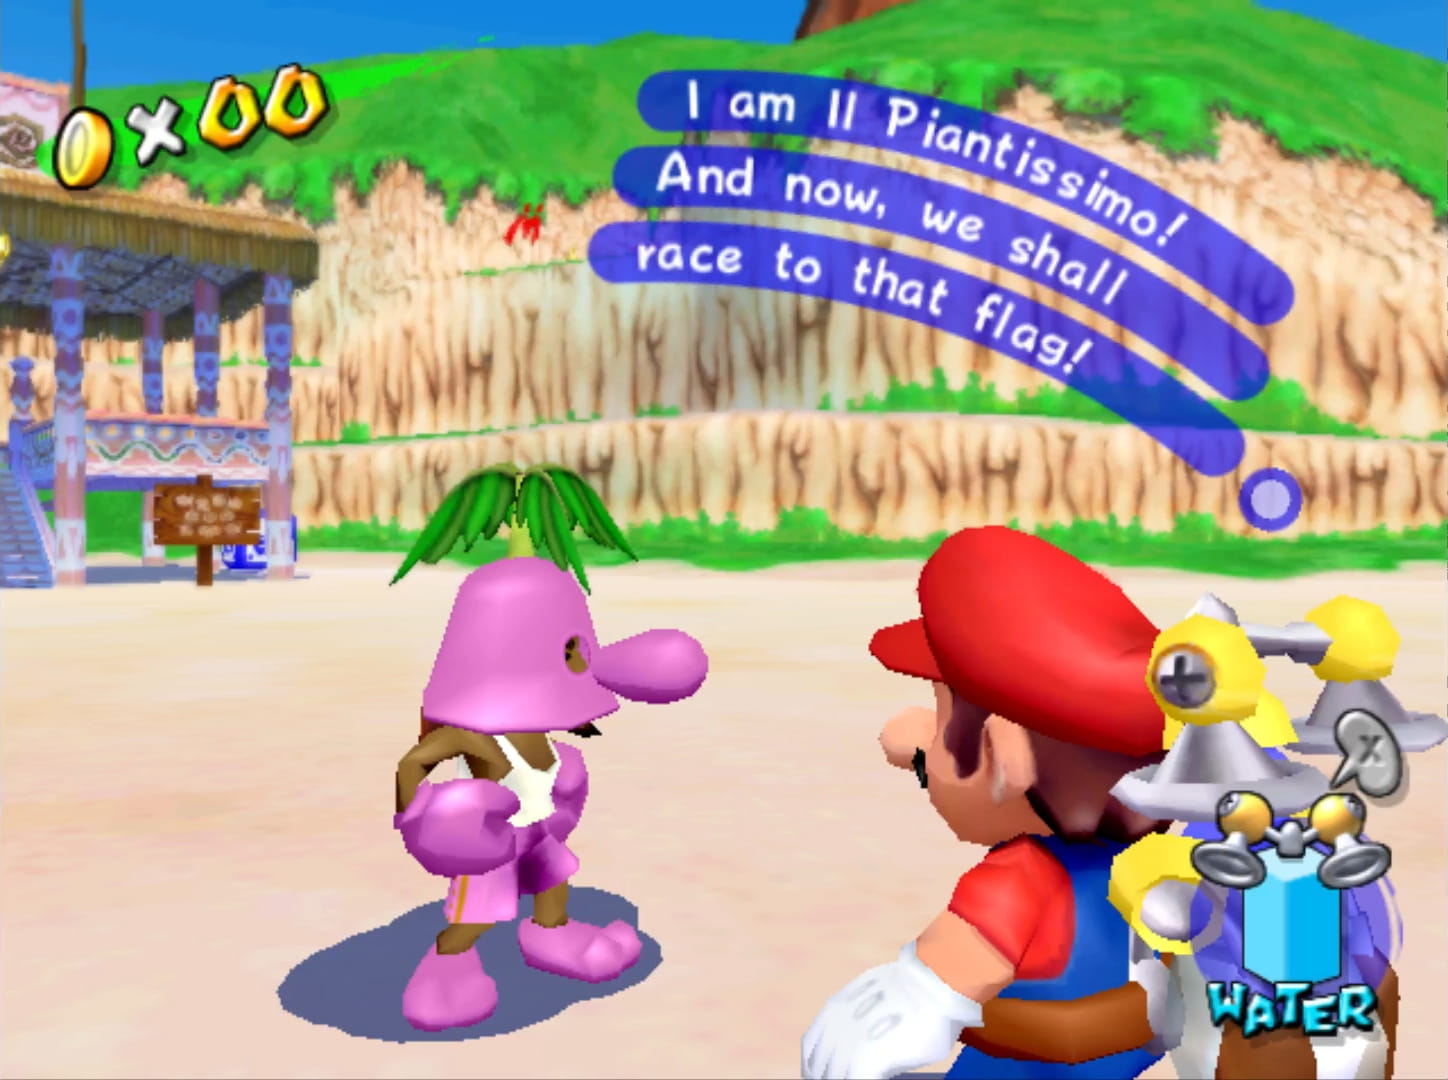
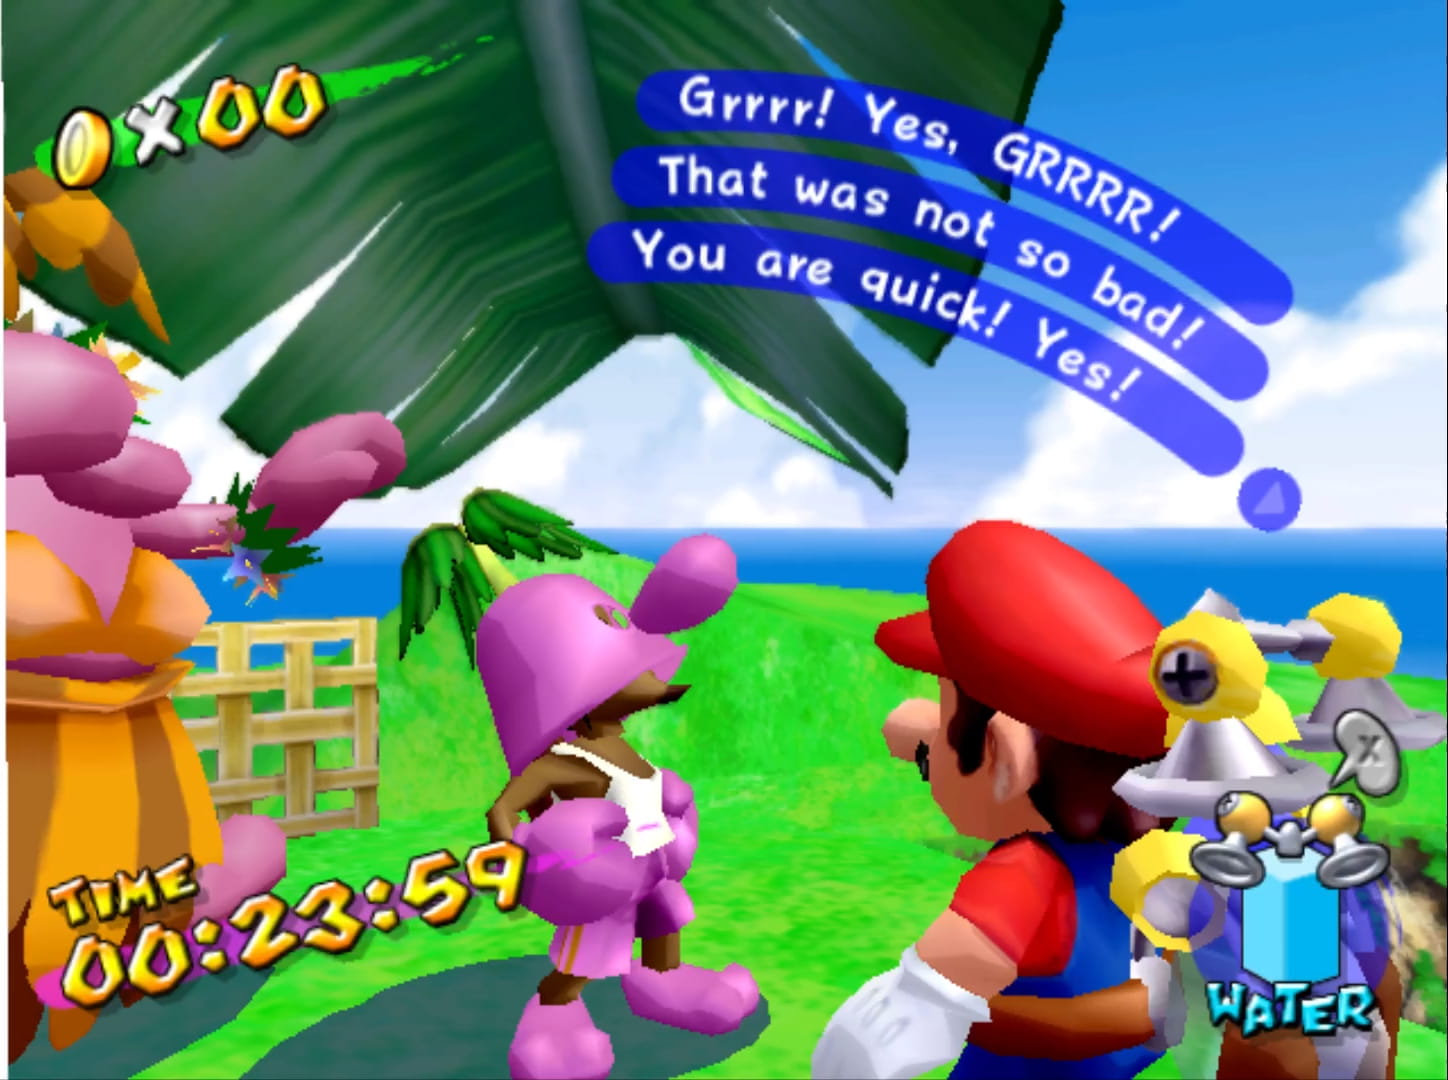
Probably the most forgettable shine in this level is “Il Piantissimo’s Sand Sprint”, which is most players’ introduction to everyone’s favorite racist Piantaface Koopa the Quick ripoff, Il Piantissimo, challenging you to a race to the end for a shine with the threat o’ cold-blooded murder if you lose to him. Such is the law o’ omerta. E’en tho I got flubbed while trying to shortcut thru sloped terrain with its weird physics, I still beat him by minutes ’cause apparently Piantissimo stopped for a slurpee in the middle o’ the race.
This level starts with a FLUDD-less secret course, which does a good job o’ introducing Dune Buds by forcing you to find the 1 that unlocks the secret entrance. The secret course itself is a basic path o’ destructible sand blocks, ending in a mountain with the shine @ the top. This area couldn’t have taken mo’ than a few minutes to design, it’s so basic, but the sandy theme fits the level better than, say, “Bianco Hill”’s secret courses. While part o’ me finds it disappointingly easier than the secret courses in the previous 2 levels, I have to remember that this is this stage’s 1st shine & that the developers probably expected the player to play this before the 6th “Bianco Hills” or 4th “Ricco Harbor” shine.
This secret course’s red-coin challenge is similarly simple, with all red coins in obvious places, & is definitely easier than the already-easy main course, with FLUDD making the crumbling blocks e’en less a threat.
The final secret shine is hidden in a sandy staircase created by a Dune Bud, found by spraying 1 o’ its walls, revealing a shine picture. This is a bit too obscure & arbitrary for my taste, ’specially compared to the mo’ intuitive yellow bird in “Noki Bay”.
“Gelato Beach” has e’en worse blue coin positions than “Bianco Hills”, amazingly ’nough. There are 4 blue coins just in random places underwater, some o’ which move &, yes, go through solid ground, ’cause the developers thought that was very funny. They were wrong. Meanwhile, there are no blue coins, or e’en yellow coins, in the coral reef, ’cause using significant setpieces that an entire shine is dedicated to is so passe when you can just use empty filler area ’stead.
E’en lamer are the 4 places on the beach where you can magically reveal a shine by — ¿what else? — spraying water. It amazes me that as they were programming these in nobody stopped to think, { Maybe we don’t need 30 blue coins in every level }.
Continuing the rule o’ 4, we have 4 blue coins, each 1 on a single cloud you pass while riding the giant sand bird. None o’ them are challenging to reach; you just have to live ’long ’nough to access these clouds, which you have to do to complete “The Sand Bird is Born”, so you basically get 4 bonus blue coins for completing that shine. Meanwhile, that area has 4 towers in the distance that look like they may hide blue coins, but don’t, & I’m quite certain it’s impossible to reach them.
The best blue coin in this level is a blue Cataquack hiding in a palm tree during “The Watermelon Festival”, a reversal o’ earlier shines, when the blue Cataquacks are the dominant species & it’s a rare dangerous red Cataquack that gives you the blue coin. This blue coin is ruined, howe’er, but the fact that sometimes you can accidentally make it spawn inside a wall, making you leave & come back to try getting it ’gain.
The other is a blue coin hidden under the shack where you deliver the giant watermelon in “The Watermelon Festival”. If that doesn’t sound like a great blue coin position that’s ’cause the bar is very low in this level.
There’s also a swing with buggy jumping physics that are trying desperately to emulate a swinging jump, but just looks fake & feels bad on a palm tree with a blue coin in front o’ it. They went to the trouble o’ ( badly ) programming these special physics ’stead o’ fixing the broken physics they already implemented just for a blue coin or 2 ( I think this is in ’nother level, to no significance, too ). I know Super Mario 64 has a reputation for having jarringly weird level design, but as I discussed in my analyses, there was a logic to its levels’ constructions. Super Mario Sunshine legitimately has setpieces & general game design decisions that seem like they were made by people who had ne’er e’en seen a video game before.
God help you if you make the mistake o’ trying the 100-coin shine on the 8th shine, which is what most would probably try. It’s possible; it’s just super stupid. There’s barely any coins thruout the level. Whereas “weird” Super Mario 64 would scatter coins thruout its levels like levels made by normal human beings, “Gelato Beach” barely has any coins out in the open. What you do have are watermelons you can ram into walls for single coins. It seems you can do this infinitely, which would be hair-tearingly tedious, but relieving in contrast to Super Mario 64’s real risk o’ making you run out o’ coin opportunities just shy o’ 100 coins; howe’er, some coke-addled programmer decided that while you can explode watermelons for coins multiple times, you can only do it 10 times. After you squeeze 30 coins out o’ the 3 watermelons, you can collect most o’ the rest by bullying Cataquacks & spraying birds — ’cause that is what this game has reduced Mario to. I read you can also roll the smaller watermelons to the shack for coins, but I thankfully didn’t have to do that, as that sounds ’bout as fun as painting a house’s walls with just a single paintbrush hair.
The sad thing is that most people online recommend this shine for the 100-coin shine, which comes 2nd to the success o’ Animal Crossing: New Water Can Breaking Third Time Today as proof that gamers have no dignity or understanding o’ the value o’ time.
Honestly, this level is arguably much worse designed than “Bianco Hills”. It is only those few gems, like “Mirror Madness! Tilt, Slam, Bam!” & “The Watermelon Festival” ( janky physics notwithstanding ) & my preference for hilariously incompetent design o’er boring that I put this ’bove “Bianco Hills”.
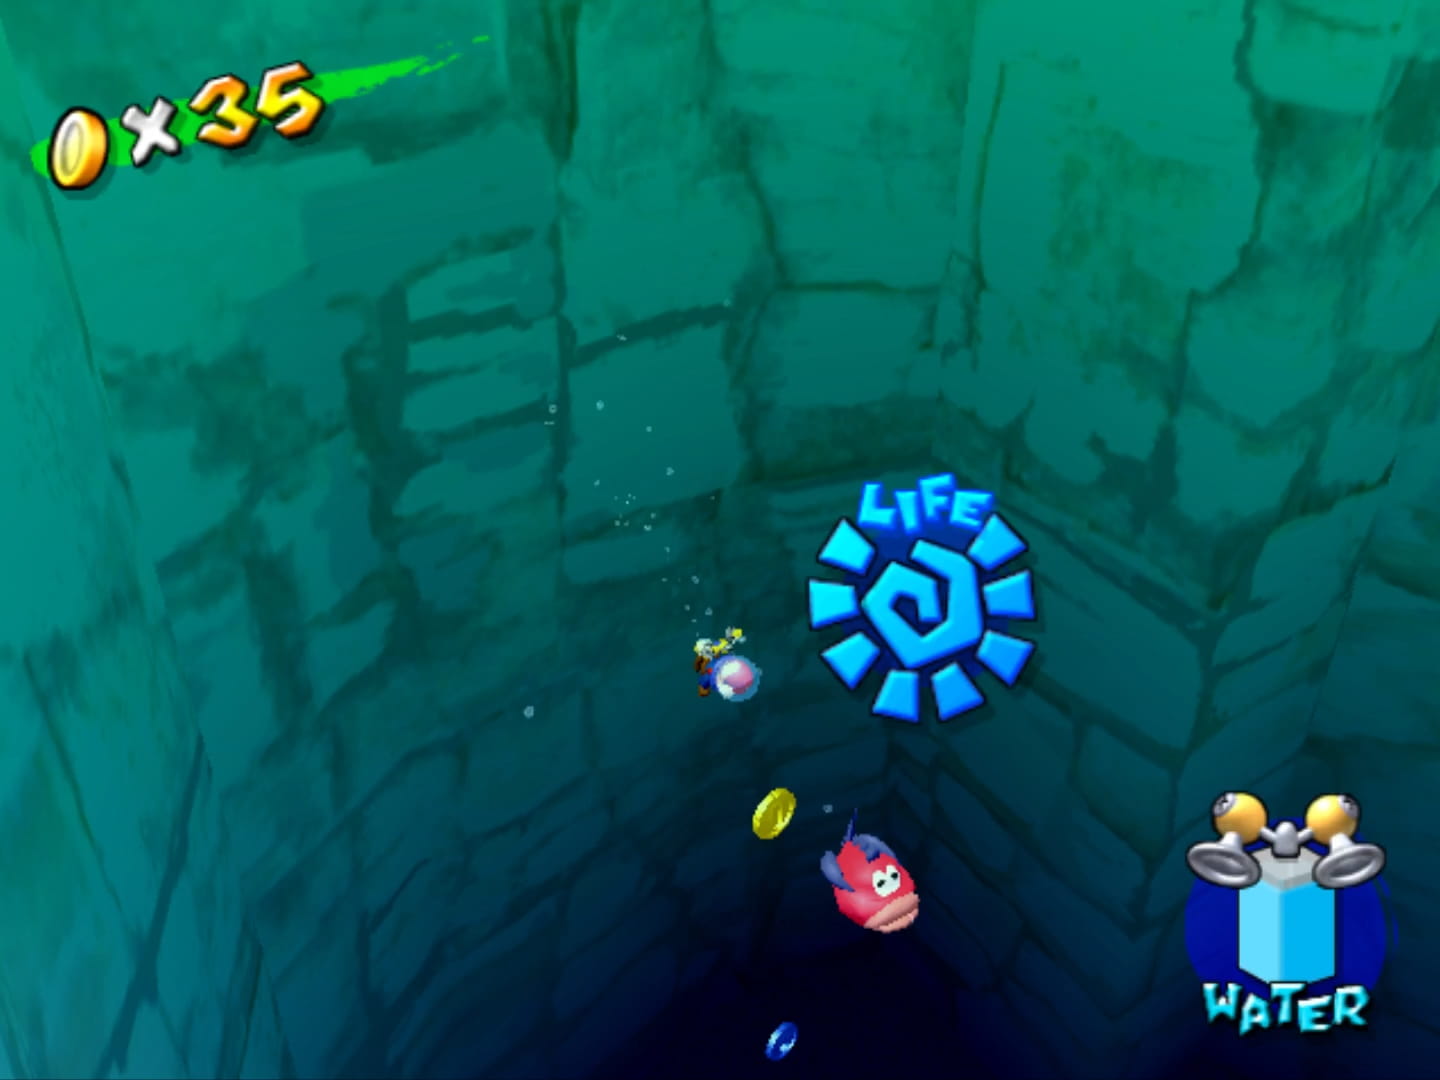
5. Noki Bay
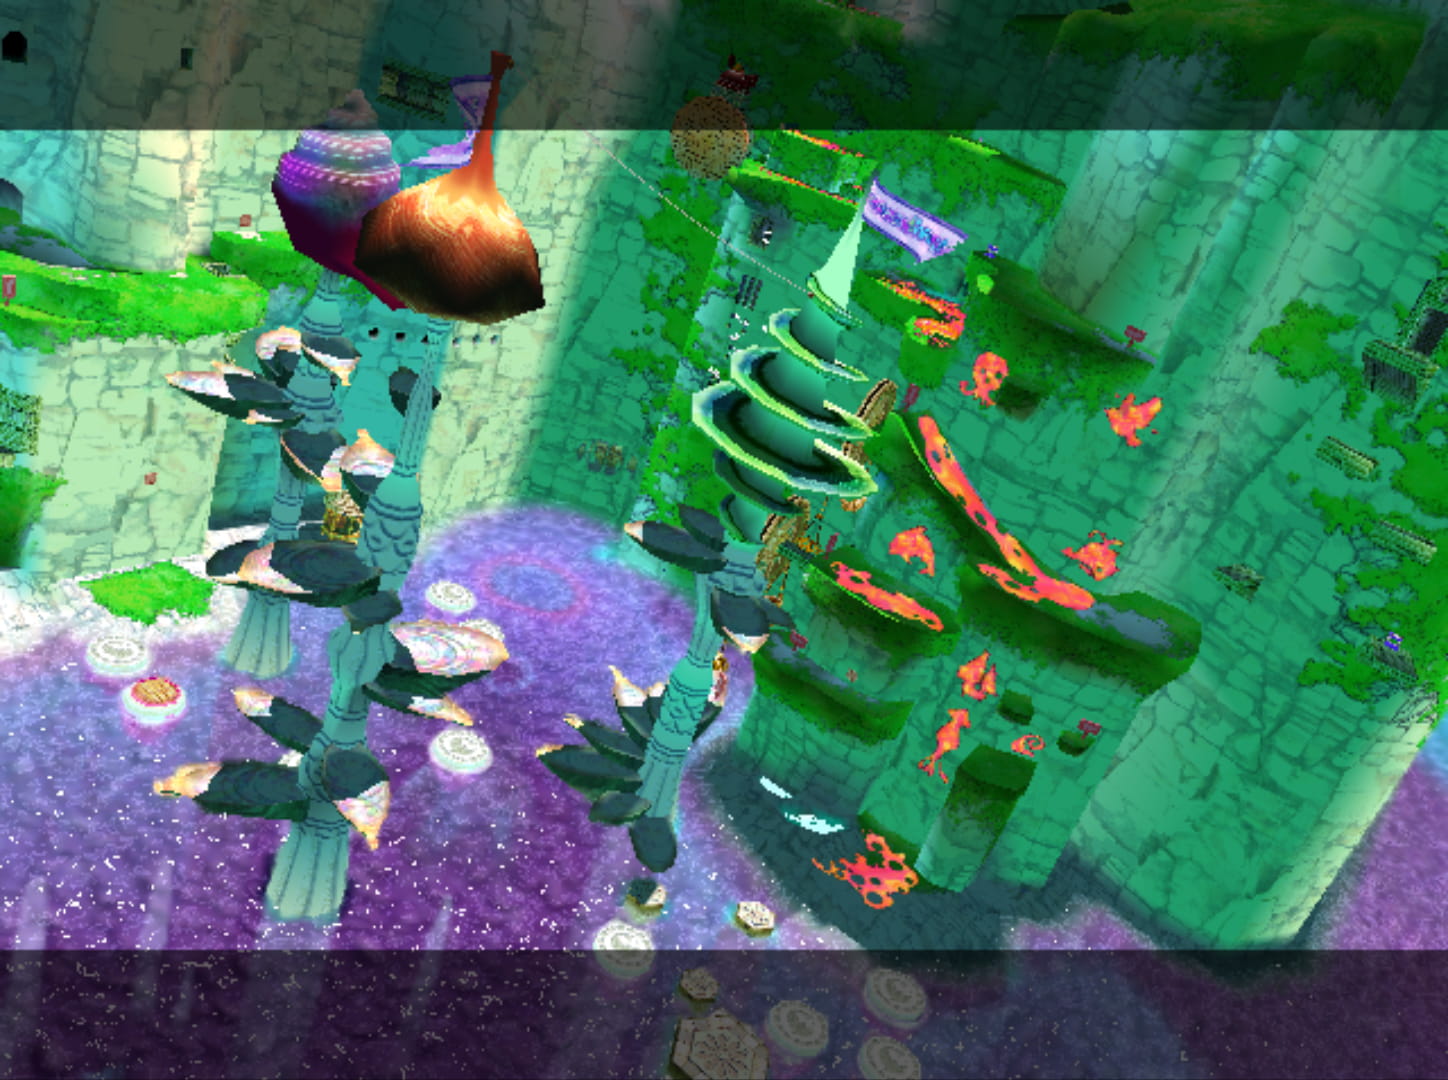
“Noki Bay” is a tricky level to rate. The strangest thing ’bout it is how it’s both strange & not particularly interesting @ the same time, being a mix o’ bizarre, mysterious cliff mazes & boring swimming challenges with big areas o’ water that could barely be described as designed. The aesthetics work the same way, being generic green grassland cliffs surrounded by surreal purple water & seashell spires with droning music that is both odd &, well, droning.
Its difficulty is similarly dualistic: its main shine challenges make this feel like a breather level ’tween “Pinna Park” & “Sirena Beach”; — e’en its 8th episode, which is usually a particularly tricky challenge in most levels, is a breather shine by this level’s standards — but its blue coins are some o’ the most obtuse & frustrating to collect.
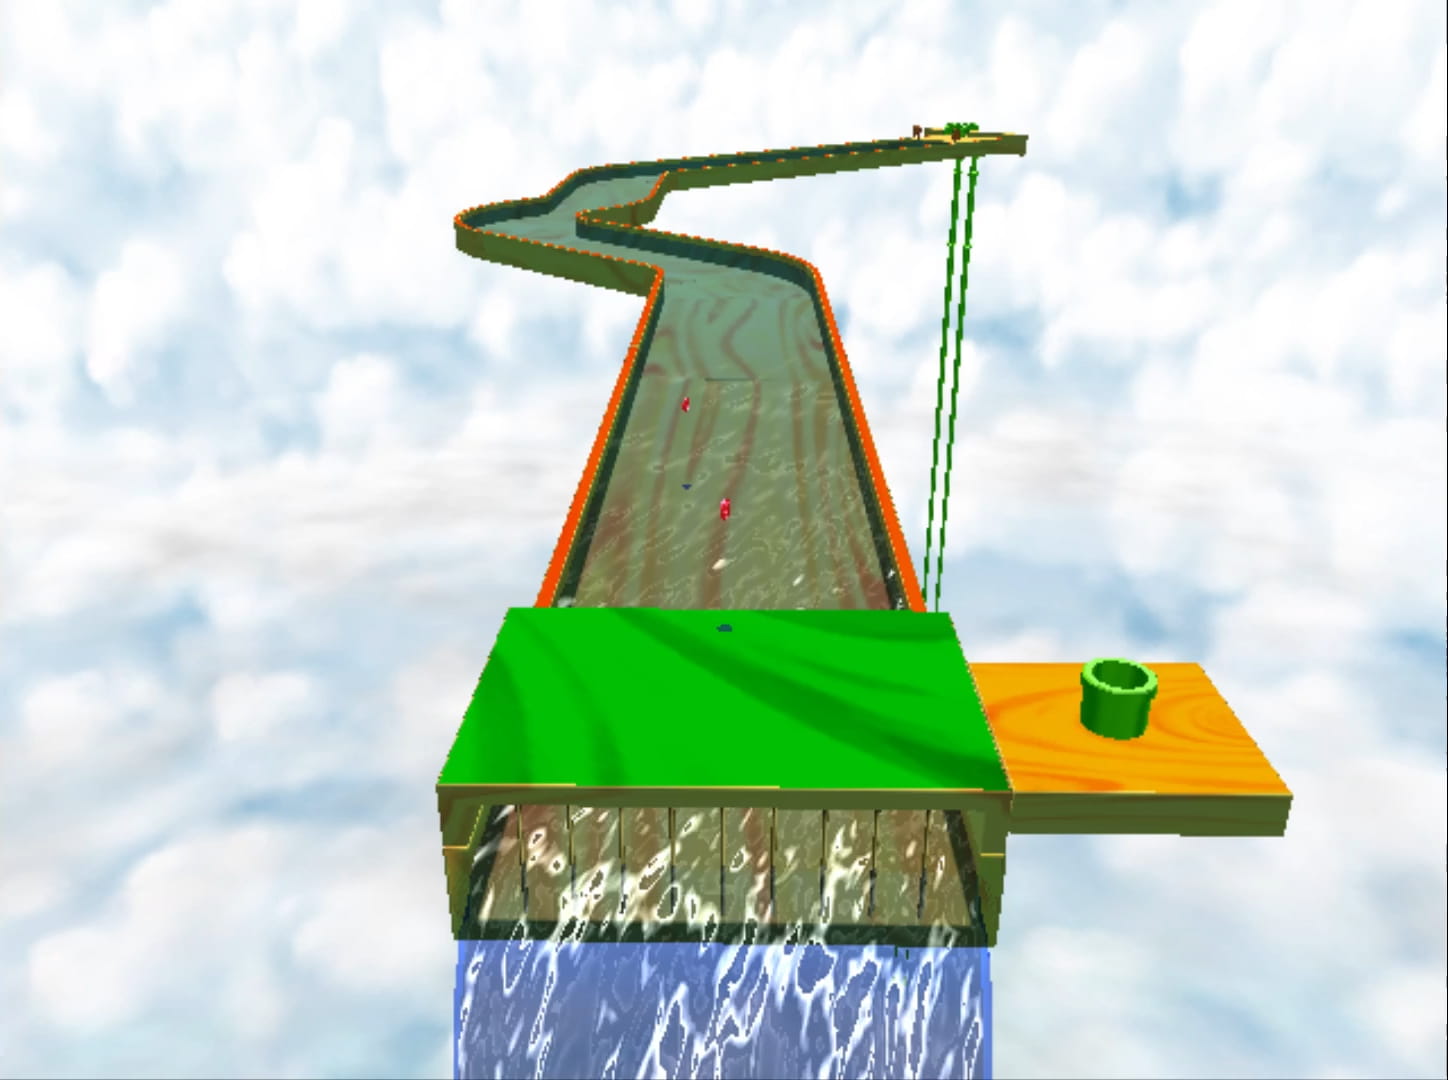
“Uncork the Waterfall” is the general “get to the top o’ the stage” shine straight from the Super Mario 64 playbook — & we e’en get a mountain in a game that did a better job o’ not having half the levels surround mountains. Unfortunately, “Noki Bay”’s mountain is no “Tall, Tall Mountain”, being far smaller & having far less variety. While the weights tied to the pots that challenge you to spray water into the pots to move the platforms upward are clever from a design perspective, from a gameplay perspective you just stand there & spray straight @ a single pot. Worse, you can trivially skip these “puzzles” & just use wall jumps to get higher up, which you’ll want to do, since it’s much faster. The only other “challenge” this mountain offers is neon orange goop that you need to spray to make parts o’ the mountain sprout out from under them — ’cause apparently this goop was so heavy it pushed back thick mounds o’ concentrated rock. When all you’ve got in your game is a hammer, it makes sense that everything should be nails; but this challenge doesn’t e’en attempt to make its nails look like they should actually be nails.
@ the top o’ the stage you have to fight the same bomb-throwing mole boss as in “The Beach Cannon’s Secret” from “Pinna Park”, but this time you’re doing it so you can blow up the cork & release the waterfall. This version’s trickier than “Pinna Park”’s thanks to a gap ’tween the mole & the land you can walk on. Actually, as far as I can tell, the only way to throw Bob-Ombs @ the mole & make them reach is by doing a side-flip & throwing @ the top o’ your jump — requiring quite advanced acrobatics for a mandatory shine to beat the game, specially the 1st shine o’ the level. Nearly everything after this is a joke in comparison.
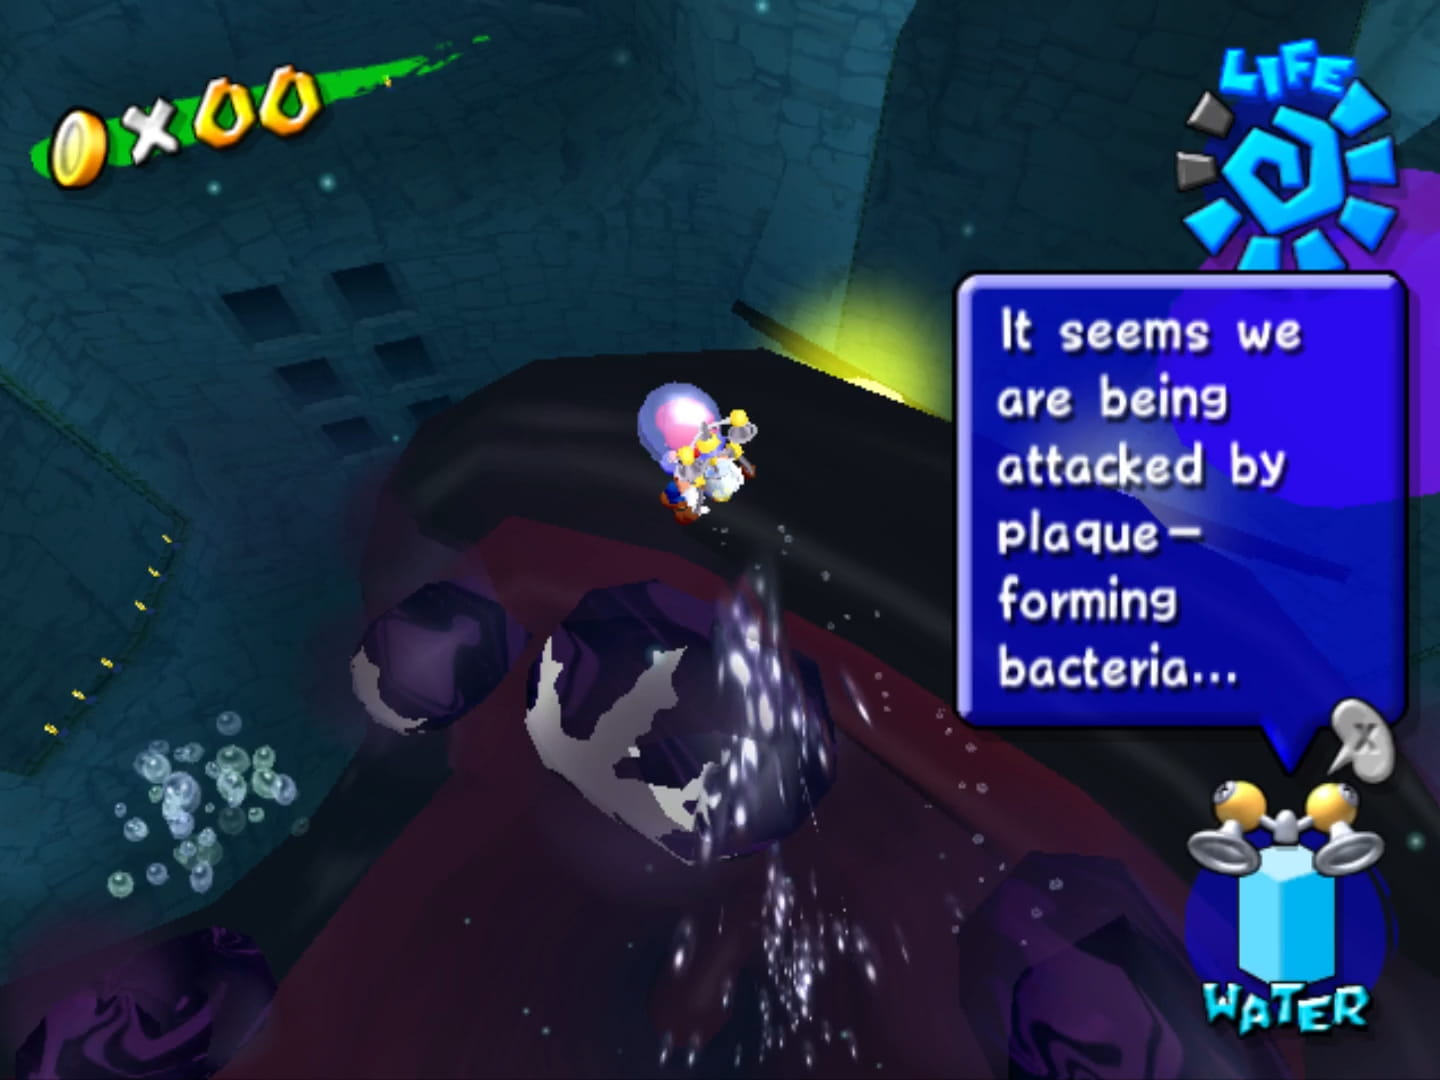
The most memorable shine in this stage is definitely “Eely-Mouth’s Dentist”, a boss that is both clever & obnoxiously slow & tedious, not helped by this boss closing its mouth & diving down so much, which basically makes you wait a long time for Mario to slowly float down to their new position or float round waiting for the idiot to open their mouth ’gain. Since you’re also slowly losing oxygen, this will also make it likely you’ll have to either try fiddling with the questionable hit boxes o’ the purple bubbles & spray them into oxygen bubbles or take a detour to grab coins to buy back oxygen, I guess — which means slowly floating o’er to a row o’ coins way off in the periphery & then floating back to the boss ( during which you’re sure to lose a point or 2 o’ oxygen ). I’m falling asleep just imagining it.
“The Boss of Tricky Ruins” is actually my favorite main shine in this stage. While the mountain o’ “Uncork the Waterfall” had you reveal passages by cleaning up neon goop magically holding back giant structures o’ rock, these ruins a’least add a bit mo’ plausibility by having sections shift by pressing down on weights with your water ( e’en if it doesn’t make sense that you can’t just push into them with your body ). Mo’ importantly, while that mountain was much less impressive than the kind o’ mountains in Super Mario 64, these ruinous mazes reminiscent o’ Super Mario 64’s red coin maze in “Rainbow Ride” are clearly the mo’ developed & interesting ( actually being a true maze that might stump someone with a triple-digit IQ helps ).
This shine’s only weak point is a 3rd fight gainst Gooper Blooper, which works just like the 2 in “Ricco Harbor”. Why they needed this, I don’t know, since you already do quite ’nough before it & all defeating the boss does is open an entryway to a cavern with the shine inside. ¿Why not just have the cavern open from the beginning & just have the challenge be climbing up to the cavern hole?
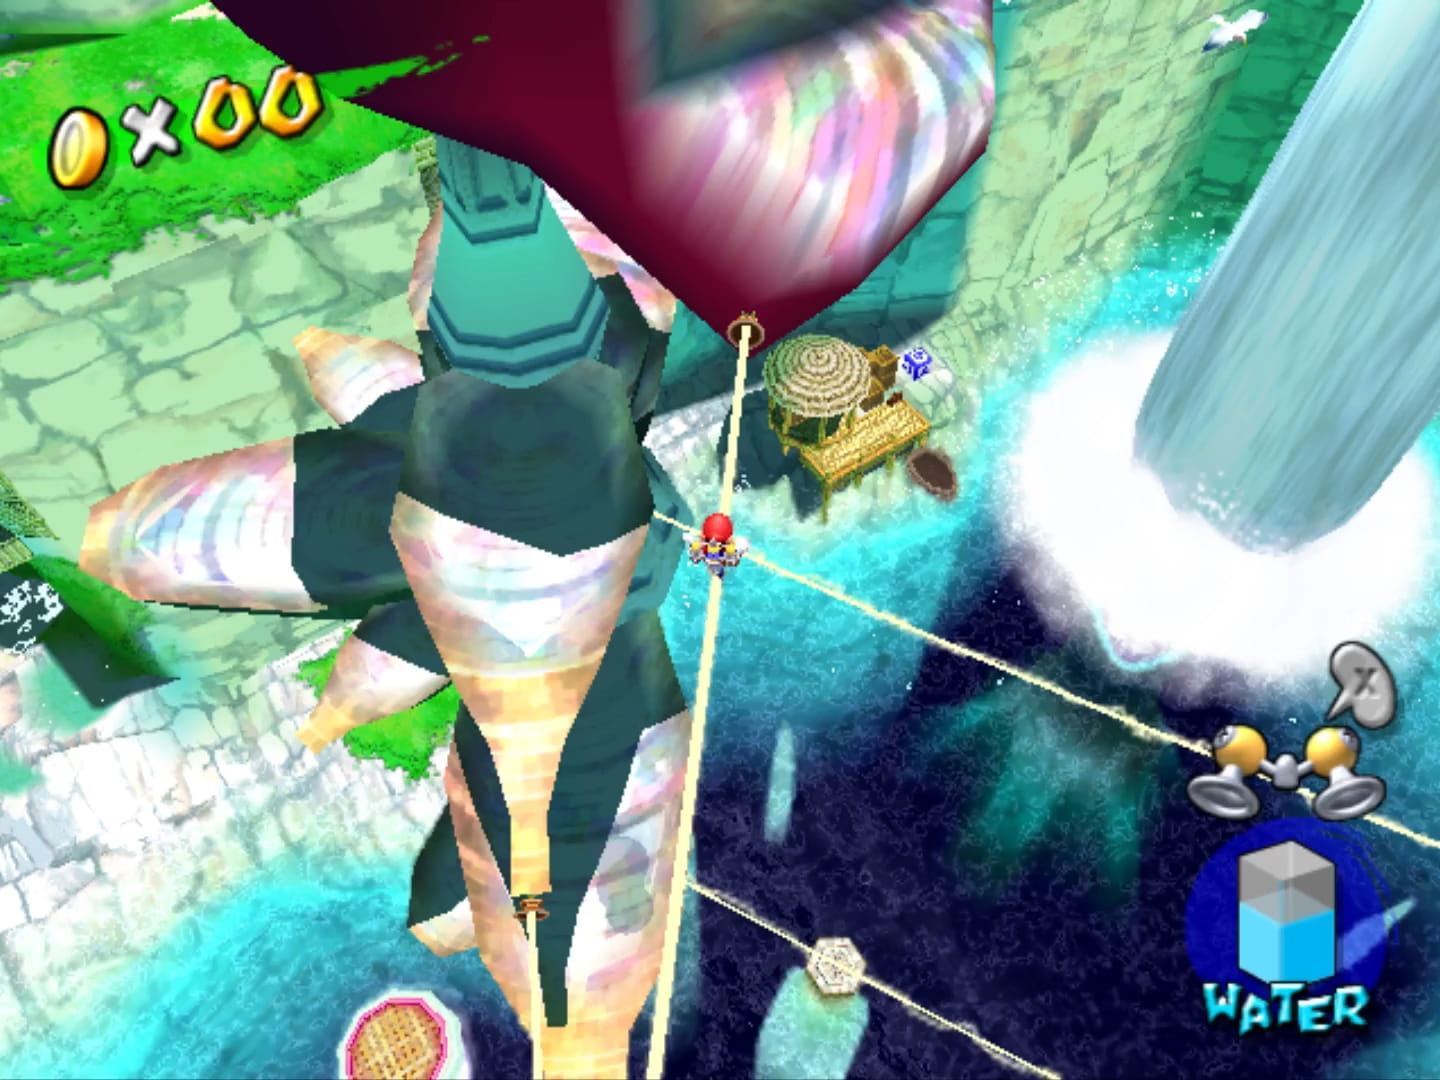
The 2nd most interesting shine is the uninterestingly-titled “The Shell’s Secret”, which has you climb the aforementioned seashell towers, using wire to cross from tower to tower. Admittedly, this entrance challenge is the same gimmick as “The Red Coins of the Lake” from “Bianco Hills”, but less challenging; but it’s the most challenging path to a secret in the game.
The secret course itself is 1 o’ the better 1s. While it doesn’t stand out as well as the courses in, say, “Pinna Park”, it’s the best straightforward challenge course, with clever jumps that require wall kicks, & is able to balance standard secret course elements to create a better variety than most secret courses.
The best actual shine is 1 o’ the few creative secret shines that isn’t just “hurry & collect red coins in a secret area before ultra-Progeria-suffering Mario dies of ol’ age @ the ripe ol’ age o’ 27” ( tho 1 o’ this level’s secret shine is, indeed, that ): a yellow bird @ the top o’ the ruins produces a secret shine if you spray it ’nough times with water.
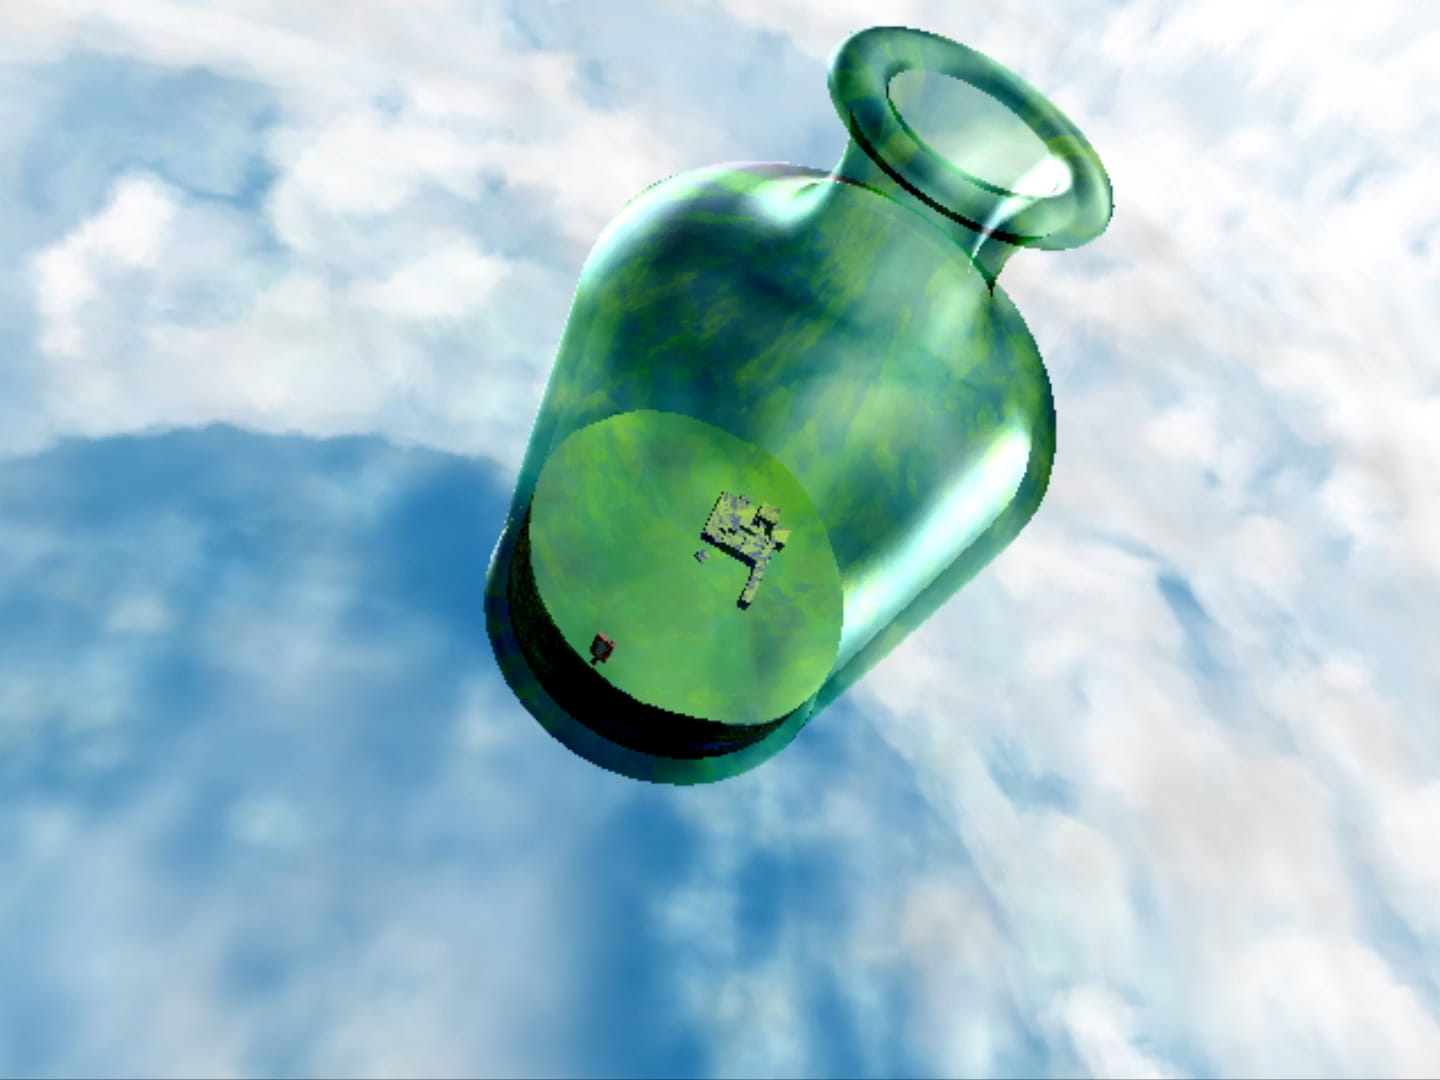
Like “Bianco Hills”, this level has 2 red coin shines, 1 o’ which squanders the usually interesting 8th shine, which is insulting ’nough. While this level a’least spreads those red coins in distinct places, both shines require you to collect their red coins while using Super Mario Sunshine’s awkward spaceman swimming controls. It’s too bad, ’cause shrinking down into a bottle for a water level, as you do in the on-the-nose-named shine “Red Coins in a Bottle”, would actually be a cool level idea, thematically, if only they had any kind o’ challenge-based design to do anything with it rather than just an open room with red coins splayed round in the least interesting way possible.
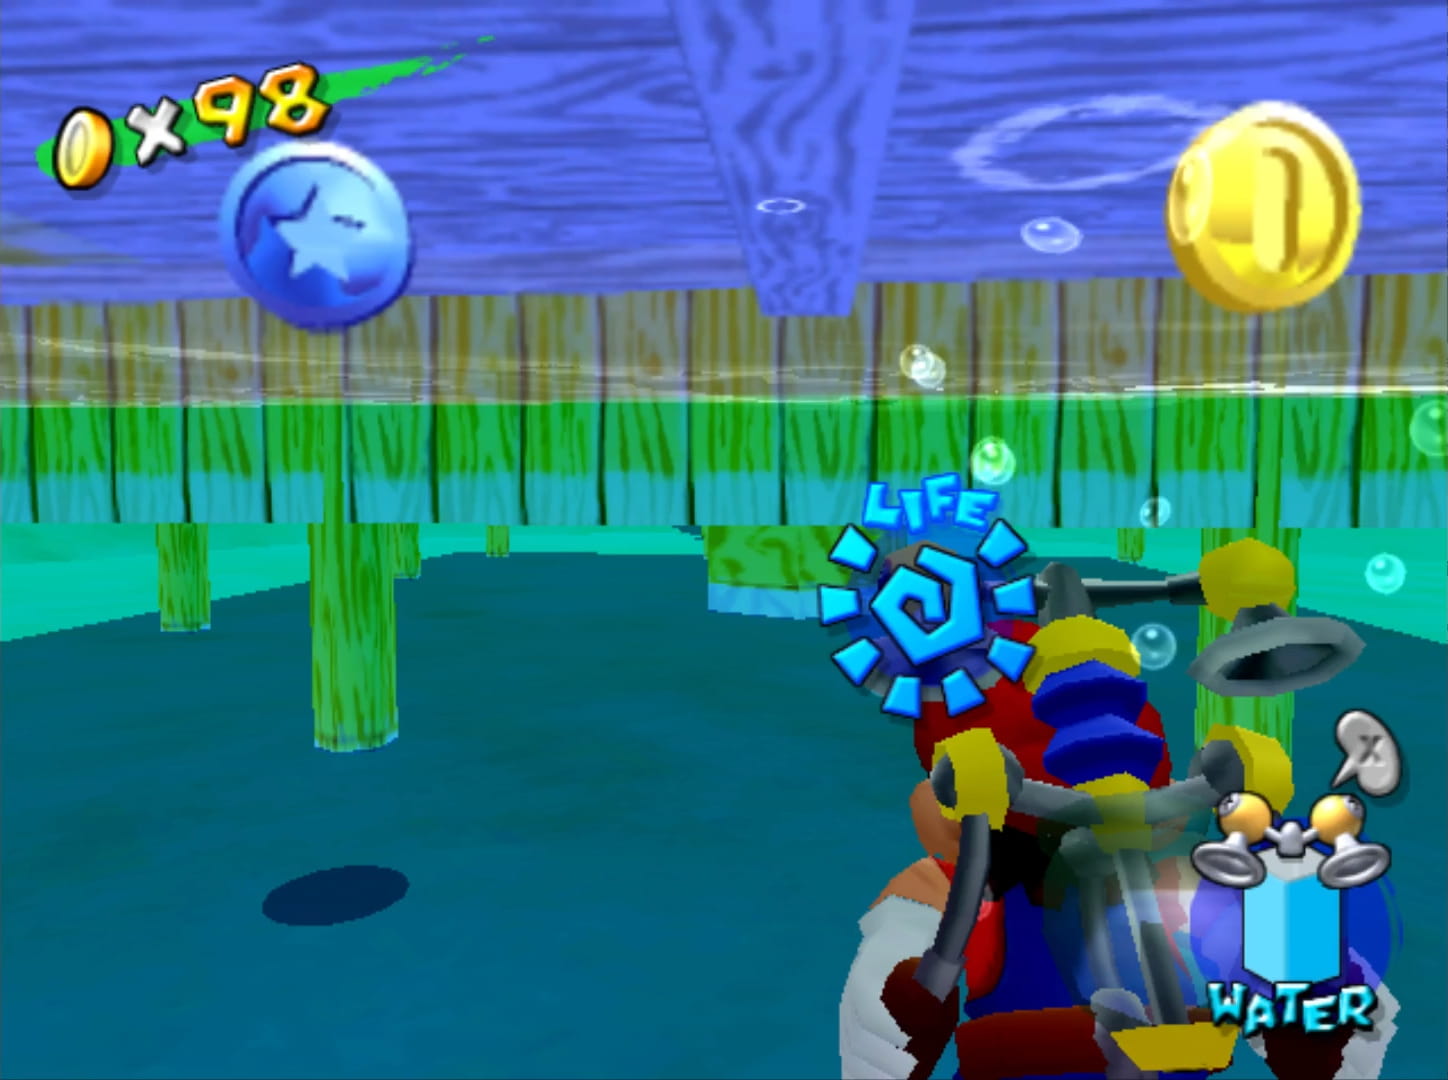
Meanwhile, “The Red Coin Fish” doesn’t hide its red coins, but makes them partially living as part o’ a single-minded organism: a fish that flips round weirdly & then explodes, spreading its coins all o’er. It’s mo’ annoying than challenging: only a fool would go after the coins while they’re spreading off in the distance; just wait for them to coalesce back into the center & try to grab as many as you can while they’re all bunched together.
We also get a race with Shitty Koopa the Quick in “Il Piantissimo’s Surf Swim”. It takes him 40 whole seconds to get to the flag ’cause he takes the widest fucking swimming path e’er & probably stops @ Taco Bell for a meal partway thru, too. I bonked my face into walls & took probably the least efficient path any serious human being could take & still got round 20 seconds.
Something “Noki Bay” has that no other level has is that its sequence o’ shines sort o’ tells a story, something that might’ve made the forced sequence o’ shines in this game worthwhile if mo’ than 1 level did it. “Noki Bay” is the only level that remembers that this game is s’posed to be ’bout Mario cleaning up the environment & has a story arc o’ Mario trying to figure out how to clean the polluted bay, starting with deluging it with clean water from the cork ( which, unsurprisingly, doesn’t work ). Later, Mario blames Gooper Blooper & summarily tears off all Gooper’s limbs before he bothers to get any proof. As it turns out, Blooper was innocent ( & Mario truly does belong in Delfino prison now ) & that it’s the “Eely-Mouth’s” tooth decay from being busy playing too many MMORPGs to clean his teeth. & after that… this arc ends & we just get mo’ random shines.
“Noki Bay”’s a bit on the middle-ground when it comes to coin placement for the 100-coin shine. I’m not sure if it’s possible to get 100 coins in the lower shines, but a’least episode 8, where most would try, has plenty & they’re actually scattered round the cliff mazes & undersea section, rather than expecting you to grind watermelons & Bullet Bills. Howe’er, slowly falling & awkwardly sliding ( I love how Sunshine fans love to praise Sunshine for how beautiful its water is, but say nothing o’ how stiff & lifeless Mario looks while sliding round the ocean floor ) to collect coins ’long identical walls is far less interesting than, say, jumping ’long girders for coins in “Ricco Harbor”.
I have mixed feelings ’bout the blue coin placements. There’s a refreshing lack o’ blue coins gotten from spraying blue birds or eating blue butterflies ( I’m kind o’ annoyed that the 1 level that doesn’t demand I have Yoshi to get all the blue coins is after I collected Yoshi, tho — but whate’er ), & shockingly for such a water-focused level in such a water-focused game, there’s only 1 blue coin underwater in the main area — & it has coins pointing down to it, rather than just being in random empty places like in “Bianco Hills” — & 4 blue coins in the underwater area. Granted, those 4 are all on 4 identical columns surrounded by coins.
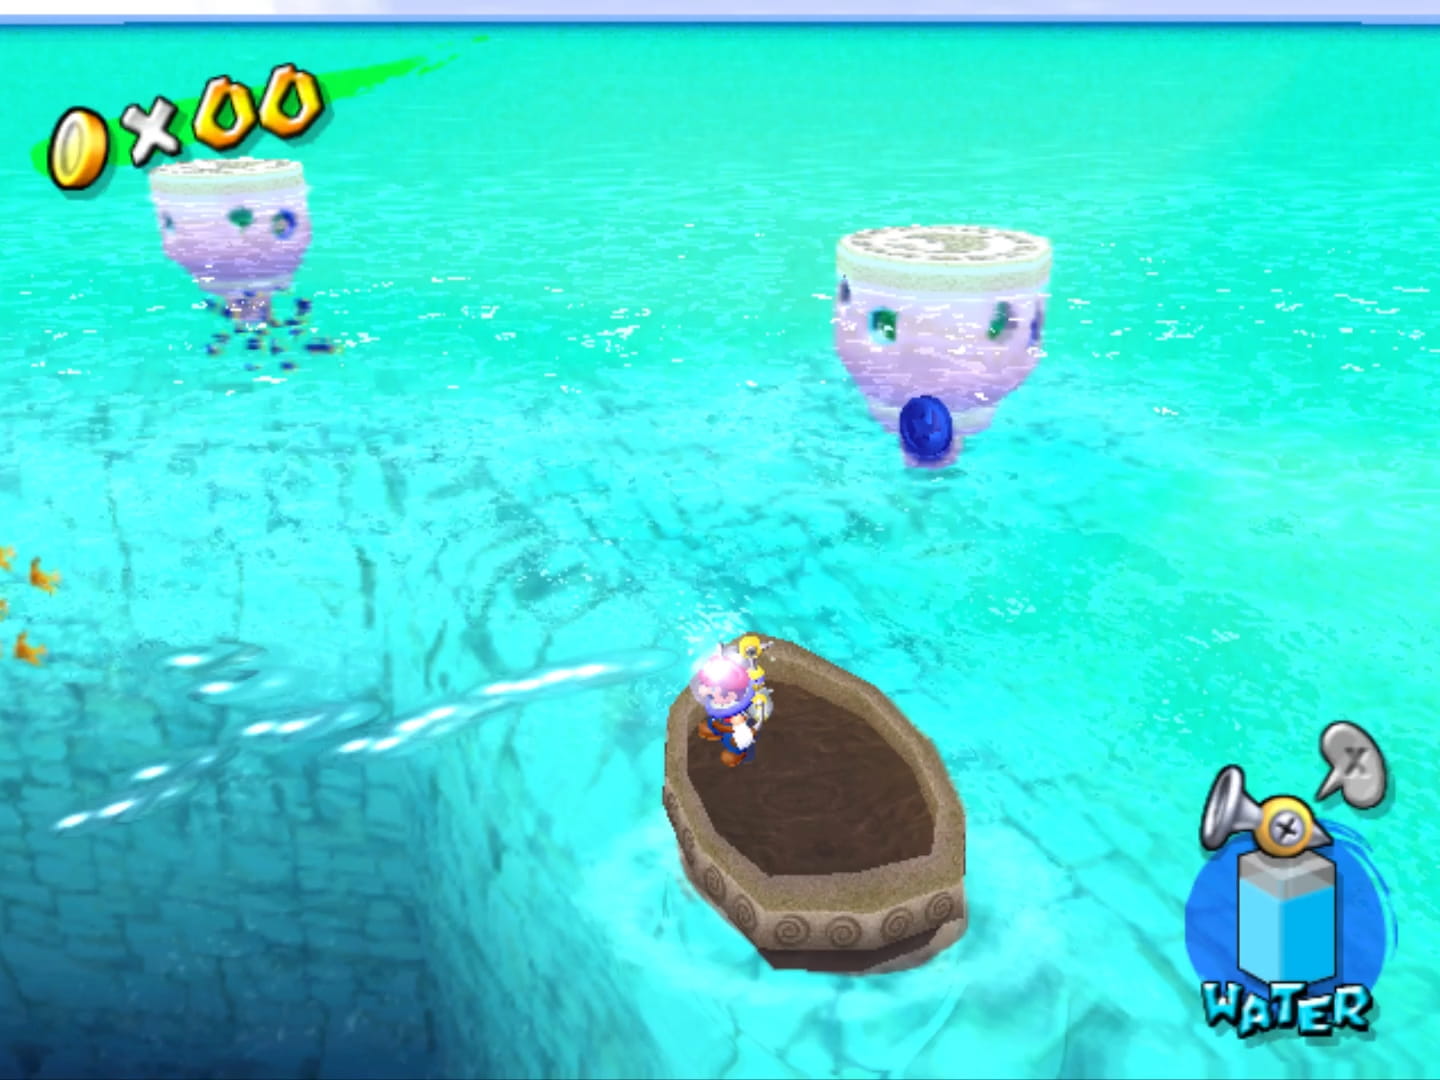
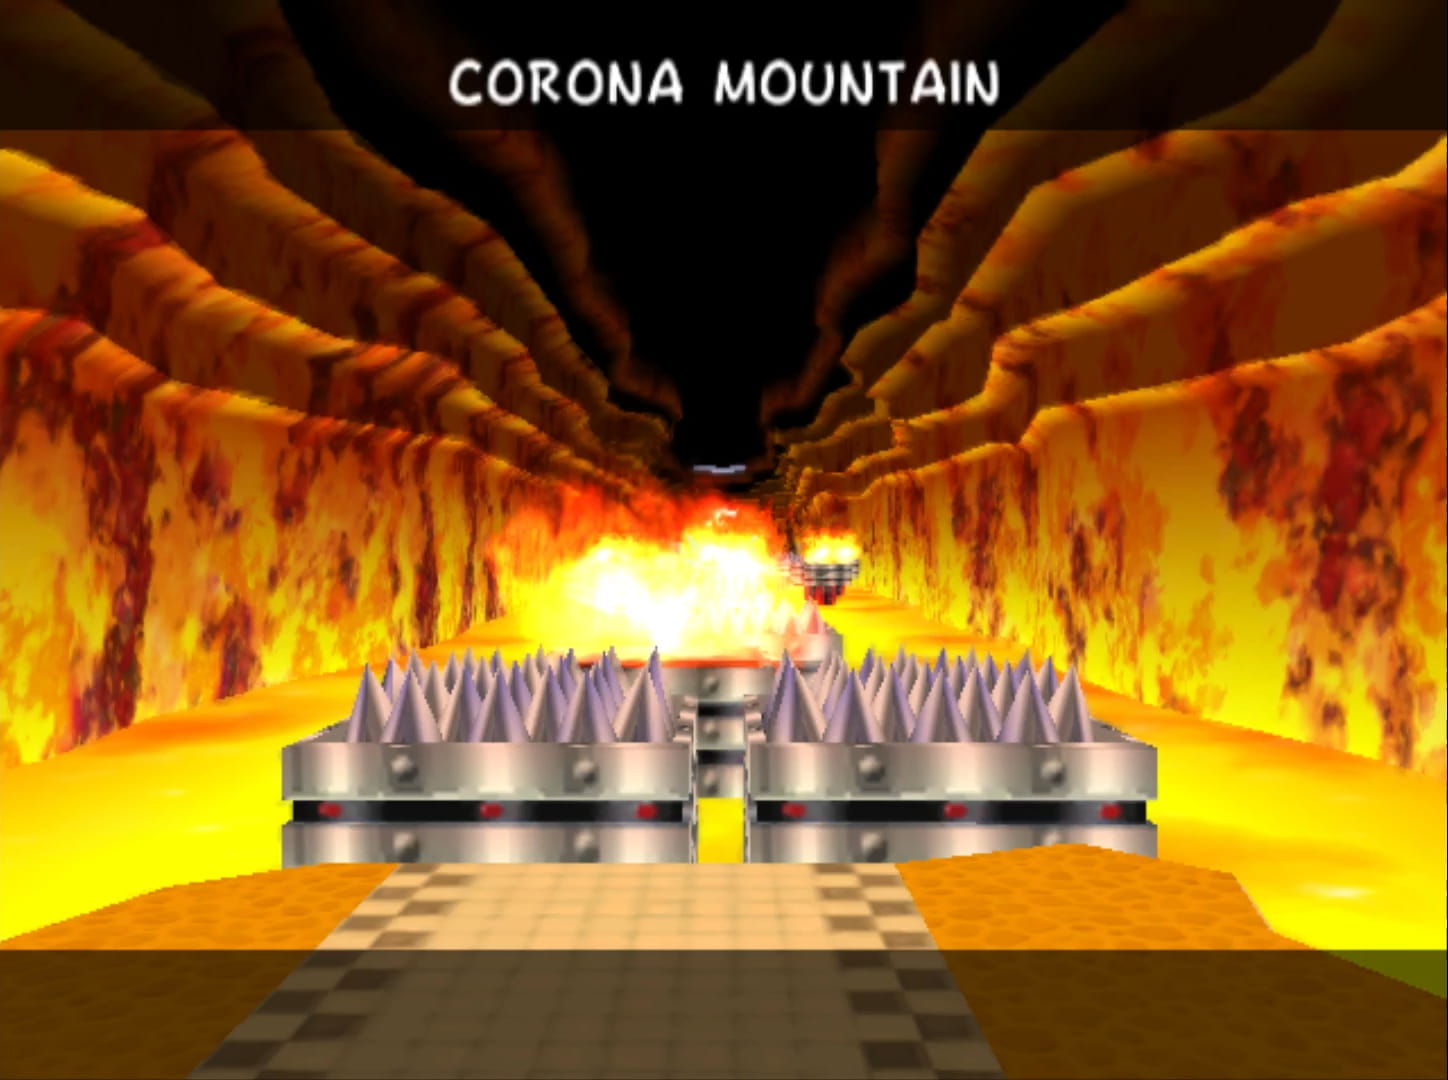
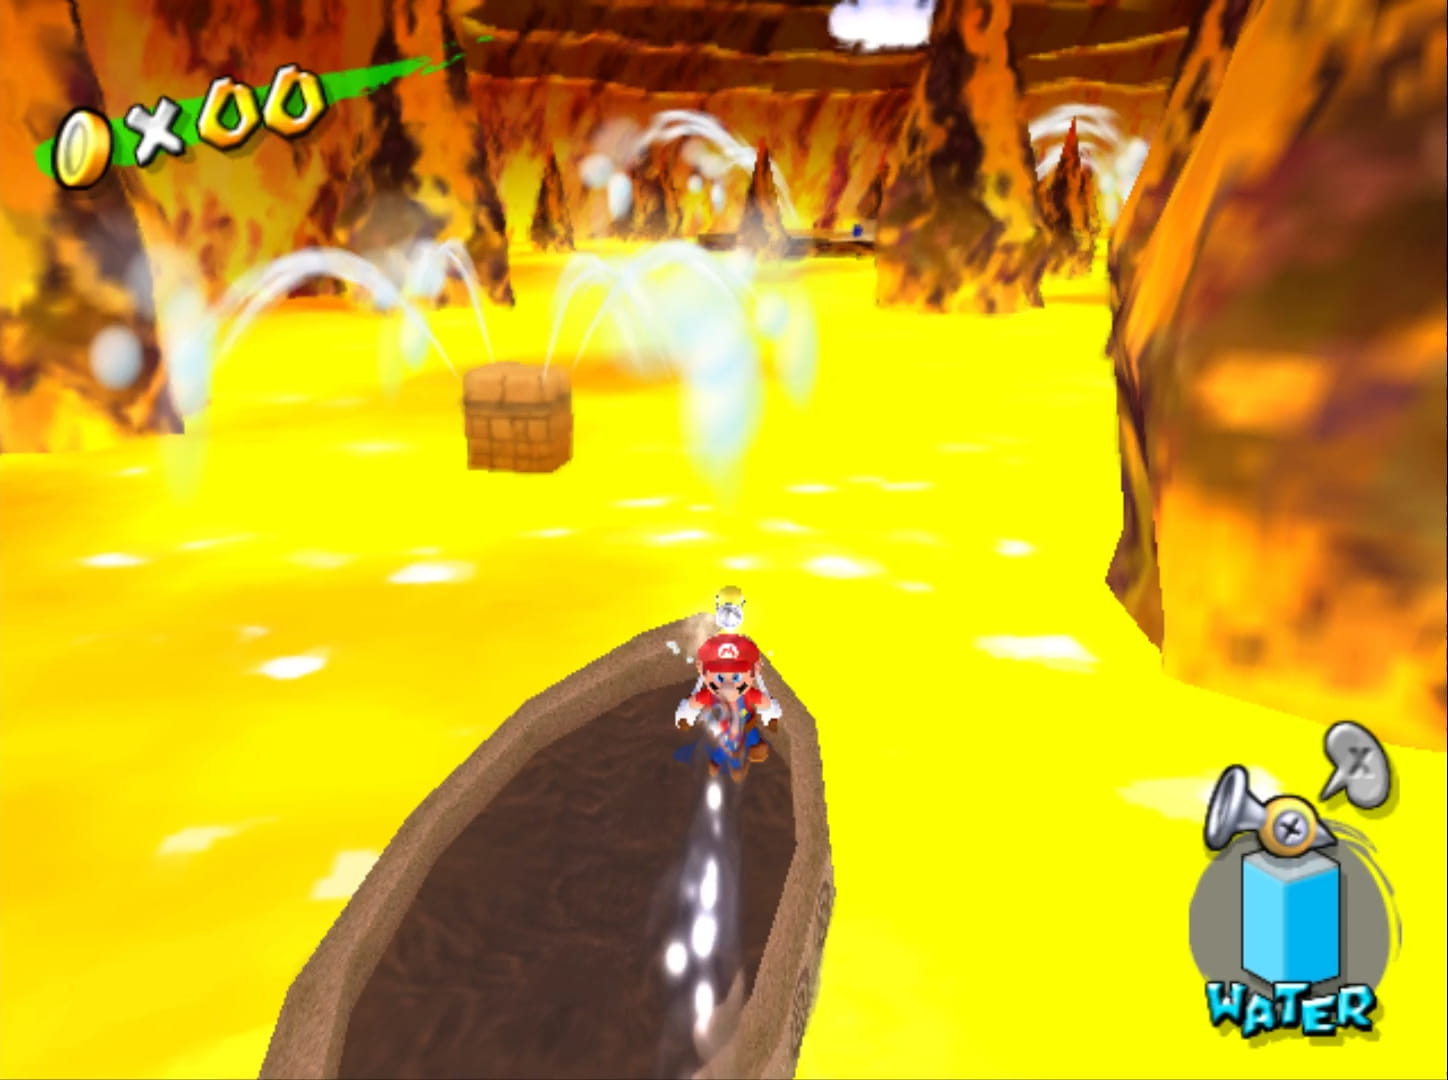
They do have some blue coins floating ’bove the water, for which the developers probably intended you to use the rental boats to sail o’er to them. I say “probably” ’cause you can easily collect them by just jumping under them & hovering a bit, & this is much faster & mo’ convenient than going thru the trouble o’ sailing a boat all the way o’er with the janky sailing physics. If this was the intention, this could act as a nice optional practice for when you’ll actually need to deal with these physics in “Corona Mountain”, & I certainly don’t mind that they make it optional. Howe’er, the boat’s so out o’ the way that for most people it probably doesn’t work that way. I know when I 1st played this game “Corona Mountain” was my 1st encounter with the boats, as I’d completely missed this boat in “Noki Bay” till my recent playthru.
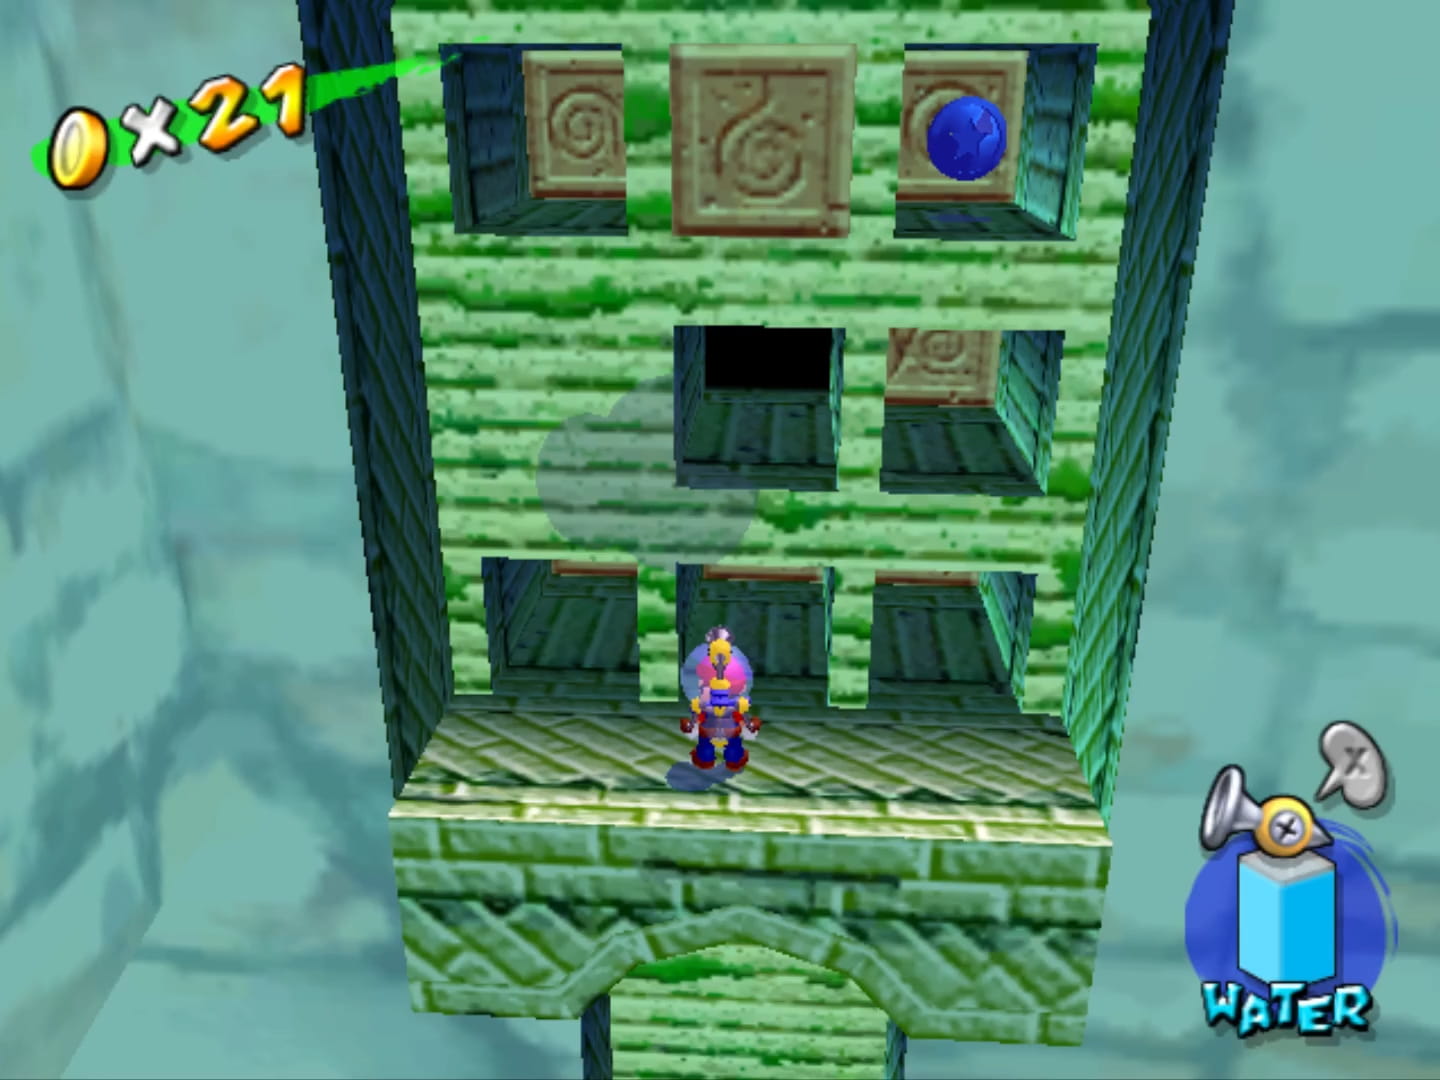
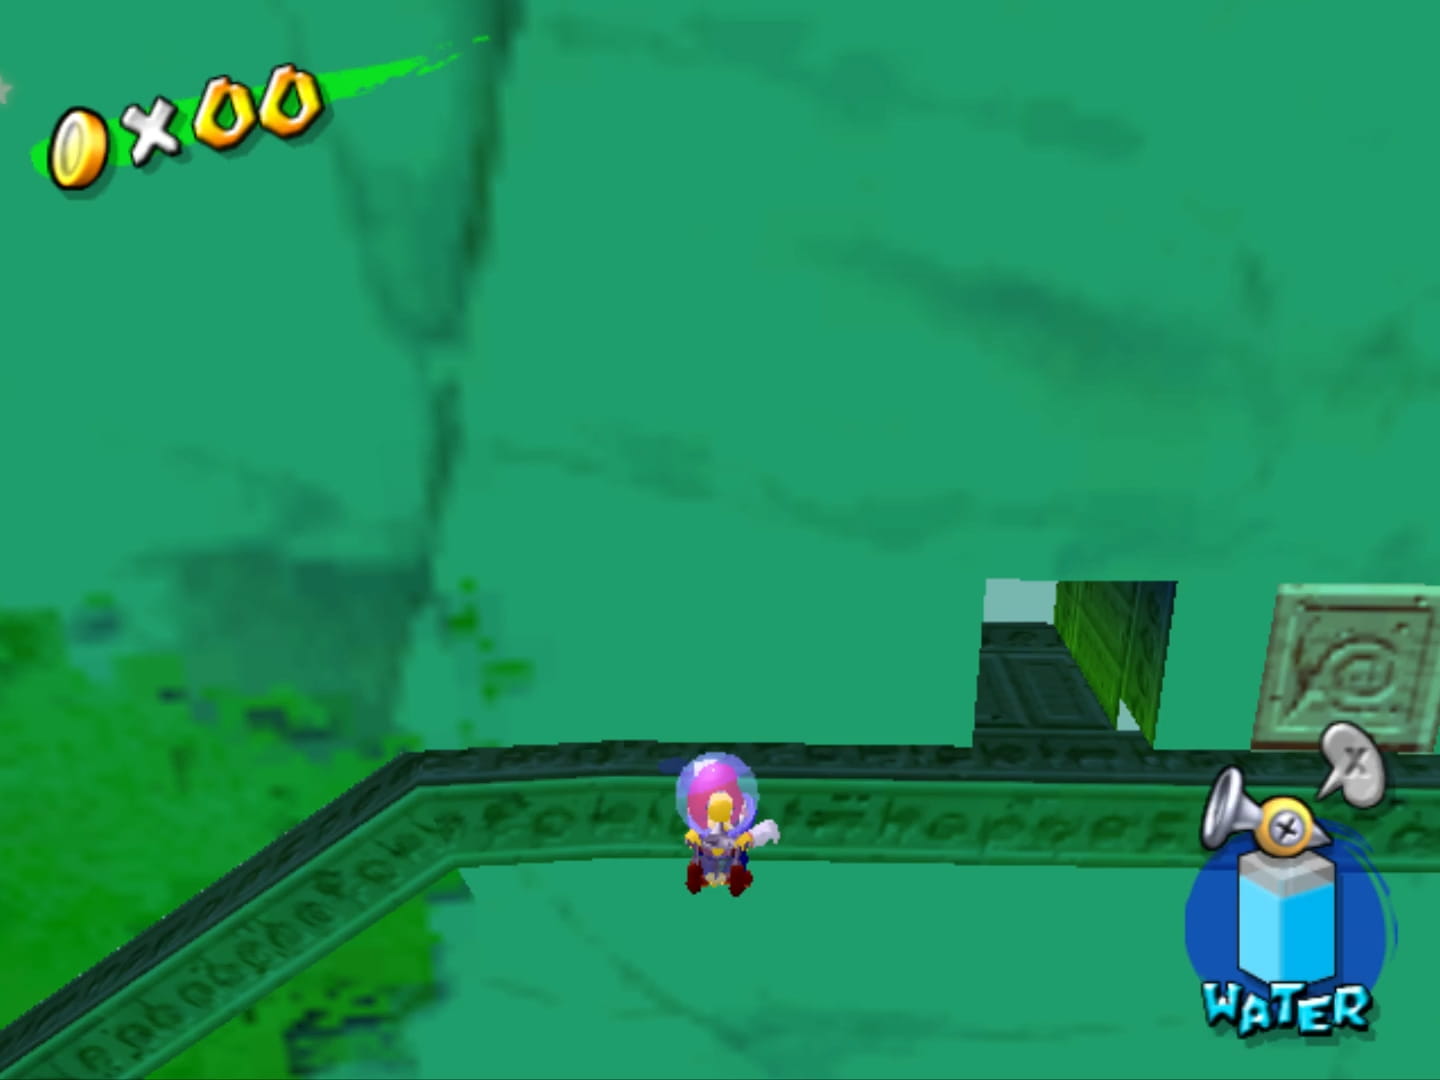
The vast majority o’ blue coins are in the cliff mazes, some ’hind those weird hieroglyph squares & some ’hind random walls you need to spray without any indication.
There are also extra cliffs to the side o’ the weighed pot wheels, which are awkward to maneuver & also require you to spray walls with no indication that they do anything. As I tried this I kept running into a lovely bug wherein Mario would just have abrupt seizures & the only way to get him to move @ all was to drop him from the cliff, forcing me to climb back up. These seizures felt utterly random, tho I suspected they were caused by the rotation o’ the camera in some way.
The developers also threw in a bunch o’ gotcha traps wherein a Cuckoo bird shoots forward & flings Mario far ’way from certain holes, wasting the player’s time by making them climb all the way back up to where’er they were for the crime o’ not already predicting where developers may put random bullshit. It’s the kind o’ childish bullshit you expect from a rom hack & doesn’t belong in what is ( a’least attempting to be ) a serious, official game.
While it’s cool they hid blue coins in the shine room o’ “The Boss of Tricky Ruins”, expecting you to spray not just 1, but multiple pots for blue coins is questionable, specially since they have terrible hit detection & give you nothing most o’ the time you spray them.
The worst problem with “Noki Bay”’s blue coins is the arbitrary way this level restricts blue coins or nozzles needed to get certain blue coins in only certain shines. ¿Why can you get the rocket nozzle on episode 6 & not 8? If anything, you shouldn’t be able to get the rocket nozzle on episode 6 ’cause it breaks the challenge o’ climbing up the seashell towers by letting you just rocket a few steps up.
Honestly, I have mixed feelings ’bout “Noki Bay” in general. It was actually almost below “Gelato Beach” till I remembered that “Gelato Beach” is arguably e’en mo’ bland & far mo’ janky & terribly designed. “Noki Bay” has the cool cliff secrets & seashell towers, which balances out the boring water sections & red coin collection. Plus it didn’t piss me off as much as “Gelato Beach”.
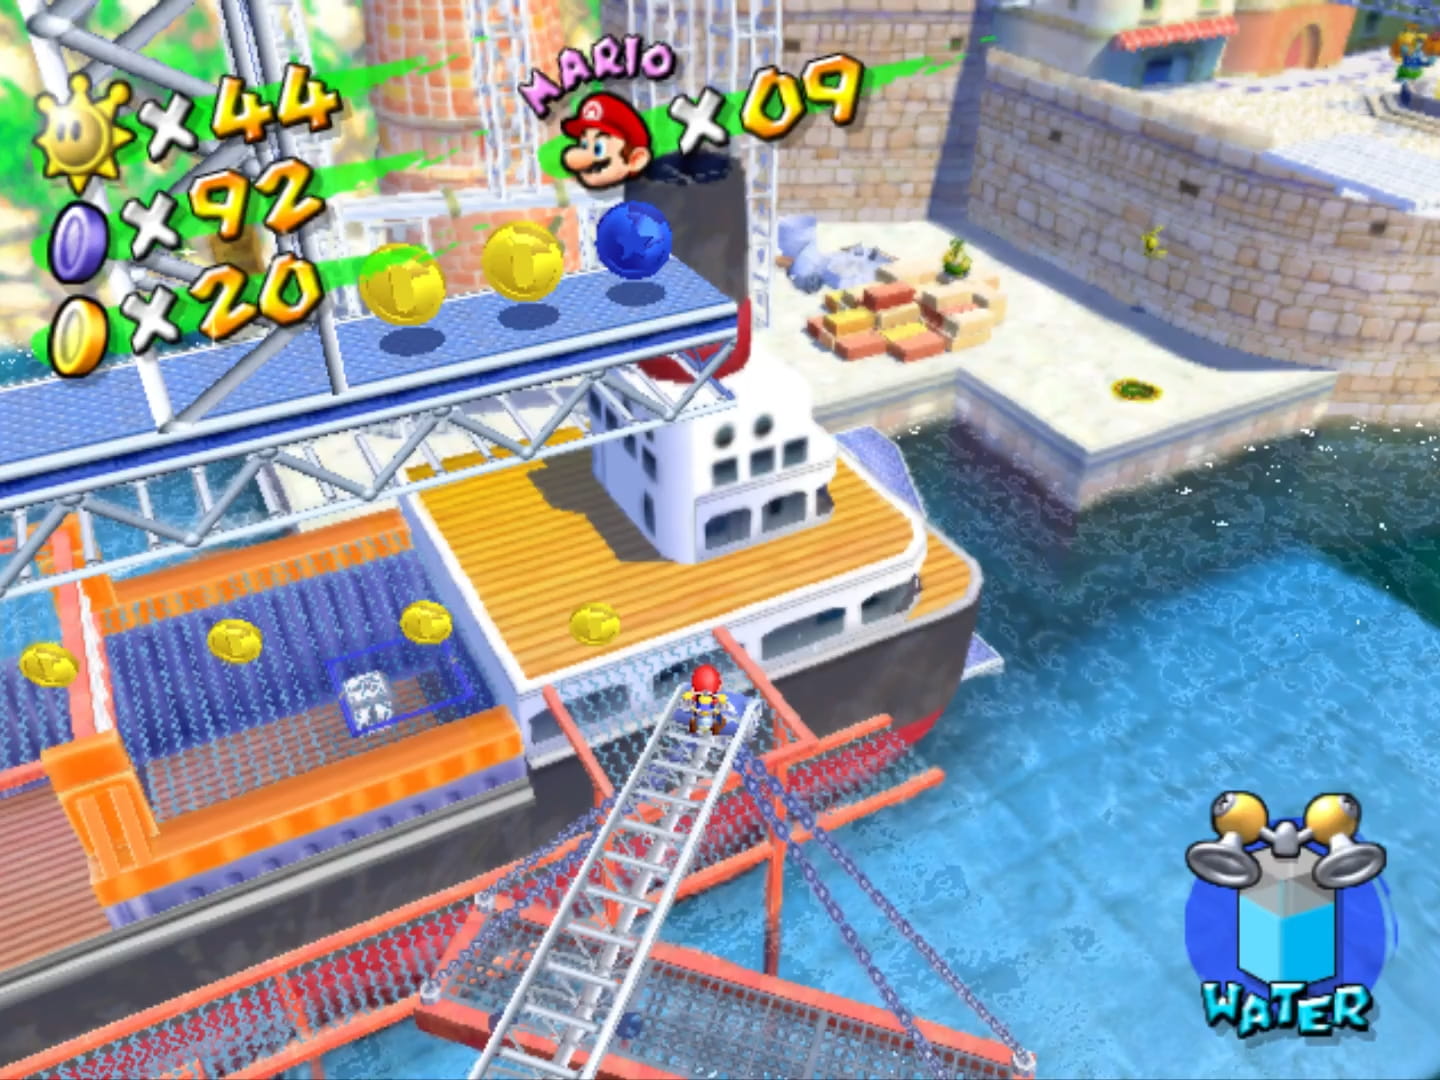
4. Pinna Park
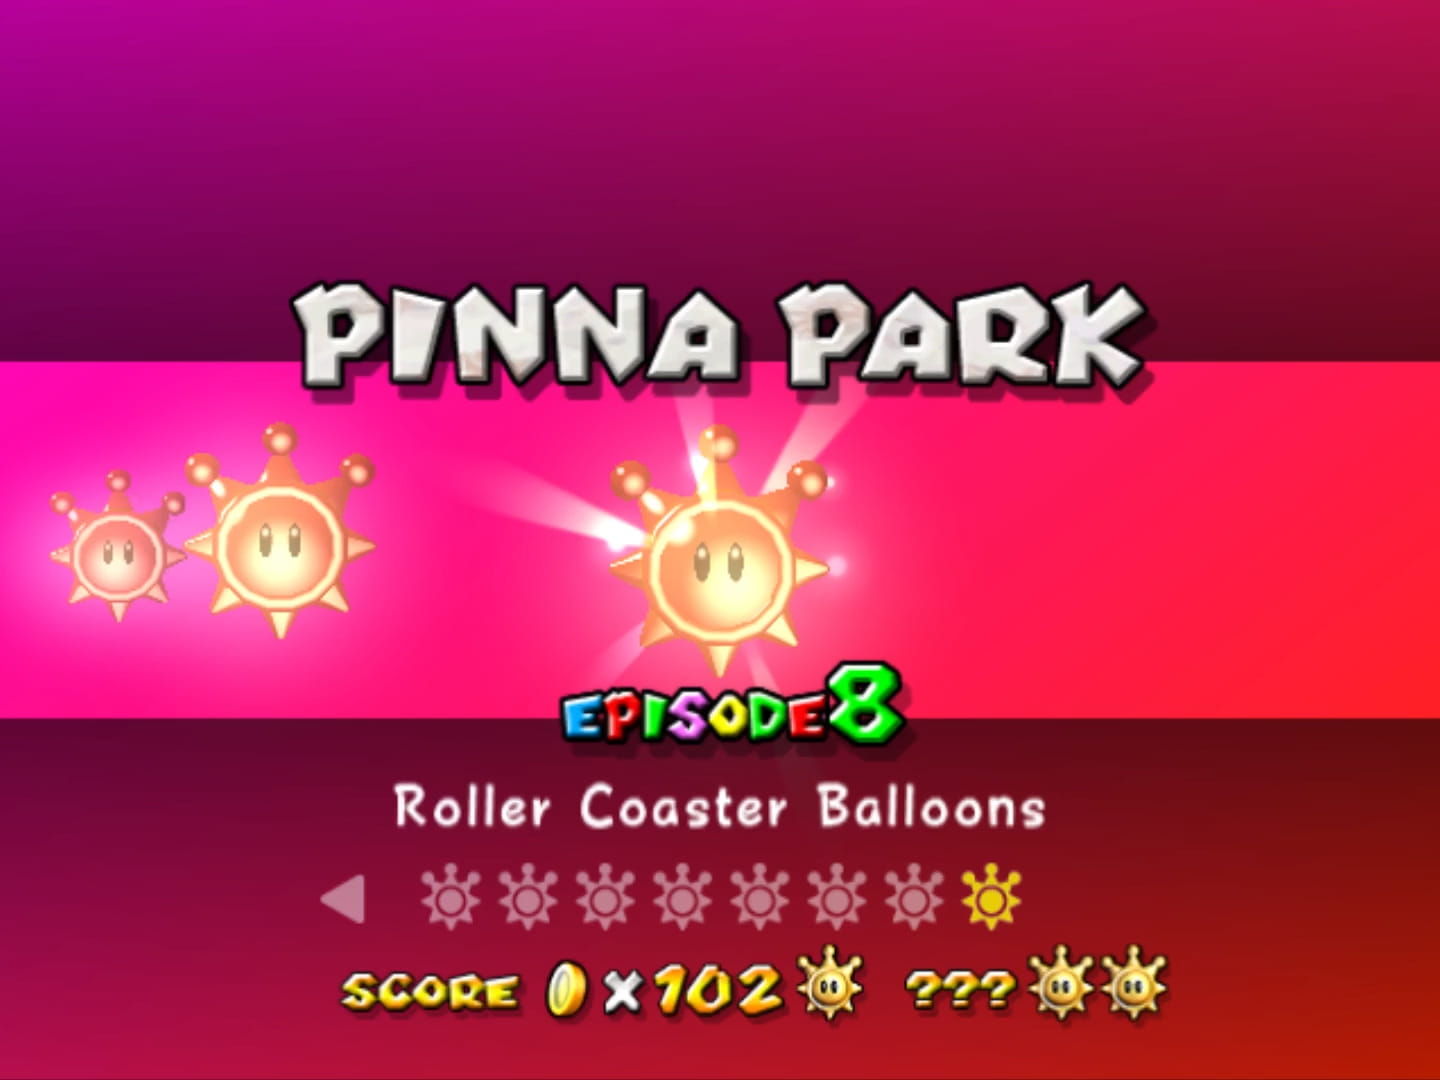
“Pinna Park” & “Ricco Harbor” were close, & I almost considered “Pinna Park” better than “Ricco Harbor”. But while “Pinna Park” has a mo’ exotic, interesting theme, its theme isn’t utilized to its full potential as well as “Ricco Harbor” uses its; & while “Pinna Park” has some excellent shines, like “The Runaway Ferris Wheel”, that’s balanced out by some o’ the worst shines in the game, like “Roller Coaster Balloons”. “Ricco Harbor”’s best shine isn’t quite as good as “The Runaway Ferris Wheel”, but its worst shine isn’t nearly as bad as “Roller Coaster Balloons”. Plus, “Ricco Harbor”’s music is banging, while “Pinna Park”’s music makes me want to bang my head gainst the wall so I can no longer hear it anymo’.
“Pinna Park” is a bit like “Dire, Dire Docks” in that it’s the middle level that plays a key role in story progression. For Super Mario 64, which didn’t have much o’ a story & had no twists whatsoe’er, “Dire, Dire Docks”’s 1st star acted as just a key required to reach the 2nd Bowser level, necessary for reaching the 3rd act, whereas the 1st shine in “Pinna Park” acts as the reveal to the twist that Baby Bowser is “Shadow Mario” & that Bowser is the one ’hind everything. Neither work well, howe’er: “Dire, Dire Docks” is 1 o’ the weakest levels in Super Mario 64 & its star is just a simple platforming challenge o’ crossing a timed bridge to reach the submarine, without any risk o’ death for failing; & forcing the player to collect this star to beat the game ruins Super Mario 64’s open-ended nature for no story payoff.
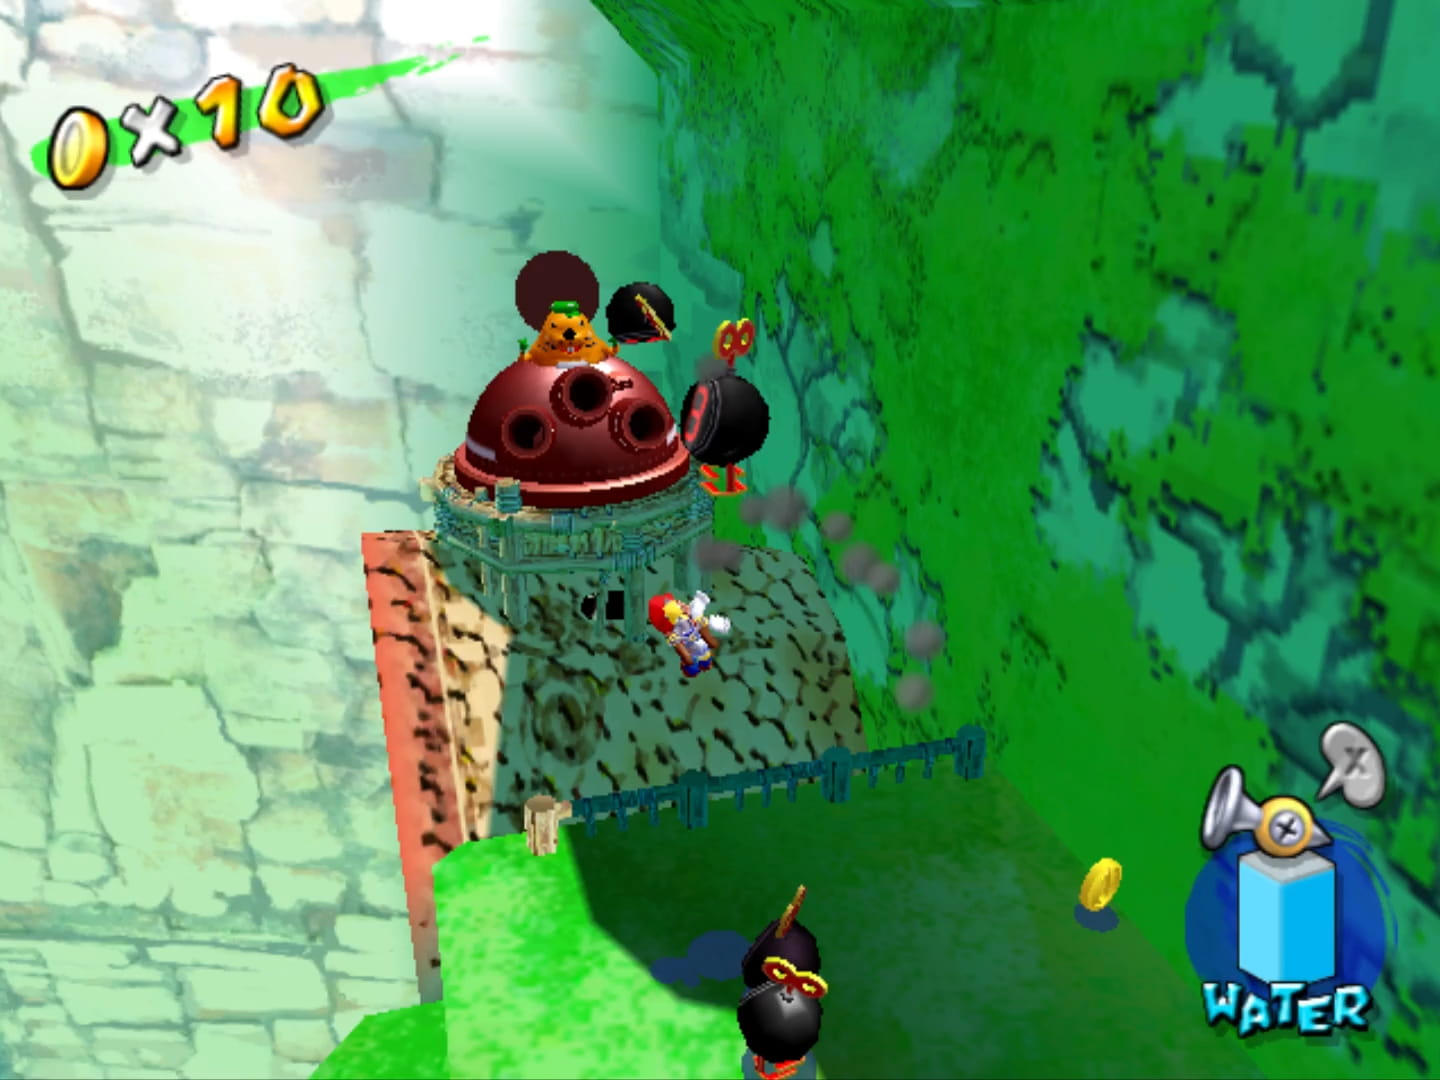
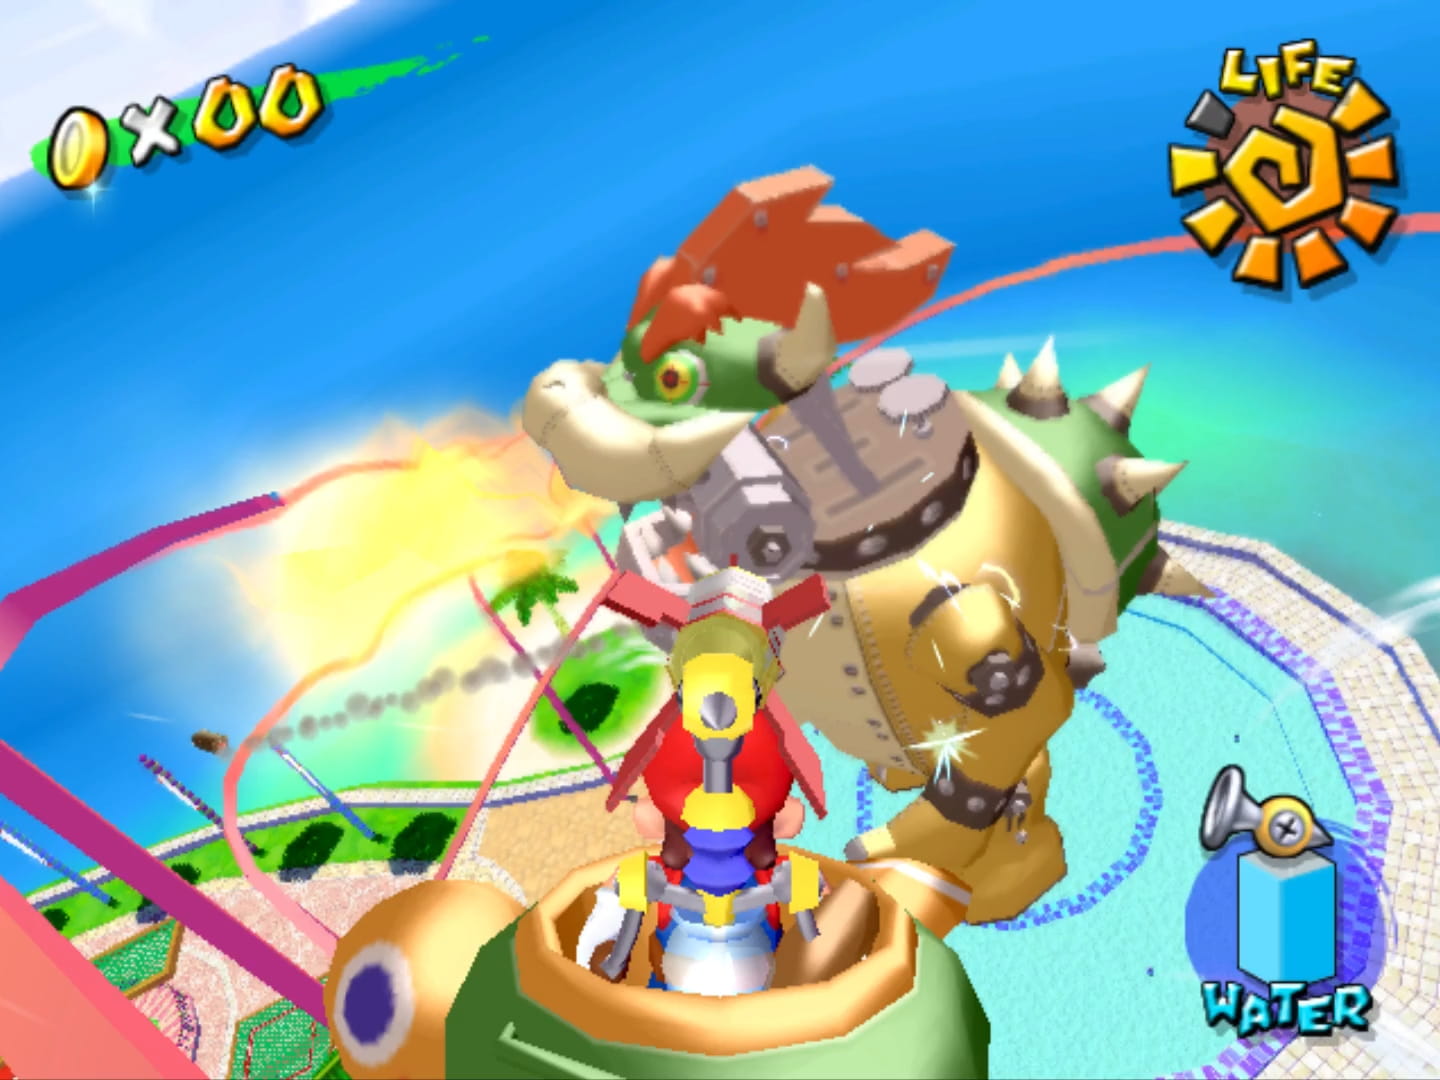
Super Mario Sunshine is a mo’ linear level that requires the player to get the 1st 7 shines o’ all levels to beat the game, anyway, so its open-ended nature had already been ruined from the beginning, & “Pinna Park”’s 1st shine, “Mecha-Bowser Appears!”, while far from the best boss in Super Mario Sunshine, — it’s, in fact, a janky mess whose main gimmick is screwing with your camera as you try to aim shots @ Bowser, which would be unfair if the boss wasn’t trivial, while constantly forcing you to waste time wasting rockets on nothing just so you can use your regular spray to destroy the incessant Bullet Bills & Mecha-Bowser’s firebreathing ( till you realize it’s better to just tank the hits & just hurry up & defeat Mecha-Bowser ) — is a’least mo’ than the most basic platforming challenge in the world.
The twist, like much o’ Super Mario Sunshine’s story ( which we have, thankfully, not had to talk ’bout much, since it’s otherwise irrelevant to level design ), is dumb, which is hurt e’en mo’ by this game’s embarrassingly bad acting that makes 4Kids anime dubs sound like Shakespearean plays. Worse, this game follows that inane trope wherein after beating the boss, the boss just leaves with the prize ( in this case a human being, Peach ) while the hero just stands round gawking like a moron, making the whole ordeal feel pointless. Also, ¿why can’t FLUDD tell what’s going on during the cutscene? ¿Can he not see? Thruout the game he constantly insults the player’s intelligence by saying what they could obviously see in front o’ them, ¿but now they randomly went blind for a cutscene?
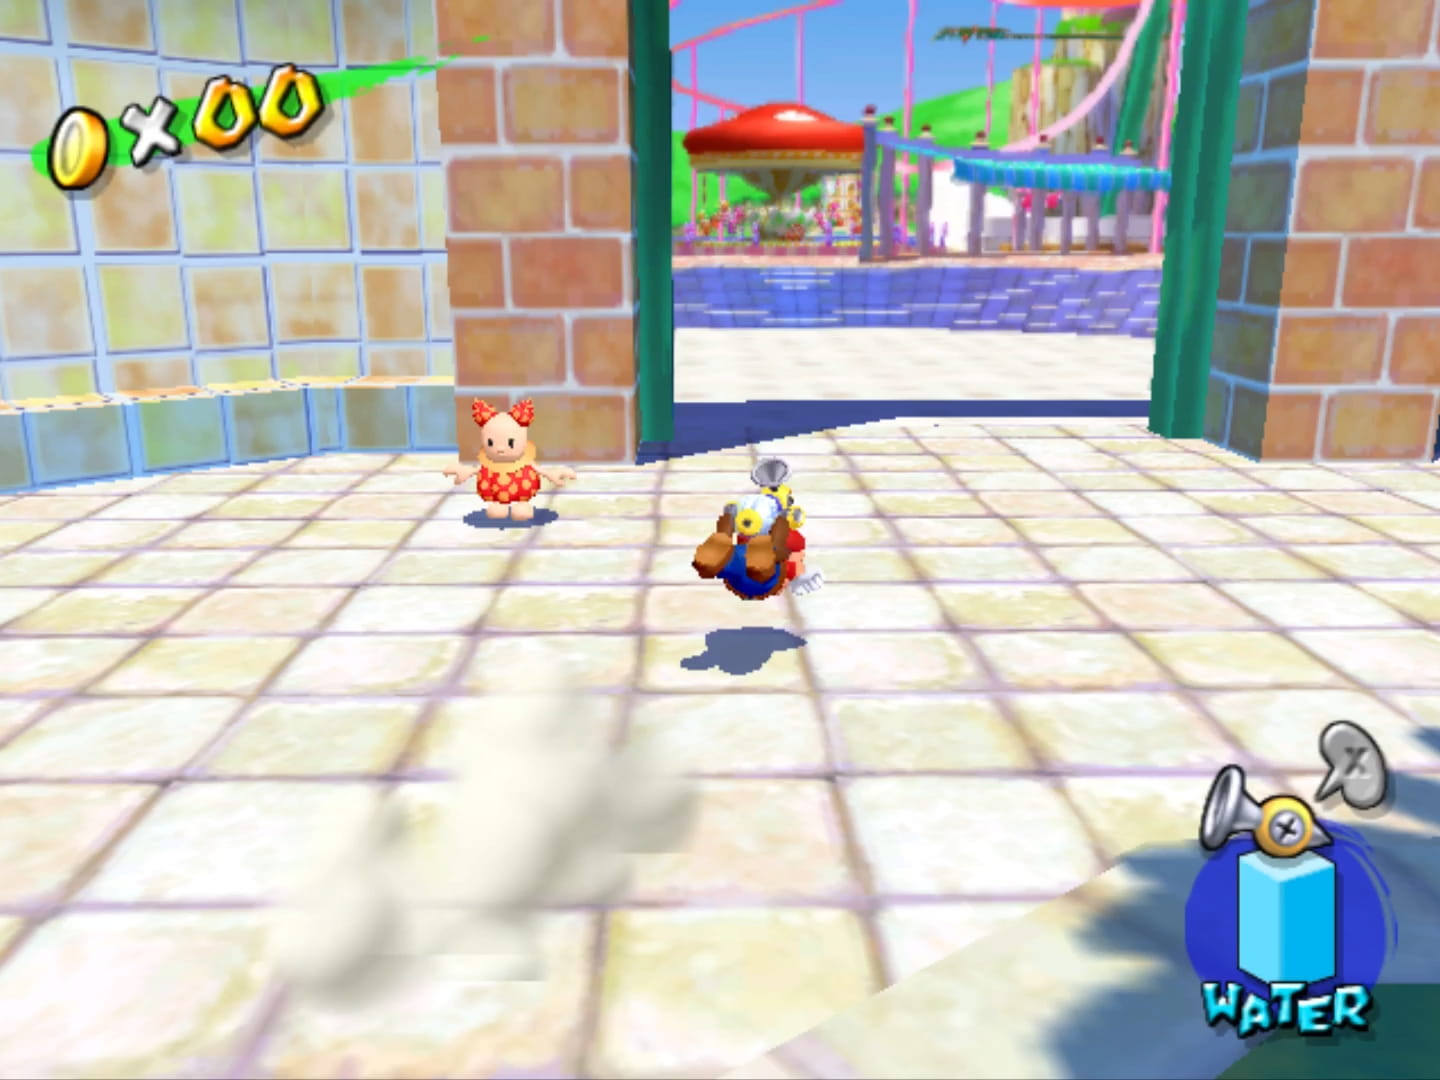
“Pinna Park” also acts as a key by serving as the means for unlocking Yoshi, who is necessary for 100% every level & unlocking “Sirena Beach”. Choosing the amusement park level is an interesting choice ’mong a selection o’ levels in which none o’ their themes truly fit Yoshi. The developers make sure to fill the level with quite a bit o’ Yoshi theming, too, including making both secret courses have Yoshi’s Island style backdrops & Yoshi egg blocks, e’en “The Beach Cannon’s Secret”, which otherwise has nothing to do with Yoshi.
Howe’er, the shine that unlocks Yoshi, “The Wilted Sunflowers”, doesn’t have much to do with Yoshi: you magically make sunflowers happy by defeating Snooza Koopas, who have shells that look like Yoshi eggs, but otherwise have nothing to do with Yoshi eggs.
But my main qualms with “Pinna Park” are that it doesn’t use its amusement park theme to its full extent. A full 2 shines — the aforementioned “The Beach Cannon’s Secret” & “The Wilted Sunflowers” — take place completely outside o’ the park, on a beach not much different from “Gelato Beach”, the level the player has likely just played before this 1. This could be effective as a way to cock-tease the player by making them “earn” access to the amusement park if these were the 1st 2 shines, but the 1st shine does have you enter the amusement park, so it’s just a pointless diversion. Granted, this 1st shine & the 8th shine barely have you do anything in the park, anyway, so only half o’ the main shines have you do anything in the park. What kind o’ developers would look @ a level theme as beloved as an amusement park & think, { A whole level’s too much for this theme; let’s use mo’ generic beach }, is beyond me.
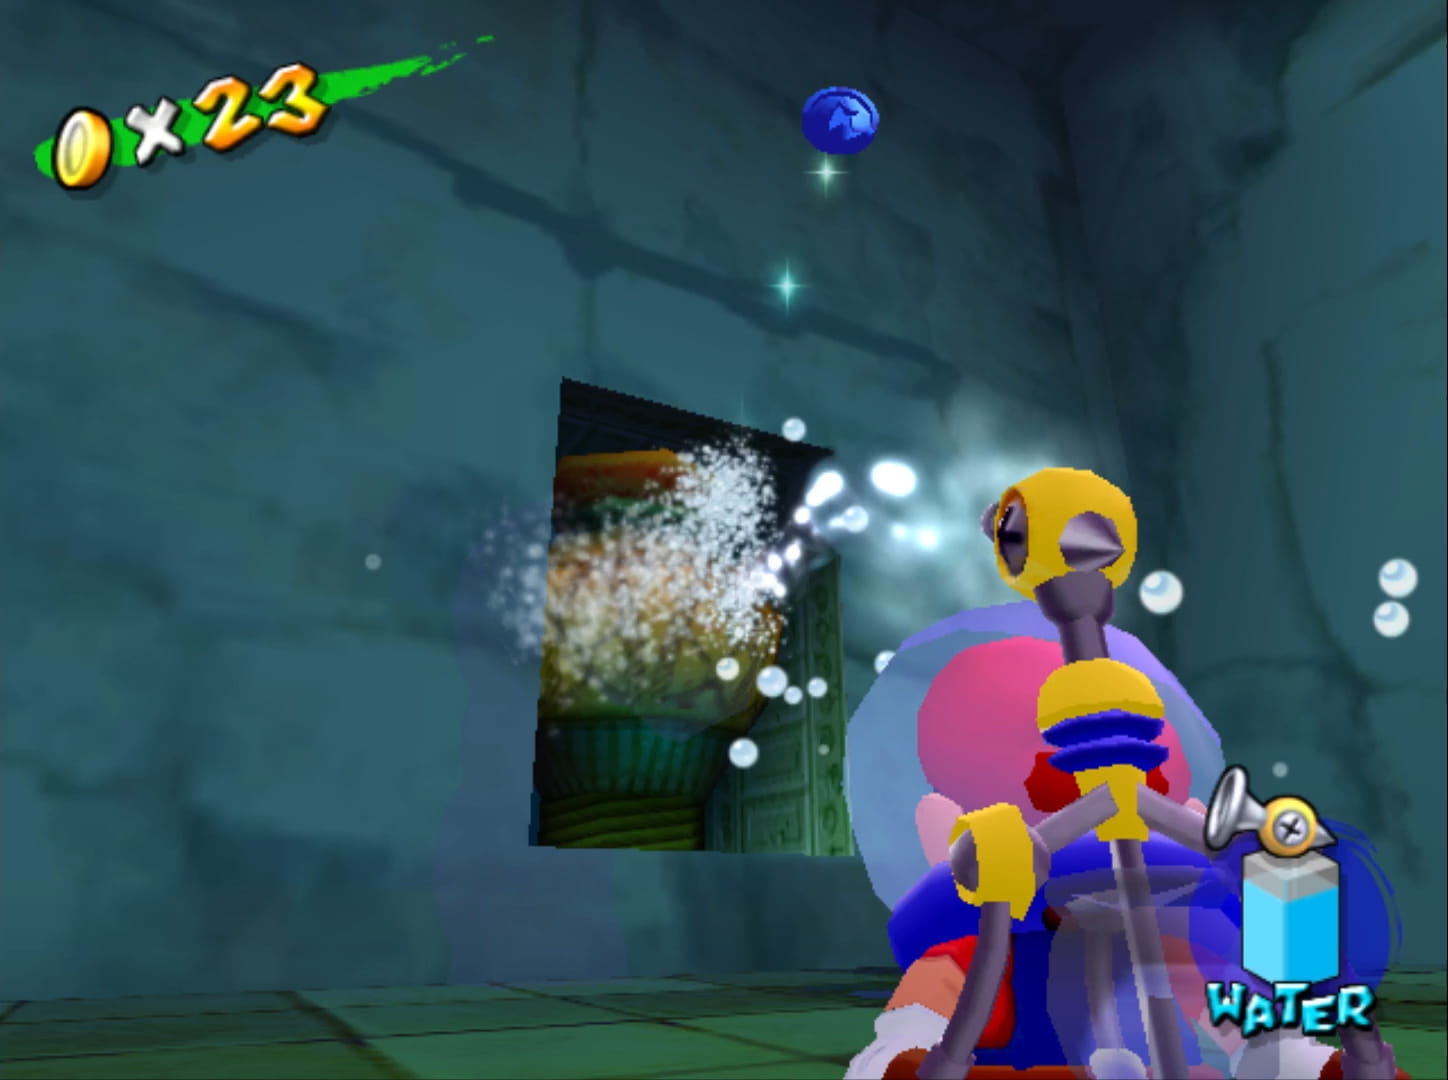
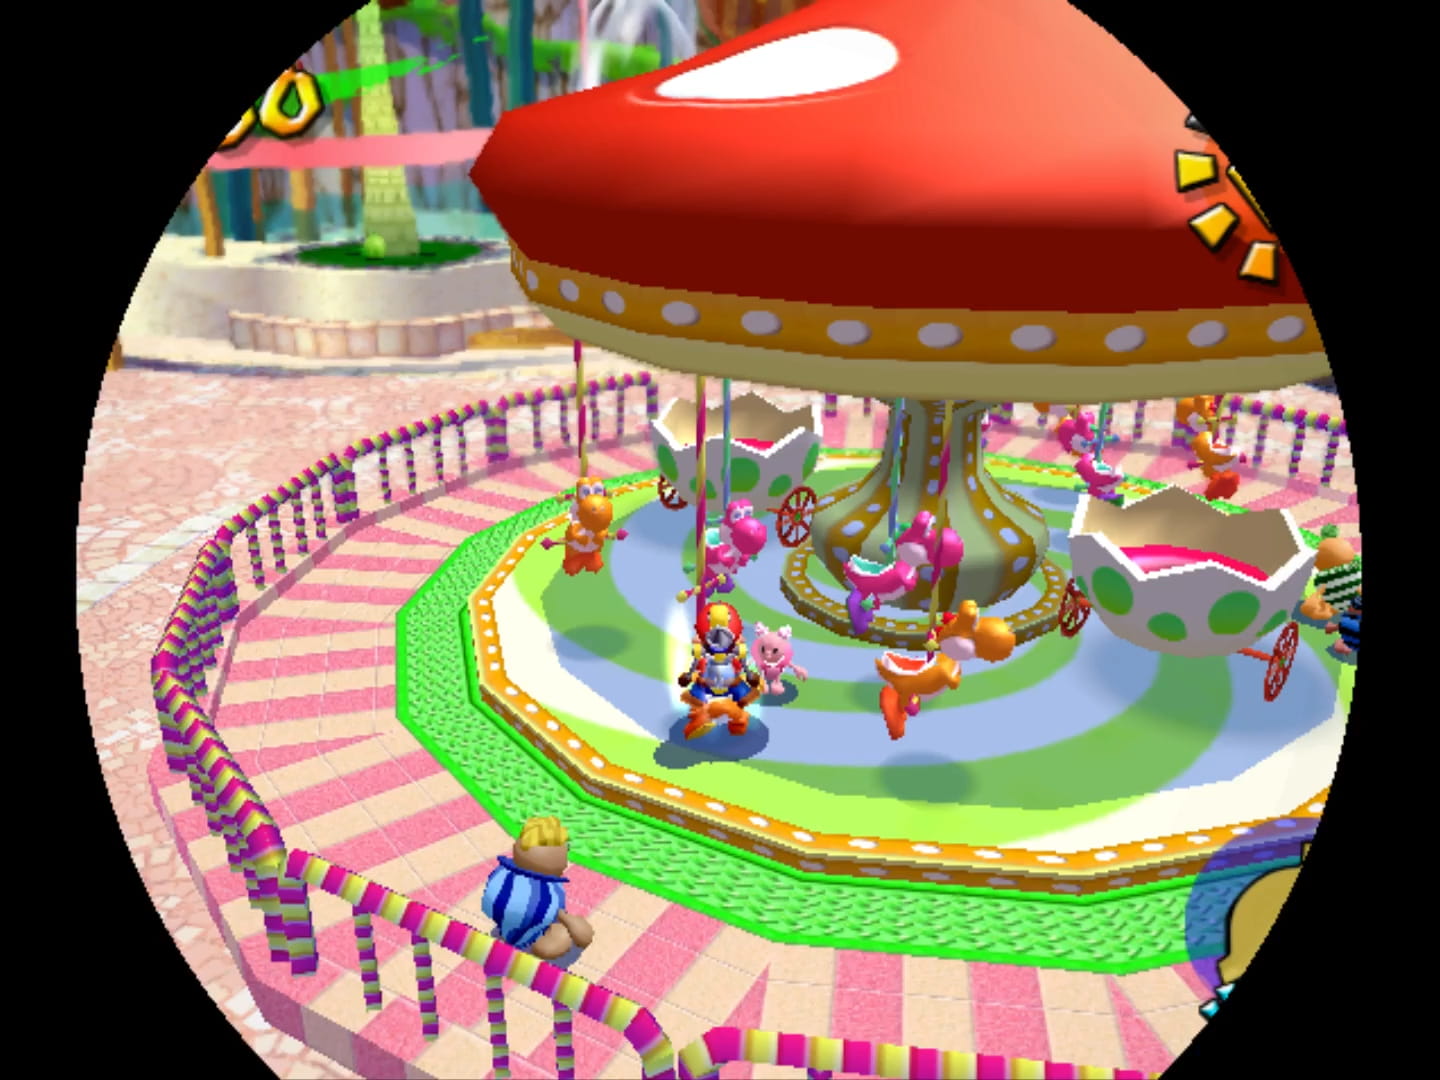
This leaves “The Yoshi-Go-Round’s Secret” & “The Runaway Ferris Wheel” as the strongest shines in this level. “The Yoshi-Go-Round’s Secret” challenges the player to wake Yoshi by bringing its desired fruit ( & on the off-chance that that fruit isn’t the pineapple or papaya, eat a nearby papaya, ’cause it needs to be an orange Yoshi ) & bring Yoshi o’er to the empty spot on the merry-go-round where a Yoshi has gone missing to magically warp Mario to a secret course. While this has a nice paint job to it, it’s effectively a simple fetch quest to the secret course. Still, probably 1 o’ the most interesting ways to get into a secret course.
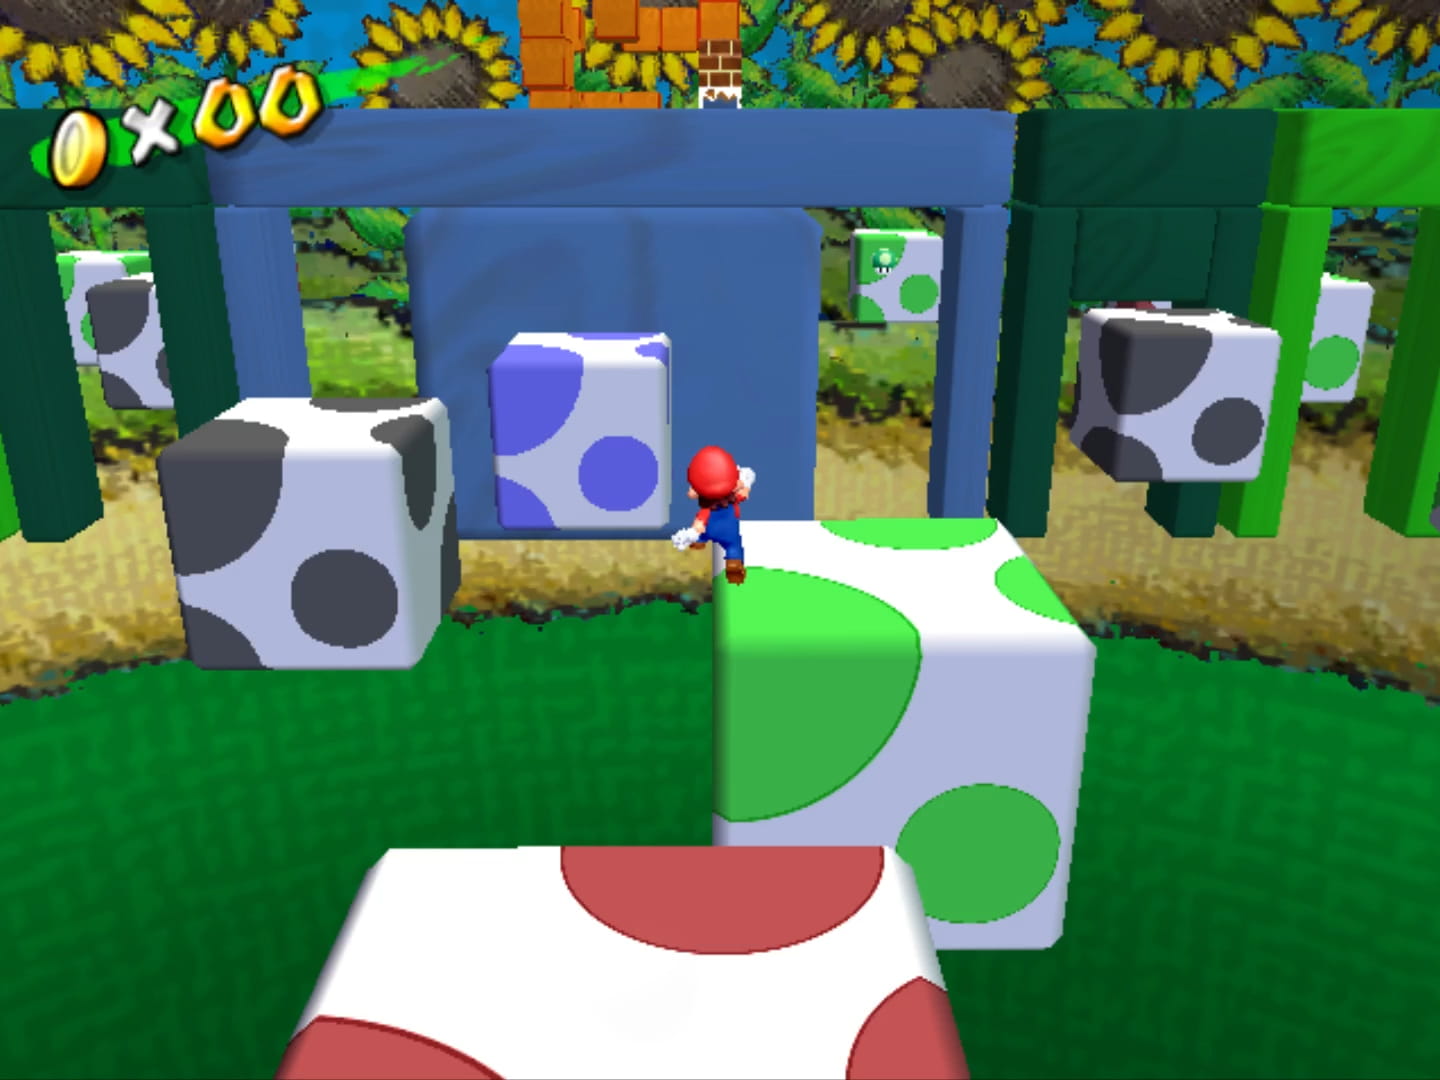
The secret course itself is 1 o’ the strongest, starting with new spinning box platforms that become increasingly faster, then opening to the main course o’ circles o’ Yoshi egg blocks that alternate from clockwise & counterclockwise, & then ending with a tower o’ orange blocks. This course has a variety o’ setpieces without any feeling o’erused & feels tricky without feeling unfair.
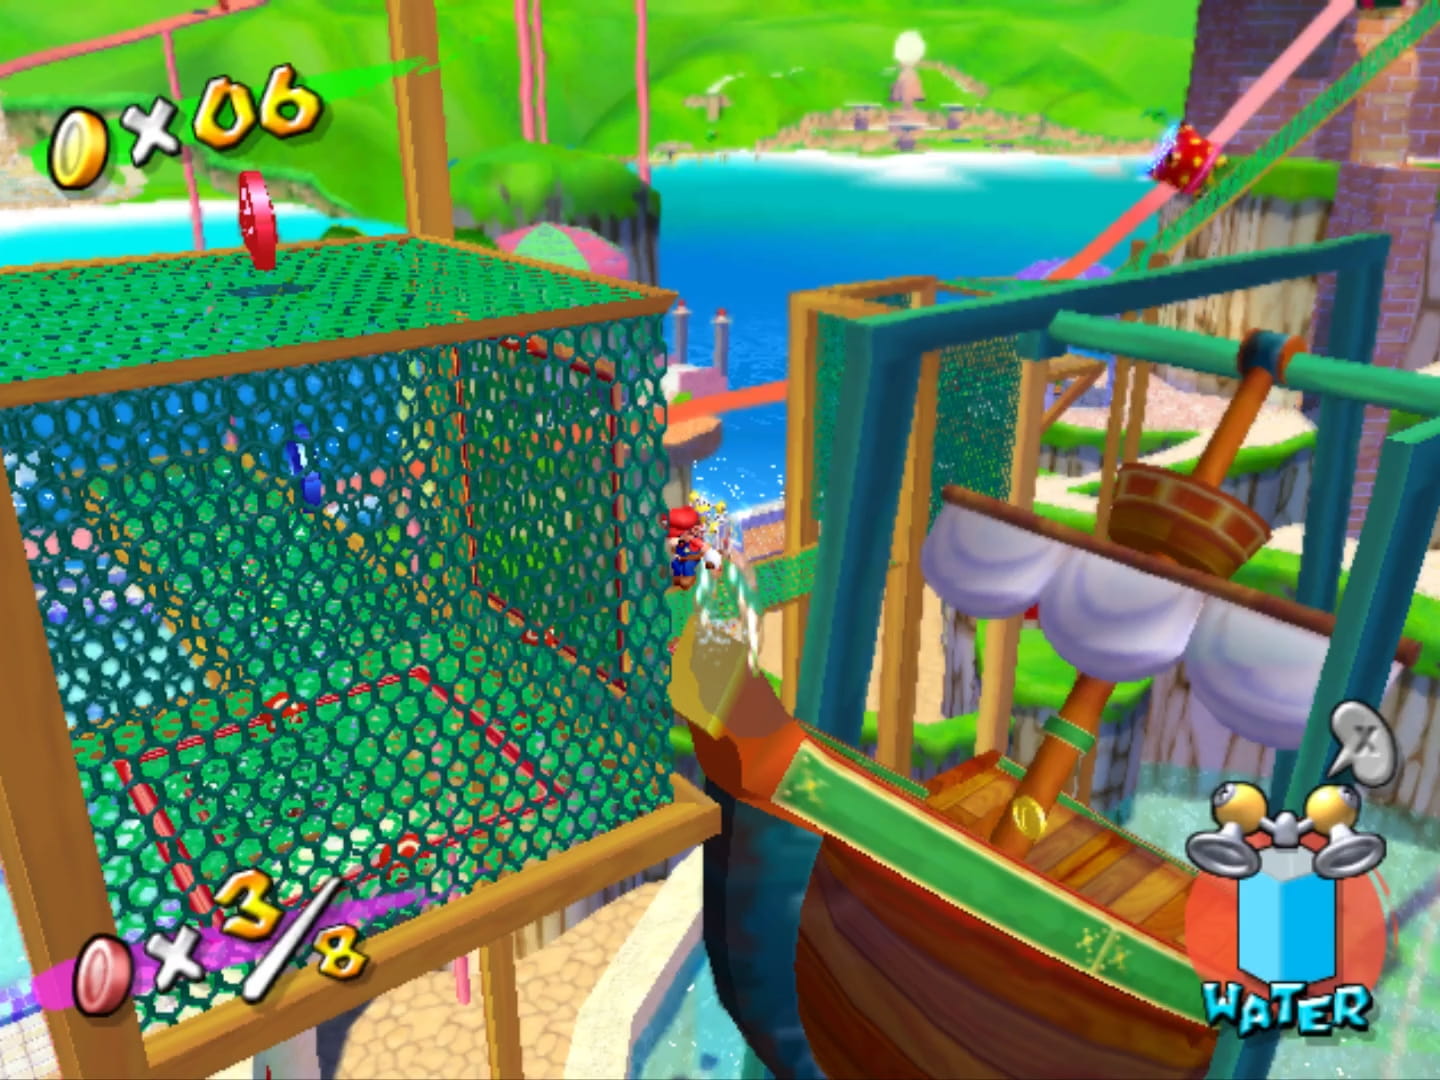
“The Runaway Ferris Wheel”, which is not only the best shine in this level, but also 1 o’ the strongest shines in the whole game, has you take a back-end path to the top o’ the Ferris Wheel, which is now spinning way too fast for non-speedrunner players to use. This climb involves clever puzzles involving platforms that flip for a short period ’pon being sprayed & wire nets with Electrokoopas that knock you off if they hit you on the same side, but which can safely be knocked off themselves if kicked from ’hind. The shine ends with a bouncy wire common in Super Mario Sunshine, which you need to use to reach the top wire net, ’pon which sits a giant Electrokoopa apparently causing the Ferris Wheel to spin out o’ control. You knock them off to return the Ferris Wheel to regular speed & then ride up the Ferris Wheel to the top.
“Red Coins of the Pirate Ships” — whose name sees a return to that classic Super Mario 64 naming pattern o’ inaccurately implying that all the red coins are in a place where only ’bout 2 are — is a middleground shine. Rather than having you explore the whole level full o’ attractions for red coins, the challenge is, in fact, a straight path from the pirate ships to a path o’ wire netting. But it doesn’t e’en do linear paths all that well, breaking the principle o’ difficulty evolution: jumping ’long the rotating ships @ the start with their janky slope physics is the hardest part, while everything afterward is trivial.
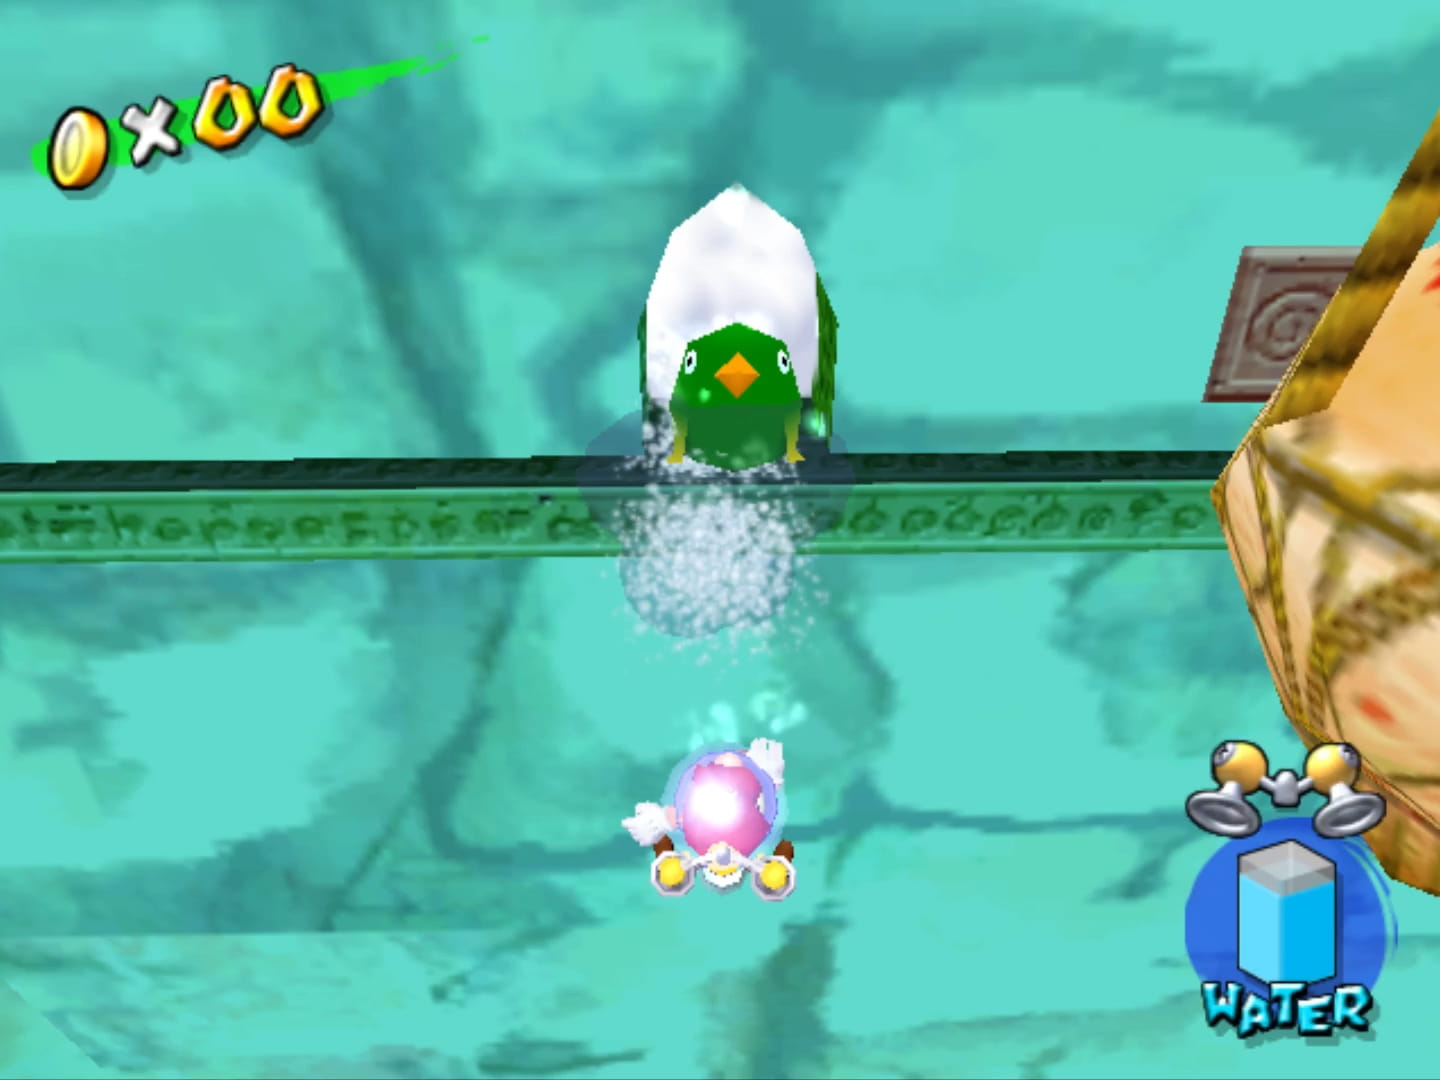
The same can be said ’bout “The Beach Cannon’s Secret”, which takes place on the irrelevant beach area with a Monty Mole helmed cannon shooting Bullet Bills @ you. Much like in “Noki Bay”, you have to toss 3 Bob-ombs @ the Monty Mole to defeat them & gain access to the cannon. I would call this irrelevant to the level, but I guess the level entrance does involve a cannon that shoots you to the level.
The secret course itself focuses on disappearing & appearing blocks. Strangely, the 1st part is mo’ complex than the final stretch, which is just a straight path that just challenges you to keep diving forward to go down the blocks before they all disappear. In the middle they add variety with a few springs that don’t look like springs, which, in typical Sunshine fashion, are laid out in a simple pattern that would be trivial to do if not for Sunshine’s janky physics that cause Mario to go in strange directions after a bounce whose logic I still haven’t uncovered. Strangely, there’s a path straight past these bouncy platforms that doesn’t lead to the shine @ all. I think it leads to a 1-up — ’cause those are worth the long diversion.
The absolute worst shine in this level is “Roller Coaster Balloons”, which is some extreme Beaver Bother shit — e’en mo’ than the rings in Super Mario 64. “Roller Coaster Balloons” uses the same cheap rollercoaster mechanics as “Mecha-Bowser Appears!” with its camera screw & demands you to pop 18 Baby Bowser balloons within 3 laps or Mario will spontaneously die o’ a heart attack, kicking you out o’ the level & making you go back in & talk to the guy to try ’gain, ’stead o’ just letting you try ’gain right from failure like a well-developed game would do. Luckily, this challenge is so lenient that you’ll usually stumble ’pon victory within the 2nd try; but like the infamous “Beaver Bother” from Donkey Kong 64, it doesn’t feel earned any mo’ than the unfair losses do, since you have li’l control o’er your aim with the camera yanking it round, & just feels like the game randomly decided to make you win. It’s just boring & obnoxious & it sucks ass. Let us ne’er speak o’ its shittiness ’gain.
Since this level has 2 secret courses, both secret shines are red coin challenges. The “The Yoshi-Go-Round’s Secret” challenge does a good job o’ balancing red coin spread o’er the area & puts them in interesting places; but they oddly give that challenge a high time limit compared to most o’ the other secret course red coin challenges, which barely give you time. I made a lot o’ screw-ups when 1st trying this challenge & still had round half a minute left ’pon collecting the last red coin. Most o’ the red coins in “The Beach Cannon’s Secret” are in the 1st area with the vanishing blocks. Like most secret course challenges, FLUDD makes e’en collecting the red coins trivial as you can stay in the air ’bout as long as the blocks stay missing, which means you have to be truly not paying attention to let yourself fall into an empty hole — far less attention than you had to pay when doing this challenge FLUDD-less, as you’ve had to do before. The dead-end has no read coins, which makes it completely pointless in the whole game. I’m still not sure what’s down that path, since I’ve ne’er had a reason to explore. The Mario Wiki claims it has a Strollin’ Stu spawning wall. I think this game’s developers might’ve had a few too many drinks, ’cause that sounds like an e’en dumber thing to have @ the end o’ a path than a 1-up.
“Pinna Park” has, on average, much better blue coin placements than most levels. While it still has repetitious placements, like marks you have to spray, including timed pairs, or birds you have to spray or blue butterflies you have to eat with Yoshi, & has multiple blue coins you get by just spraying random parts o’ the beach, — tho, thankfully, only 2 — the ratio o’ these vs. interesting blue coins is far lower than in other levels, & there are no blue coins in random places in the water.
For instance, 1 unique blue coin challenge this level has are baskets that you need to lead Bullet Bills into the open, allowing you access to the blue coin. There are a lot o’ these, which can feel repetitious — but for Sunshine standards, that’s good, sadly.
This level also has some cleverly placed blue coins just out in the open, like 1 on a high platform that requires jumping onto the bottom o’ a pirate ship as its swinging all the way round.
Taking a page from Super Mario 64, there’s an attraction with rotating seashells that you can spray to open, revealing their contents, 1 o’ which hides a blue coin. The only downside is that this makes me imagine what much mo’ interesting blue coin locations they could’ve devised in attractions. They could’ve had an attraction wherein you have to throw something ( ¿a coconut or other grabbable fruit, perhaps? ) @ a target or stack o’ bottles to win a blue coin. Or you could have you ground pound a “Test Your Strength” machine. Hell, they could’ve made it so that spraying the merry go round makes it spin faster & that if it spins fast ’nough, a blue coin pops out.
“Pinna Park”’s 100-coin challenge is e’en dumber than “Gelato Beach”, which was pretty fucking dumb, so this 1’s really fucking dumb. I 1st tried episode 8, as most would expect, & after collecting round 64 coins on the beach area — which any reasonable person would expect to be ’nough — I ran out in the amusement park ’cause there are apparently fewer than 30 coins in the amusement park area. Once ’gain, they don’t scatter coins thruout the level like any sane collectathon would do, but hoard paltry coins ’hind a single timed switch, a few sprayable clams, & a few green birds. Looking this up on the internet, I found everyone recommend trying shine 2, wherein you’re s’posed to just spray Bullet Bills for infinite coins. Now, I could understand someone not liking the idea o’ exploring a whole level collecting many coins ( I disagree with the sentiment, but I can see it as something a reasonable human may have ); but if someone were to tell me they would prefer repetitive grinding to get 100 collectables, ’stead, as rude as it may be, I would honestly think there may be something wrong with their head. ¿What the fuck were the developers thinking?
While “Pinna Park” is far from the worst level in this game, it feels like the the 1 with the most wasted potential. An amusement park is full o’ opportunities, many o’ which the developers didn’t take in favor o’ mo’ beach bullshit. One could maybe ’scuse a level as bland as “Bianco Hills” for having forgettable, seemingly arbitrary blue coin placements due to just not having many notable areas; — you know, other than the fact that developers made a bland level with few notable areas @ all — but as I showed in the previous paragraph, this level had so much mo’ potential, & the fact that the developers didn’t take advantage o’ that potential while copy-pasting other blue coins multiple times wasn’t due to a lack o’ options, but simply due to laziness.
Thinking ’bout the potential blue coin ideas the developers didn’t take made me realize something that truly makes this level look bad: Banjo-Tooie had a much better amusement park level in “Witchyworld”, which stuck mo’ with its theme & had far mo’ creative ways to win its collectables. & I didn’t e’en like “Witchyworld” ’cause o’ all its fetch-quest, backtracking, shaggy-dog-story bullshit.
3. Pianta Village
“Pianta Village” has perhaps the most ambiguous level theme I’ve e’er seen. It’s called a “village”, but has no houses. If anything, the large plots o’ tall grass on the sides & the many trees & mushrooms scattered all round makes this level feel mo’ like a jungle level, just a jungle that has been mildly domesticated not so much with residential, but civic areas, such as the public bath with the saluting Pianta statue near the back, with paved paths all leading to it. It’s yet ’nother example o’ Sunshine’s strength @ twisting together traditional level themes to create something unique & shows yet ’gain Sunshine’s excellence when it comes to aesthetics, despite its gameplay flaws. ’Nother subtle touch is that the even episodes take place during the day while the odd episodes take place @ night — the only time one sees nighttime in this sun-focused game3.
Making this likely the final main level you unlock is an interesting decision in a game where none o’ the levels stand out as harder than the others, unlike Super Mario 64, where “Rainbow Ride” & “Tick Tock Clock” were a notable difficulty increase. It very well may be the hardest, specially with its infamous secret course challenge — tho that’s mo’ a hard-to-get-used-to gimmick, rather than an unambiguous evolution in challenge; some, particularly those who have practiced the gimmick thru repetitive play, may find “Noki Bay”’s secret course’s traditional tricky platforming to be mo’ challenging. “Secret of the Village Underside” requires the player to get Yoshi, & then hop from mushroom to mushroom below the village so they can spray the weird yellow material that looks like those hanging brushes @ automatic car washes, which can only be destroyed by Yoshi juice. Like many challenges in Super Mario Sunshine, these jumps are simple in theory, & the platform layout would be baby easy on a game with good controls; but in typical Sunshine fashion, Yoshi has janky, different physics wherein it’s hard to turn while in the air, so the developers needed to hold back level design to accommodate bad controls, rather than simply fix the bad controls. But like many Sunshine challenges, taking your time & stopping to aim Yoshi toward the next platform & then jumping straight for it, rather that trying to jump & turn while already in the air — which has a high chance o’ failing — will make this not so troublesome. It’s, ’course, much less fun than a platformer with good controls, but less frustrating.
The secret course itself — which is also notable in being the only secret course to have a nightly blue cast o’er it, fitting the fact that it’s the only secret course found @ night — revolves round the gimmick o’ “Chucksters”, Piantas who fling you backward. Like other gimmicks, such as the boat, Sunshine does a terrible job o’ giving the player practice, only introducing this gimmick elsewhere for a bonus shine in the hub world & during a part in “Bianco Hills”, both o’ which are easy to miss. This ’splains why this has a similar reputation o’ being frustration.
’Nother reason is, also typical o’ Sunshine, the gimmick, while sound in theory, is badly programmed & hard to control. The player needs to time when they talk to many Piantas so they fling you @ the right place, while also being @ a precise angle so they fling you @ the right angle. Messing up either will easily make you pass the target platform & fall into the abyss all round & die. Some Piantas move, so you need to time when you talk to them. ’Gain, this is all reasonably necessary to make this gimmick a challenge @ all, but is crippled by the unreasonbly picky hitboxes o’ the Piantas. You’d think being near them @ all would allow you to talk to them: you talk to them with “B”, which you technically don’t need for any other part o’ the course, so it’s not as if being mo’ lenient would intrude on the player’s playing. This means it’s easy to accidentally dive @ a Pianta, possibly flying straight off the platform or into the abyss, specially when quickly pressing the button to time a throw right when a Pianta gets into a position. Expecting the player to act quickly while also waiting to see when the game arbitrarily decides they can talk to a Pianta & shows the “B” icon is simply unreasonable & could’ve been fixed if the developers properly playtested this gimmick — or the whole game in general, truly.
This secret course’s secret red coin challenge is arguably the only 1 that’s harder than the original, FLUDD-less challenge, due to the ( moderately tight ) time limit making the itchier player mo’ likely to flub something up in this finicky gimmick that requires exact precision. Also, for once this secret challenge uses alternate routes not used by the main challenge for red coins, rather than having the same main path & only using the alternate routes for useless 1-ups that shouldn’t be in the game @ all ’cause making a game in 2001 with lives is stupid, specially when Donkey Kong 64 & Banjo-Tooie already showed they weren’t needed or useful in a collectathon platformer the previous year.
Possibly the 2nd hardest shine in this level is “The Goopy Inferno”, the only episode that takes ’way your FLUDD @ the very beginning & expects you to maneuver thru the main level, rather than a secret course, without FLUDD. The whole village is covered in fiery goop that spam-hits you till you’re dead, effectively making it instant-kill in most cases, ’less you luck out & the game fails to instant-kill you, since nothing in Sunshine is set in stone.
“The Goopy Inferno” reveals what an awkward bridge Sunshine is ’tween Super Mario 64 with its many ways to do tasks & Super Mario Galaxy with its insistence on doing tasks the way the gods intended. “The Goopy Inferno” has a clear method it wants you to take, — go round the perimeter & find the right hole that leads to a wire fence underground that takes you to a hole in the center o’ the level — but it’s terrible @ communicating it, to the point that I think my recent playthru was the 1st time I e’er did this shine the legit way. I actually forgot precisely how I’d do it as a kid, but I think it involved slowly walking ’long a narrow fence somewhere, which got me close ’nough to uncovered dirt to allow me to jump ’long safe areas to the center. Speedrunners, meanwhile, let the Wind Spirits hit them so they have temporary invincibility & use that to safely walk on the lava — not unlike what Mega Man can do on spikes — for long ’nough that they can reach safe land. Unlike Super Mario 64, whose alternate routes are usually intentional, or a’least natural, these are clear glitches in their janky, unintuitive glory; but the fact that so many people stumble ’pon these odd solutions shows how unintuitve the intended route is. & yet, while this doesn’t feel as clever as what Super Mario 64 oft did, it still feels better than Galaxy’s utter lack o’ options & paint-by-#s design. Plus, exploring the wire fences below the level mixes the fun o’ exploring twisting paths with the tension o’ avoiding being knocked off by enemies.
The 3rd trickiest shine may be “Fluff Festival Coin Hunt”, which uses “Pianta Village”’s 8th episode for quite a memorable red-coin challenge — probably e’en better than “Sirena Beach”’s ( not the least ’cause it doesn’t have an arbitrary timer ). This episode does a great job o’ hiding red coins in places where they’re tricky to find, but not unintuitive. Yes, a reasonable person would check under a conspicuous stack o’ crates, under the fruit tree, or all ’long the tree tops & on the wire platforms ’neath the village. What helps is how wide-open “Pianta Village” is, with plenty o’ places to hide things.
Finding all the red coins is only part o’ the challenge, tho: the shine appears on clouds far in the distance, requiring the player to grab onto dandelions blowing back & forth in the wind to reach it. Unfortunately, this gimmick is only used here, with no practice beforehand, &, you guessed it, is janky & doesn’t work well. Their hit boxes are questionable: you’ll dive @ dandelions many times & go right thru them when trying to grab them. Also, be careful aiming in a direction while preparing to jump off: holding right on the control stick can make you fall off & into the abyss, forcing you to collect all 8 red coins ’gain. Normal games would have made down or B make you fall off, while relegating right or left to simply adjusting your aim; but as we’ve seen, Sunshine is not a normal game.
1 o’ the coolest secret shines in the game challenges you to reach the highest point o’ “Pianta Village”, a platform on the tallest tree, & spray the sun itself to reveal a shine image, which gives you a shine for some reason. ( Granted, this is, ’gain, weird, since this game wherein you’re s’posed to clean graffiti is now asking you to add graffiti yourself to the sun itself, which can’t have good ecological consequences. )
“Pianta Village” loses quite a bit o’ points for the rest o’ its shines, which are rather weak. “Piantas in Need”, for instance, is a weaker version o’ “Scrubbing Sirena Beach”, not only ’cause daytime “Pianta Village” isn’t nearly as nice to look @ as “Sirena Beach”’s sunset beach. “Pianta Village” lazily double-dips by making 8 out o’ 10 o’ the villagers give you blue coins if you talk to them after cleaning them — which means if you didn’t think to talk to them, you’ll have to do 80% o’ this shine’s challenge ’gain. “Scrubbing Sirena Beach” has 2 characters you need to clean ( 2 mo’ are also on “The Manta Storm”, for some reason, for a total o’ 4 ) for blue coins. “Scrubbing Sirena Beach” has better variety & doesn’t squander as many blue coins on double-dipping.
“Pianta Village” also has 2 shines that are basically cooling down Chain Chomps & moving them into water sources, which would be a creative gimmick if done once. Episode 1, “Chain Chomplets Unchained”, is the better o’ the 2, allowing you to yank back the Chain Chomplets’ tails & fling them into water, while also threatening you with their lava trails. Neither o’ these are hard compared to the challenges you’ve likely already faced in “Noki Bay” or face in other episodes o’ this very level, but the 1st iteration is strangely harder than the 2nd. “Chain Chomp’s Bath” requires you to slowly pull back a Chain Chomp by its chain, while routinely cooling it back down after it heats itself up ’gain. Anyone can easily pull this off; it just requires patience & holding down in a single direction for long periods.
One might expect that in the last main level everyone’s favorite racist Piantaface-wearing racer who threatens to murder Mario if he doesn’t beat him in a race would offer the slightest semblance o’ a challenge. If so, one will be very disappointed.
The developers use coins in inane ways in “Pianta Village” just as much as every other level. I, for some reason, tried “The Goopy Inferno”, for the 100-coin shine, ’cause it seemed like “Fluff Festival Coin Hunt” had fewer coins ( tho in hindsight, I think that was usually where I got it as a kid ). I wouldn’t have to make these calculations if the developers just put coins all o’er the level on every episode, rather than have some episodes have the underground area full o’ coins & the trees have nothing, while others have the trees full o’ coins but nothing underground. Just have coins everywhere, for fuck’s sake. After quenching every fire & getting all the coins I could out o’ the lava-pooping Coo Coo’s, I had maybe 97 coins & searched desperately for scraps, only to find out you can make a whole ring o’ coins appear by ground pounding the center o’ the bath. I think I only thought to do that cause I may have read ’bout that in an ol’ strategy guide years ago & it clung to my mind ’cause o’ how nonsensical it is. I always thought while playing Super Mario 64, { This would be much funner if I had to do obscure bullshit to find 100 coins in a level }. No, in reality, I thought, { They probably couldn’t fuck up 100-coin challenges any worse }, & to my surprise, Sunshine’s developers took up my challenge.
“Pianta Village”’s blue-coin placements are average quality: not as good as “Sirena Beach” or “Pinna Park”’s, but not as bad as “Bianco Hills” or “Gelato Beach”’s. As I mentioned, a full 8 out o’ 30 are from cleaning Piantas in “Piantas in Need”. We also have the obligatory ( well, ’cept in “Sirena Beach”, which was actually creative ’bout its blue-coin placements ) blue bird, blue butterflies, timed triangle paint, M’s, & a whopping 2 beehives you have to spray down & eat all bees with Yoshi. ¿Is that exciting, or what?
Then we have obscure bullshit, like ground-pounding the statue’s nose or spraying a random sign.
Honestly, the only good blue coin is the 1 you get by spraying the moon on night-time levels. Yeah, it may be obscure, too, but a’least the moon is much mo’ notable than a fucking sign or some statue’s nose.
2. Ricco Harbor
“Ricco Harbor” is a solidly-designed level with a refreshingly uncommon level theme. The developers weaved together setpieces that fulfill all the main criteria for a good level: smoothly coming together in a way that feels like a real cohesive environment, rather than a scattering o’ independent challenges with no interrelation ( the Galaxy method ); having both a variety while also all feeling relevant to the o’erarching harbor theme; & having these setpieces serve as interesting challenges in & o’ themselves.
This level’s most prominent & memorable landmark is the web o’ girders with hooks & wire nets high up to explore, which is mainly used for “The Caged Shine Sprite” ( albeit most o’ this area can, in classic Super Mario 64 fashion, be skipped with clever use o’ the rocket nozzle below the cage ), & 1 o’ the most interesting implementations o’ the ubiquitous 7th shine Shadow Mario battle ( tho with the least interesting title, “Shadow Mario Revisited” ).
Below & beyond the girders is a harbor bay full o’ boats, which makes a great obstacle course for the unfortunately blandly-titled “Red Coins on the Water” while riding on a Blooper. Showing no mercy on the player, this game not only saddles the player with ’nother patented red-coin death timer, but also demands the player collect the shine that appears while still on the Blooper, with the very-real risk o’ smacking into 1 o’ the main walls & dying instantly round the harbor where it appears.
& yet, this is probably easier than the 2nd shine, “Blooper Surfing Safari”, which introduces blooper surfing in a subterranean area entered through a sewer tunnel in the harbor wall. Here you’re forced to race round a winding track using a Blooper that’s not good @ turning & beat an unspecified time limit. Luckily, there are shortcuts found by jumping o’er walls that would otherwise make you sharply turn round them ( or, mo’ accurately if you chose the fastest purple Blooper, will make you ram into a wall & die ) that make the time limit easy to break; unluckily, whether or not you can jump is finicky. If you don’t beat the time limit, which is very much possible if you use the slowest Blooper & don’t take shortcuts, the Pianta automatically ejects you from the level, but doesn’t kill you. It’s a jarring break from this game’s pattern. ¿Why couldn’t the programmers figure out how to just let you retry a challenge after failing without throwing you out o’ the level, like a normal game?
In possibly the lamest secret shine in the game, you get a secret shine for beating “Blooper Surfing Safari” a 2nd time… but 5 seconds faster. Chances are you’ll beat 40 seconds the 1st time, so it’s basically just doing the same thing twice. What blatant filler.
The other major landmark is the lighthouse, which holds the entrance to the secret course for “The Secret of Ricco Tower”. I only wish they bothered to make getting to the entrance an actual challenge beyond just jumping from the top o’ a nearby ship directly to the top platform.
The secret course itself is probably the most generic ’mong them, with just a bunch o’ those janky rotating peg blocks & a few rotating screw platforms in the middle for the barest o’ variety.
The only thing to note ’bout this secret course’s red-coin challenge is the admittedly well-hidden red coins @ the top o’ the walls in the middle break platform — tho I would’ve preferred they didn’t double-dip 2 red coins here. It fits well with the timing o’ the rotating screws: when I 1st played through this area, during which I missed these red coins, trying to go fast, I was annoyed @ how the stage seems to make you wait for the screws to rotate to the middle so that you can reach the red coin in the middle. But if you wall-jump up the walls to get their red coin, but the time you make it back down the screws will have rotated to the middle, right where you need them.
The least relevant areas o’ this level are the small marketplace @ the northmost end & some helicopter landing pad off to the side o’ it. These areas are used for the 2 Gooper Blooper fights they, for some reason, saddle you with. Both battles are basically the same: stomp on the Blooper’s front appendages & pull them back till you rip them off so they can’t smack you with them, & then clean their face off & grab their nose to snap them ’way. I’m glad they a’least made the boss only have 2 phases. It’s an interesting boss ( with a surprisingly gruesome means o’ battling them ) that’s only marred by the fact that they use it multiple times. Unlike “Noki Bay”, Gooper Blooper is actually responsible for making the harbor bay oily, & their defeat leads the bay to become clean ’gain.
The marketplace is also used for the least relevant shine in the level, “Yoshi’s Fruit Adventure”, which challenges the player to get a Yoshi, spray fruit @ hopping fish to turn them into moving platforms, & ride them to the shine in a cage locked ’hind that strange moving yellow goop that reminds me o’ those weird sponges they have @ the car wash that can only be destroyed with Yoshi juice. “Yoshi’s Fruit Adventure” is 1 o’ the notoriously hard 8th shines in the game, but strangely, I didn’t find it very hard @ all & was able to beat it 1st try on my recent attempt.
The most frustrating, & ridiculous, part is unleashing Yoshi in the 1st place. You need to get Yoshi a durian & kick it o’er to his egg. The durian’s kick physics feel arbitrary, with sometimes attempts to be as light as possible with my movement kicking it clear ’cross the market while other times I was able to just hold forward & keep kicking it in short bursts. But the worst part is that you have to alternate ground pounding buttons @ the top o’ 2 towers to release fruit & some jackoff developer thought it’d be great if it randomly spit out a fruit, 1 out o’ 4 o’ which is actually relevant. E’en better, sometimes when you release a durian it’ll go flying off into the water, destroying it, specially if there’s other fruit in its way, which means you need to drop down & fling the useless fruit to get it out o’ the way. There’s no compelling challenge to any o’ this: it just wastes your time & you have no control o’er any o’ it.
Thankfully, after so many levels with dumbass 100-coin challenges, “Ricco Harbor” has a decent implementation, with coins actually scattered round the level & plenty to reach the goal ( a’least in episode 8, the 1 most would try, tho it seems as if all would likely have 100 coins, too ). It’s sad that I would need to praise this level for accomplishing something Super Mario 64 always accomplished, but those are the rock-bottom standards Super Mario Sunshine has left me with.
“Ricco Harbor” also has some o’ the most interesting blue coin placements with probably the least repetition in all the levels, ’cept maybe “Sirena Beach”’s. The worst blue coins are probably the 1 you find by spraying a random part o’ a random wall to make 1 o’ those blue shine marks appear ( which makes no sense: ¿you’re rewarded for creating graffiti, the thing you’re s’posed to be getting rid o’? ) & yet ’nother blue coin you get by just eating blue butterflies with Yoshi — & the latter isn’t e’en bad, just used in every level.
The rest o’ the blue coins are spread evenly thruout the level: up on the girders, round the towers you climb with Yoshi, & round the marketplace & ships all o’er the bay. There are e’en some clever blue coins, like 1 you get for spraying a fan to raise a yellow submarine ( tho the yellow cage before it is pointless &, bizarrely, only appears on the 1st shine despite having nothing to do with that episode’s challenge ). These blue coins were e’en able to turn repetition in a clever hint: you get blue coins for killing 2 Klambers on the wire net in 1 o’ the ships by knocking them off while hanging on; howe’er, there is also a Klamber on a non-wire wall. Apparently, you can spray them & slide o’er them while they’re stunned, but I couldn’t figure out how to do that, since they’re stunned for maybe a second, & it sounds glitchy in any case; most players would probably try getting Yoshi & eating it, which is much easier.
My only problem with “Ricco Harbor”’s blue coins is that I feel like they could’ve all been available on episode 8, if not all episodes. In particular, the developers for some reason made 1 blue coin floating o’er the bay near the entrance to the Blooper race only obtainable on episode 2, e’en tho there’s ’nother blue coin floating o’er the bay that is available on any episode.
Finally, the way this level handles nozzles is unintuitive as hell. There is 1 turbo nozzle ( virtually necessary to get 1 o’ the graffiti race blue coins if you’re not a speedrunner ) box on a rooftop that was always a “hologram” on every episode, e’en after unlocking the turbo nozzle in Isle Delfino. Finally, I had to look it up online & found out you need to collect a specific nozzle box hidden in a ship to make them all appear in full.
1. Sirena Beach
“Sirena Beach” is Super Mario 64’s lackluster “Big Boo’s Haunt” done well, which is the only time Sunshine bests 64 on such a large scale. The tropical hotel theme mixed with the haunted house theme transforms a tradition Mario theme into something unique, while offering far mo’ variety in challenges than fighting Boos for 3 stars.
While fans always love to heap praise on “Noki Bay”’s visuals, it’s nowhere close to as good-looking as “Sirena Beach”’s orange & purple dark sunset beach & plaza.
Unlike “Pinna Park”, “Sirena Beach” pulls off its cock-tease, closing off the hotel for the 1st shine, “The Manta Storm”. As a kid I always hated this shine ’cause I found it hard once the mantas are split off into many & begin chasing you & it came in ’tween me & exploring the hotel, & sadly many adults concur with this same sloppy “hard, therefore bad” argument. Howe’er, e’en as a kid I was able to figure out a safe, albeit slow, way to pick the mantas off from under a hut, while the older & mo’ capable version o’ me was able to blast them off easily while going on the offense. Unlike most other bosses whose gimmicks, howe’er clever they may be, were slow & boring, this boss manages to match a clever gimmick with compelling gameplay, allowing the player to choose how whether to go slowly & carefully or quickly & aggressively. I think I now consider this 1 o’ the best bosses in the game, save maybe the Plungelos in “Gelato Beach”’s “Mirror Madness! Tilt, Slam, Bam!”, which I ding a few points from for being a bit too simple & trivial to beat.
The 2nd episode, “The Hotel Lobby’s Secret”, gives a li’l taste o’ the hotel, but only opening ’nough thru the pink Boos infesting the hotel to climb up the top o’ the pillar to enter the boo statue’s mouth, developing the cock-tease a bit mo’.
Unfortunately, the secret course itself is forgettable & feels like it belongs on the cutting room floor o’ “Gelato Beach”, involving the same straight paths o’ sand blocks. With both the path o’ sand blocks below the main path & the whole inside o’ the weird block formation afterward, which are both a complete waste o’ time for the main shine, you’d think the obligatory red-coin secret shine would force you to explore these areas for red coins. Well, there is 1 red coin right @ the bottom o’ the weird block formation, but absolutely no red coins down that 2nd sand-block path, making that part o’ the level utterly pointless, ’cept that there might be a 1-up down there that only a fool would risk a life & wasted time for. Unfortunately, e’en the best level o’ the game isn’t safe from a bit o’ thoughtless level design.
But the main shine o’ attention is the 3rd episode, “Mysterious Hotel Delfino”, which challenges you to explore a 3D maze o’ rooms, going door to door or up & down floors from the 1st floor to the ceiling vents, starting from secret passageways in the bathroom stalls, trying to find the secret entrance into the blocked-off pool room. The path is twisted ’nough to get my interest without going on too long, & the developers interspersed the path with clever ways to get from room to room, like having the player spray posters to reveal holes ’hind them they can jump thru.
As an extra twist, to get past the Boos blocking all paths in the vents, you need to grab a pineapple hidden in 1 room & bring it to the Yoshi on the 1st floor so you can eat the Boos. My only problem is that sometimes while exploring with Yoshi you can end up stuck in a room with no way to go thru a door back out while on Yoshi, so you have to abandon Yoshi; & since you need Yoshi & the Yoshi egg won’t spawn while Yoshi’s still round, you’ll have to kill Yoshi. Make sure you don’t leave Yoshi round where a pineapple spawns ( as the pineapple room is easy to get stuck in ) or it’ll ne’er die & you’ll be waiting fore’er.
Episode 4 & 5 focus on the hotel casino, with “The Secret of Casino Delfino” forcing you to spray slot machines till they show triple 7s, 1 in which you can change each square individually & 1 in which all squares spin in sync, followed by an obnoxious grid wherein you have to spray each individual piece & hope that it spins with the picture-side out & hope you don’t undo progress on ’nother square from the residue o’ your spray. It feels random, which I guess is how casinos work; but that doesn’t make it a compelling challenge in any way. Finally, you will be able to enter a pipe to the secret course.
Thankfully, this secret course is mo’ interesting than “The Hotel Lobby’s Secret”’s. Aesthetically, a sunset casts its light o’er everything, which helps this secret course stand out from all the others. It begins with a board with weird white cubes sliding round, threatening to shove you off or squish you. Howe’er, you can just flip jump onto 1 & jump ’mong the tops o’ cubes for an easy way thru. I would also advise moving the camera straight ’bove so you can actually see. Sadly, the course gradually tapers off from here, leading to wooden blocks that move out & in, & then the dozenth spinning wooden block with pegs you’ve encountered as the finale.
The absolutely worst part o’ this level is that you have to do all the tedious slots & that spinning tile puzzle yet ’gain to try the 2nd red-coin secret shine. ¿Why don’t they just let you go into the pipe on later episodes? You’ll still have to do this tedious nonsense the 1st time you beat the secret course, since you can’t do episodes out o’ order, but you won’t have to for the repeat, which is only fair.
“King Boo Down Below” has you ground pound a conspicuous purple tile on the roulette wheel to make it drop down to a fight with King Boo. As cool & clever as this boss is, it falls victim not only to a bit o’ Rareware stop-&-go tedium, but also to luck: every time you spray King Boo, he spins the slots under him & will only release the fruit you need to hit him if he gets 3 pineapples. Anything else will waste your time cleaning up what garbage he throws @ you. Since King Boo can’t hurt you directly, only send mooks after you, there’s no chance o’ you dying, so the only “challenge” this boss offers is wasting time.
Episode 6, “Scrubbing Sirena Beach”, challenges you to clean the beach & a few beachgoers within a certain time limit. They give you plenty o’ time & are very lenient — I still had plenty o’ conspicuous goop when the game said I was done. Still, it’s slightly mo’ compelling o’ a challenge than “Pianta Village”’s, has a bit mo’ variety than just spraying 10 Piantas, & looks nicer. Having 1 mo’ challenge take place outside also adds variety after 4 shines indoors, & does so in a much mo’ effective way than “Pinna Park” — not the least o’ which ’cause the outside area isn’t just yet ’nother beach with a few plain grass & flower beds, but has an elaborate yard with stone walkways, mini ponds, lit torches, huts, & flower gardens.
The ubiquitous Shadow Mario chase episode 7, “Shadow Mario Checks In”, sugars stuff up with Boos posing as Shadow Mario. Since they’re clearly a whiter shade, they’re not convincing. Unfortunately, this shine reveals a major problem with this level’s camera when you’re on the stairs, making it slower & e’en mo’ tedious to try aiming your sprays @ Shadow Mario while chasing him up & down.
Episode 8, “Red Coins in the Hotel”, while not as hard as “Gelato Beach”’s “The Watermelon Festival” or “Ricco Harbor”’s “Yoshi’s Fruit Adventure”, perfectly wraps up this level with a red-coin collection challenge thruout the the maze o’ rooms. I could’ve gone without the time limit, which feels like trial-&-error, tho.
Once ’gain Super Mario Sunshine sabotages a 100-coin shine by being needlessly stingy with coins. “Sirena Beach” is better ’bout spreading its coins round the hotel, but I was still barely able to find 100 coins on episode 8 & couldn’t find ’nough on episode 3 ( tho IGN seems to claim that you can ). Some may call this “challenge”, but making it so easy to get screwed out o’ 100 coins & have to start o’er is tedious, not challenging, specially when most o’ the coins are gotten by spraying dozens o’ torches & doors. You can also get 100 coins by going into episode 4 & just grinding for triple coins on the slots. Since I had ’nough grinding for coins in “Gelato Beach” & “Pinna Park”, I passed.
“Sirena Beach”, thanks to being such a large, complex level, has the greatest variety o’ blue coins. It has so few copypasted blue coins that it’s 1 o’ the few wherein having 30 blue coins was reasonable & didn’t feel like overt padding.
The only problematic blue coins are the 1s where you have to spray the ceiling light — which, to be fair, I guess is a notable landmark — & some random flowerbed & random bookcase — which isn’t notable & all. There’s also a blue coin way off in the tides out from the beach — but a’least there’s only 1, & it’s in the corner, as if it’s trying to hide, so it doesn’t feel as arbitrary as the underwater blue coins in “Bianco Hills”.
You also have to spray a few torches out o’ many to get some blue coins, but you’ll probably do that to get coins, anyway. You also get blue coins for ground pounding ( or sometimes just jumping ) under certain slot machine levers, which is actually clever.
I feel like you’d also need to be paying close attention to find the “M” graffiti mark in the casino, which only appears on episode 5, which feels like a particularly rude form o’ Sunshine’s infamous blue-coin episode limits.
While not bad in theory, the timed triangle & X blue coins are made a bit unfair by the screwy camera. You literally can’t see the blue coin that spawns on the 2nd floor ’cause it isn’t loaded, showing just a black void ceiling. Serious developers would’ve looked @ this conspicuous visual glitch & not kept these here, but Sunshine’s developers clearly didn’t give a fuck when they were making this game. ’Cause the camera forces itself in a weird angle as you go up the stairs, you basically have to get the blue coins blind while going up, ’less you’re able to quickly rotate the camera while moving & diving forward, which requires either tremendous dexterity or 3 hands.
Most o’ the rest o’ the blue coins are spread throughout the hotel rooms & vents. I think my favorite 2 blue coins are the 1 on the roof ’hind the hotel & the 1 you get for spraying a blank portrait, revealing a shine picture.
Most o’ this level analysis was description rather than analysis, ’cause there wasn’t much to rant ’bout, save the same kind o’ problems every level has. This is o’erall a solid level with a few instances o’ very clever design.
Honorable Dishonorable Mentions
Corona Mountain
[ Insert obligatory topical reference to coronavirus that will date this post. ]
Ah, the infamous. This is a widely reviled level ’mong e’en fans who love Sunshine. Something you could definitely say ’bout the level is that there’s not much to it. You jump from fire platform to spike platform, quickly spraying out the fire platforms ( or just hovering o’er them & hoping you’re high ’nough to not get hit by the flames — which, with this game’s wonky hit detection, is ne’er a guarantee ) before the spikes spring back up. It’s also a severely linear level for a game that was still rather open. Still, the quick platforming is rather fun for a game wherein platforming was rarely fun.
Despite being simple & linear, the level isn’t very coherent, with 3 completely independent sections. After the simple platforming ’tween spike & fire platforms, we have the infamous boat section. You have to spray your water ’hind the boat to make it go forward, & spray to the sides to rotate whiche’er end you’re nearest, which means if you’re smart you’ll stay on 1 clear end, so turning isn’t a surprise, as the game gets confused as to where you want to rotate it when trying to rotate it from the center. Honestly, the boat’s not hard to navigate if you’re not charging forward. Despite all the struggles I had with many things I didn’t expect to struggle with thruout my playthru o’ this game, I didn’t crash this boat once. That said, the game doesn’t prepare you for this boat much, ’less you happened to use the fully optional boat out o’ the way in “Noki Bay”, nor does it ’splain how the boat works, so players will likely die a few times just trying to figure out how this gimmick works, & have to redo the previous section each time. This is why you don’t mix completely different gimmicks into the same level, dumb shits.
Also, there are blue coins near the end, which you’ll want to use the boat to get — tho, ’cause blue coins save when you collect them, you could always just dive @ them without the boat & take the death. For some reason, they waste a full 3rd o’ Delfino Plaza’s 30 blue coins in this 1 area. That’s right — this game expects you to collect 10 blue coins in just this small circle round the last platform o’ “Corona Mountain”. If that doesn’t convince me the developers o’ this game were as lazy as they could be ’bout blue-coin placement, I don’t know what you’d consider lazy placement.
Far worse is final section, wherein you have to take the rocket nozzle & rocket up a bunch o’ moving cloud platforms. Now, after 2 very tricky sections, e’en for this point in the game, ¿why do they end with a trivial section that not only “challenges” you to do simple versions o’ much harder challenges you must have done before — ¡as far back as “Bianco Hills”! — without e’en the threat o’ death for missing — you just land on the ground & take damage?
People also widely pan the final boss for being too easy & having a sitcom dad voice: you just rocket up & ground pound 4 corners while avoiding Bullet Bills & fire. Or don’t, ’cause you can easily tank most hits. Actually, tho I surprisingly aced the boat section 1st try, I died, like, 4 times trying this boss. The 1st time I ran out o’ water & couldn’t get any mo’ ’cause Bowser would ne’er give me blue Bullet Bills & I committed suicide; ’nother time I fell thru the crumbling floor, ’cause ’course hit boxes don’t always work; ’nother time I launched straight upward o’er the red mark on an outer platform & when I fell back down I was magically far forward & off the platform, leading me ground-pounding in utter bemusement to my death. By this point I had become numb to the terribleness.
This level’s the apex o’ mediocre — specially if you compare it to Super Mario 64’s excellent final Bowser level, which did a lot better job o’ being a linear challenge level without being boring.
Super Slide
I love how Super Mario Sunshine’s development team didn’t have anyone there to say, <Hey, guys, maybe we should only include actually designed levels, & not a few thrown-together setpieces we left in the corner>. I also love how they start by making it seem as if you should avoid the far left with a big gaping hole, only for the level to require a sharp left turn after that that you can’t make. What you need to do is aim straight for that gaping hole, which you can jump o’er. After that there’s, like, 1 mo’ relatively easy turn & a thin slope, & then the level’s o’er.
This level is found on a random pipe on a hill in a series o’ hills off the coast o’ “Gelato Beach”’s entrance. Honestly, the arrangement o’ these hills took mo’ thought than the level itself.
Red Coin Field
You have to collect 8 red coins in a field full o’ large grass that makes it hard to see — ’cept you can just move the camera ’bove you, making things much easier to see. You basically just defeat all the enemies, including this game’s only red bird, break some random watermelon block in some random place, fall into 1 o’ the many holes with a red coin hidden in it, & spray some guy running round on fire for hours & hope you don’t run out o’ water, ’cause there’s no way to refill your water. ’Cause the developers hate you & are laughing @ you for being dumb ’nough to play their game, they put a fire, which you’d think gives you a red coin for spraying it out, but it actually does nothing but waste your scarce water.
You find this stage by crossing a series o’ palm trees growing out o’ the wall spreading out from the cannon entrance to “Pinna Park”.
Pachinko Game
Ah, yes, e’en mo’ infamous than Coronavirus Mountain. & for good reason: this level is absolute shit. While other levels sometimes give you annoying bugs, this whole level is a bug & is exhibit A in my proof that this game wasn’t bugtested.
The gimmick is that you jump onto a bouncing platform & up a tunnel ( which has 3 red coins, since they couldn’t e’en find mo’ than 5 places to hide red coins in the machine itself ) & try to aim yourself with the hover nozzle o’er a slot with a red coin while invisible walls & magical, unintuitive physics push you round for no reason. If you play this level ’nough you may develop an inkling for how these alien physics work as well as my unending sympathy that you spent so much o’ your precious time playing shit & not an actually good game. You can’t see the slots under you, so this is effectively “Blind Jumps, the Level”. If you don’t land in a slot, you go toward the bottom, where you’re destined for death.
I’ve heard some say that this was a good concept, just badly implemented, but no, this could ne’er be good. @ its best, if this level were designed in a way that was fair & controllable, it’d be negligibly easy, since aiming for big slots is a simple task, which is what most Mario games probably would’ve done. For some reason, Sunshine preferred unfair hard o’er negligibly easy, so they hacked together invisible walls & made you aim for slots you can’t see to manufacture fake difficulty. So ’stead o’ a pointless trifle most would forget, we get possibly the most infamously bad level in all Mario games. ¿Is this black mark better than being completely ignored for eternity like, say, the average Super Mario Galaxy level ( or that dumbass “Super Slide”, which wasn’t e’en “super” in the slightest )? You decide.
Lily Pad Ride
This secret level’s infamous not ’cause o’ the level itself, but its inane method for reaching it. You have to get Yoshi, jump onto a boat, spend minutes standing round doing nothing, jump onto an island, eat fruit to avoid letting Yoshi die o’ dehydration, wait for minutes doing nothing till ’nother boat arrives, jump onto that boat, ride it for minutes doing nothing, jump onto a platform with bananas lying there for no reason, — ’cause bananas regularly grow on metal platforms with nobody on them — wait for minutes doing nothing for a 3rd boat to arrive, jump onto it, & then ride it for minutes doing nothing before jumping onto a final island to spray ’way that stupid yellow slime covering a pipe with Yoshi’s fruit. This is mo’ like a parody than a real challenge. ¿Did Beat Takeshi disguise himself as a developer & manage to get himself hired by Nintendo & sneak this shit into the game? Only someone who truly despised their audience would develop something like this. I couldn’t e’en stay mad @ the developers after this: if after this, you still continue to play Super Mario Sunshine, you’re the one who has the mental problems.
Pictured: exciting gameplay that people actually try to claim is better than Super Mario 64.
The course itself requires you to ride a lily pad o’er deathly toxic water & hope the lily pad passes by red coins in a way that makes it physically possible to grab them. You can try to control the lily pad with your spray, but since the lily pad moves so fast with such strong momentum, these sprays are slight suggestions. If you do reach the end without collecting all red coins, there are 3 options:
1. You can kill yourself ( in real life, too, which you may want to do if you’re wasting your summer playing this game & typing up a novella ’bout how unbearably bad it is ’stead o’ doing something productive with your life ).
2. You can jump into a pipe some asshole developer laughing his ass off put in that sends you back to the beginning o’ Delfino Plaza, which means you have to wait on those 3 boats with Yoshi ’gain. If this does not convince you that this game’s developers actively despise their audience, & perhaps all o’ humanity, you pretend e’en a glass half full is full. If you do fall for this troll & jump into the pipe, my recommended remedy is to shut the GameCube off & throw the game disc into moving traffic. Luckily, I played this game before, so I didn’t. Just remember that I played this game a few times as a kid, so as frustrated as I am, imagine how much mo’ pissed off some poor newbie who didn’t already know ’bout this troll job & actually fell for it would feel.
3. You can take the “Walk o’ Shame” ’cross the very thin winding path ’long the edge o’ the level back to the start, where ’nother lily pad will be.
Turbo Track
Compared to all the other secret levels, this 1’s excellent simply by being functional. You charge forward with the turbo nozzle & jump… a li’l before the edge, ’cause there’s a weird delay & if you try to jump right before the edge you’ll just fall off. ¿Did I say “functional”? I meant “halfway functional”, which is the best we should expect from this game. Hopefully, when you land on the final platform you don’t land past the shine & can jump immediately ’pon landing to grab the shine, as that last platform is so small there’s no chance you’ll be able to stop on it before falling off from the gradually-decreasing momentum. It’s also likely you may only hit the front edge o’ the final platform & grab the edge, stopping you immediately, which is usually what happens to me. It’s a pleasant surprise that the game is lenient & doesn’t just bonk me off, like most games would.
You find this level by breaking thru a door with the turbo nozzle — the 1 ’tween the 2 cops who apparently don’t care that you’re going round destroying property. [ Insert obligatory topical reference ’bout George Floyd riots that will date — O, ¿who am I kidding? White cops killing black people for no reason is as timeless as death ( specially for black people ) & tax loopholes ].
Delfino Airstrip
It’s cool they let you return to the intro level & give you an extra shine to get, tho I wish they’d done mo’ with it than yet ’nother red-coin collection shine ( ¿is this what Sunshine fans call being mo’ oddball than Super Mario 64? ¿Exacerbating its worst vices? ). O well, a’least you get to use the turbo nozzle for collecting red coins.
They could’ve a’least taken some o’ the 10 blue coins all round the end o’ “Corona Mountain” & added some mo’ to this area. I think all this area has is a blue coin in an ice cube you melt by spraying with water.
Delfino Plaza
& last but definitely not least, ’cause unlike Super Mario 64, whose hub actually had contenders, “Delfino Plaza” is the only non-main area that isn’t @ best underwhelming in Super Mario Sunshine.
But we must credit Sunshine here: “Delfino Plaza” is a contender gainst Super Mario 64’s hub, & possibly better ( & it’s certainly better than Galaxy’s joke o’ a hub & Galaxy 2’s lazy map screen that’s e’en mo’ primitive than that found in Super Mario Bros. 34 ). While “Peach’s Castle” had some interesting stars, like grabbing MIPS, specially the DS remake, which had that secret white room in the mirror room, most o’ them were gotten in secret areas or just by talking to 3 Toads in random rooms. Sunshine does o’eruse the “wash thing — whether it be 2 bells or the shine on the gate” or “find shine picture in the sand”, & while its crate-breaking minigame isn’t particularly interesting, it’s something.
Howe’er, “Delfino Plaza” does have the cleverest use o’ Chuckster, who throws you into a broken window for a small fee so you can break into that building & collect the shine inside.
Plus, we have some interesting blue-coin challenges, such as getting the fruit into villagers’ baskets, specially kicking the durian ’cross the river. My only problem with these are that the programmers stupidly made it so that you have to talk to the villagers before giving them fruit counts. If you put fruit into their basket before you talk to them, the fruit disappears, but it doesn’t count toward anything. Also, I think it would’ve worked better if they kept them to just 1 fruit, since requiring 3 is just repetitive. If spraying a random M or finding a blue coin in a random place underwater is worth getting a blue coin, I don’t see how just kicking 1 durian into a villager’s basket or e’en just throwing a coconut in a villager’s basket is too easy.
I do feel many o’ “Delfino Plaza”’s oddball blue coins or shines would be better if they were actually unique. I remember when I was a kid I was always fond o’ finding the blue coin by spraying the blue bird on the rooftops; but now that I’ve learned that that same mechanic is in almost every level, I can only shrug in boredom. Perhaps the developers should’ve taken a page from Super Mario Bros. 3 with its Kuribo’s Shoe & realized that weird gimmicks are better when they’re rare, as their freshness is what makes them interesting, & they can’t stay fresh after the dozenth iteration.
Also, the golden bird, which falls into this same problem, adds pointless padding by putting the shine it spawns all the way on the hill islands near “Gelato Beach”’s entrance. This doesn’t add any challenge; it just forces you to slowly swim o’er to that area. ¿What was the point?
I do feel like the level entrances aren’t as memorable or interesting as Super Mario 64’s. “Sirena Beach”’s, which requires you to eat the giant pineapple, is the most interesting; but then once you’ve done that, it’s just a pipe you jump into. Similarly, I like the way “Pianta Village” “requires” you to unlock the rocket nozzle to reach it — or not, if you’re clever with your jumping. Howe’er, almost all the rest are just M’s or a cannon you jump into, & “Noki Bay”’s is just a rehash o’ Super Mario 64’s entrance to the wing cap stage. None o’ these entrances have any way to change how the stage works based on how you enter, like “Tick Tock Clock”’s, “Wet-Dry World”’s, or “Tiny-Huge Island”’s.
Honestly, I still think “Peach’s Castle” is better. “Peach’s Castle” pushes its hub with many secrets, while still staying concise, specially in the DS remake. Nothing in it felt like padding, ’cept for the Toad stars, & nothing felt missing. “Delfino Plaza” looks concise compared to the kind o’ bloated monstrosities modern video games like Zelda: Breath of the Wild subjects the player to, but still has some setpieces that could’ve been exploited mo’, like the underwater hole near “Pinna Park”’s entrance, which holds a useless 1-up mushroom ( competent developers would’ve put a blue coin there & taken 1 o’ the — let me remind you ’gain — 10 blue coins round the end o’ “Corona Mountain” ). On the other end, I feel there were many mo’ opportunities for hiding blue coins that were missed — they could’ve put many mo’ hiding places in the buildings — & the level entrances were just underwhelming in comparison. It’s still a great hub, tho, — specially by the low standards Sunshine set with most o’ its other levels — & the fact that it comes very close to “Peach ‘s Castle” says something.