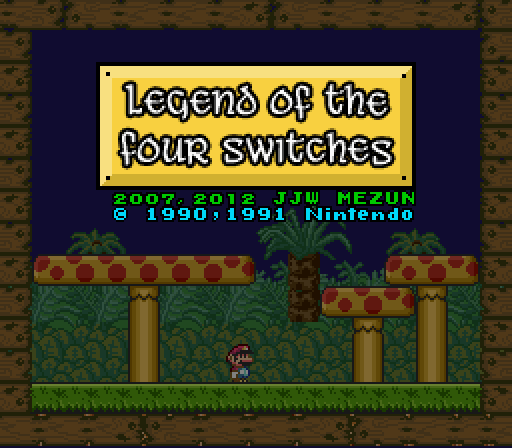
Highway to Hell ( revisited )
Music: “Dark Cave”, Pokémon Gold, Silver, & Crystal
A’least the secret exit is rather clever. Here we see the importance o’ being able to take Yoshi from level to level, which is usually considered bad design in Super Mario World hacks: some exits require it. You’d think that since the idea o’ being able to take Yoshi from level to level was so important that I’d do a better job o’ planning for the happenstance in other levels. You’d think since you’re definitely expected to take Yoshi into the room with the key that I wouldn’t put Balls ’n Chains in it with the magical powers to make Yoshi’s head & neck disappear.
Here’s also a case wherein SMW Central’s advice helped: originally the pipe to the keyhole room had brown blocks o’er it, requiring you to go & get the blue P-switch ’gain, double-carrying both it & the key. I wasn’t sure whether to go with this or not till SMW Central made the decision for me, telling me not to require such glitches. I agreed, & am glad, since it would’ve just made this exit excessively annoying.
( Note: you saw me double grab in the secret exit to “Caves that is Cool”, but it wasn’t required there, as you can just carry the blue P-switch o’er to the brown blocks & go back to get the key. Nowhere in LOTFS is double-grabbing required. )
- P-Switch level count: 21 / 32
- Levels with mo’ than 1 switch: 9
- Levels with mo’ than 1 o’ the same switch: 6
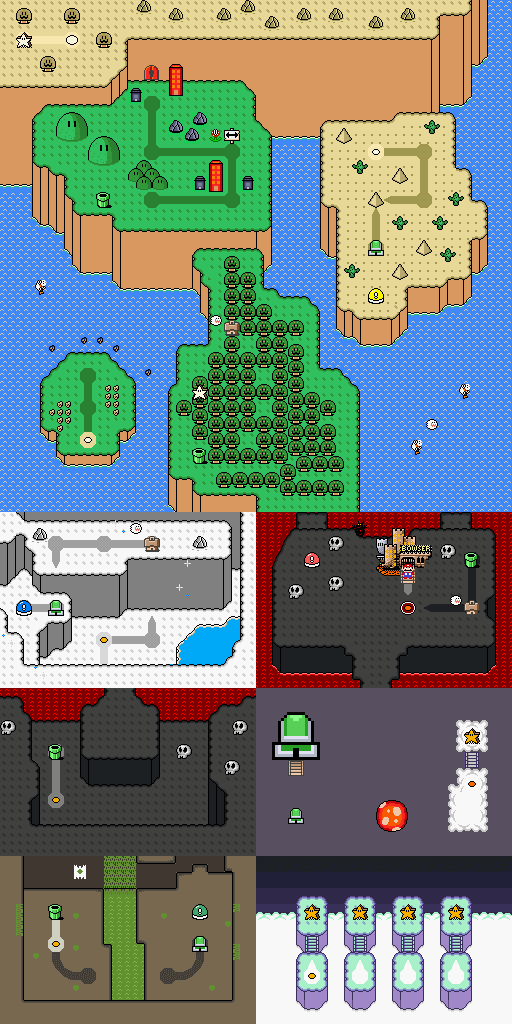
World G: The Lost Woods
There’s quite a difficulty leap here. I remember 1 o’ the people who looked @ this hack @ SMW Central complained ’bout my hack getting too hard too quickly ’cause he played this section near the start — a lesson on the risks o’ giving the player a lot o’ control o’er what level they play next.
This world takes inspiration from “Forest of Illusion” in that it has many circuitous paths. Also, earlier on levels had a theme o’ having names that indicated how lost you were, like “Still lost…”. I found these level names to be too generic & gave mo’ indicative names.
Playing in the BG
Music: “Forest’”, Kirby’s Adventure
Welcome to the world o’ gimmicks, which reveals how late most o’ the forest levels were in development. Having run out o’ ways to make you carry P-switches from point A to B, I’d just read through SMW Central’s lists o’ patches, blocks, & RAM addresses for ideas, & that’s where this came in. I’m surprised I’ve ne’er seen these blocks used in any other hack; you could do so many mo’ interesting things with them than I did.
I thought I remembered being able to skip most o’ this level by just using the changing blocks themselves as platforms, but when playing it this time it didn’t seem to allow me to do that so much. I dunno, maybe I fixed that problem later on.
- P-Switch level count: 21 / 33
- Levels with mo’ than 1 switch: 9
- Levels with mo’ than 1 o’ the same switch: 6
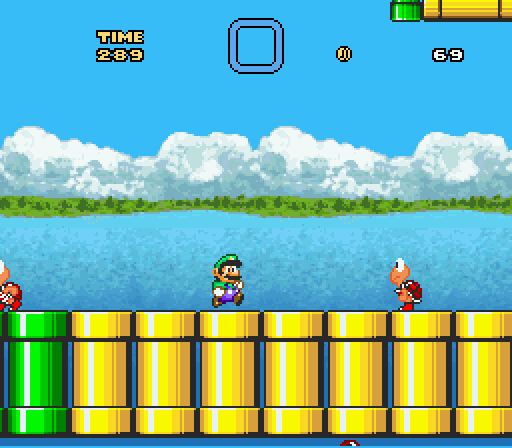
Teresa’s Triathalon
Music: “Shade Man – Ghouls ’N Ghosts”, Mega Man 7 ( Based on 1st stage theme from Ghost ’N Goblins games )
Despite its name, this level actually doesn’t have much to do with racing, ’cept for maybe a few areas, but timing. I think I started with the idea o’ racing the Goomba disguised as a Boo, but found my ability to design levels round it limited, since if the distance ’tween you & the Boo is too great you’ll get hit; thus I found that timing ’tween the Boo being on wooden parts worked better for puzzles, but then didn’t bother changing this level’s theme to match that or e’en give it mo’ interesting graphics than vanilla Super Mario World’s usual ghost house graphics.
( Fun fact: I believe this level was originally “Ghosts ’n Goblins” & what is now called that was called “Teresa’s Revenge”. I also think that other level originally had a Boo boss, which made that level name actually make sense. )
Also, ironically, the level’s quite slow if you don’t cheat. I have no idea how I missed the fact that someone has ample room to just fly to the main goal without bothering with the long hopping & floating bullshit, but I can understand anyone who takes the faster route. Similarly, one may be better off just damage-boosting to the left to the key room rather than wait for that sluggish Boo to go all the way right & then all the way left. This was a case o’ me coming up with a clever idea, but 1 that wasn’t particularly fun.
- P-Switch level count: 21 / 34
- Levels with mo’ than 1 switch: 9
- Levels with mo’ than 1 o’ the same switch: 6
Orchid Orchard
Music: “Flower Garden”, Super Mario World 2: Yoshi’s Island
This level name must be so late in development that I didn’t e’en expect it on this playthrough, though I recall the level itself exactly as it was ( though with a slightly better palette now ). I can’t e’en remember what ’twas originally called, though — ¿“Still lost…” maybe? I remember these forest levels originally had level names all talking ’bout how lost you were till I later decided those names were lazy.
Don’t have much else to say ’bout this level, though. Nothing in it is particularly surprising, though it doesn’t feel too ol’ hat, either. We see a variation o’ sorts on the “Some Igloo Level” Muncher puzzle wherein now you start going through with a star & then go back through with a newly-gained Yoshi so you can go back to a pipe near the start & tongue a P-switch out o’ some brown blocks. It’s ’nother instance o’ that ubiquitous blue P-switch, but a’least you don’t have to carry it anywhere. It’s basically just a way to ensure you have to have Yoshi.
Though I just realized that, with that aforementioned ability to take Yoshi into levels, & this level’s conspicuous lack o’ a no-Yoshi sign, one could simply enter the level already with a Yoshi & beat it with li’l effort. Great testing.
- P-Switch level count: 22 / 35
- Levels with mo’ than 1 switch: 9
- Levels with mo’ than 1 o’ the same switch: 6
Inferno Forest
Music: “Forest Frenzy’”, Donkey Kong Country
I don’t hardly remember e’er playing this level with Yoshi, despite the inevitability o’ beating “Orchid Orchard” with him, & doing so now makes the level much easier. In particular, the fact that Yoshi can walk on fire is somewhat funny — though I guess it’s no odder than the fact that Yoshi can just walk on Munchers. Usually I have a fire flower & accidentally sabotage myself by trying to spin jump off a Piranha Plant, only to kill it with a fireball & land right in the lava.
This level actually originated from a different, mo’ linear hack ( the secret exit was thrown in after I transfered it to LOTFS ), which used icegoom’s Super Mario World Redrawn graphics, which is why they’re used here for the level graphics. I think it works well with the Donkey Kong Country background & music. Mixing forest & fire is also a cool gimmick, though I don’t think I did ’nough with it.
The fire blocks is 1 case where I disagree with SMW Central’s advice, but caved in since I didn’t care that much & didn’t want something so trifling to get in the way o’ submission. They were originally ice blocks, but SMW Central said that didn’t make sense for a fire level. I always found it weird how much o’ sticklers they could be for “sense” in Mario games. It’s like how they complain ’bout floating Munchers, e’en though Mario games have had floating ? blocks fore’er. I always felt the fire blocks made less sense, ¿since shouldn’t fire blocks be mo’ resistant to fire? Then ’gain, I guess they’re kinda like the fire blocks in Wario Land 3.
- P-Switch level count: 22 / 36
- Levels with mo’ than 1 switch: 9
- Levels with mo’ than 1 o’ the same switch: 6
The ’50s and ’60s ( 1st trip )
Music: “Hippie Battle’”, Earthbound Beginnings
As the info box says, his level requires 1,000 coins. Normally I’d show off how great “Pain in My Temple” is, but it turned out I already had 1,000 coins ( you just can’t see it thanks to zany 1-player Luigi glitches ), so it let me go through. If you didn’t have ’nough, an invisible wall would stop you.
Also note: you only have to pay the fee once, a’least till you reset, so don’t worry ’bout dying.
Not like it matters, since as this level shows, it’s a simple, easy level. It makes you wonder why the game e’en bothered to lock out Yoshi or power-ups. It seems this level hardly does anything but make everything grayscale. Big woop.
- P-Switch level count: 22 / 37
- Levels with mo’ than 1 switch: 9
- Levels with mo’ than 1 o’ the same switch: 6
Rope-Bee Trees
Music: “Forest Frenzy’”, Donkey Kong Country
For some reason I think the sound o’ the saws goes great with this music.
This is ’nother level that changed quite a bit from what I remember. I remember the secret exit had you follow a rope down to a pipe in the middle o’ the rope section, not @ the end. I guess I feared — or maybe SMW Central told me — that the secret exit was too obscure & required suicidal guessing.
Gotta love that rope that just hangs out down there, though.
I don’t know how I feel ’bout making you go back & forth for the secret exit here. On 1 side, it’s repetitive; on the other, a’least this is challenging, as opposed to “Teresa’s Triathalon”, which was just boring.
I love how the main path ( the room with the blue background ) has so many parts where you can trivially skip harder parts, but I take the harder parts due to my instinct to avoid skipping parts I want to show ( since it’s too easy for me to know how to skip parts, having played this hack millions o’ times ).
- P-Switch level count: 22 / 38
- Levels with mo’ than 1 switch: 9
- Levels with mo’ than 1 o’ the same switch: 6
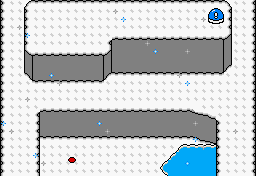
Nose-Bleed Trees
Music: “Forest’”, Kirby’s Adventure
As this video shows, there’s a major glitch for the secret exit ( which is necessary to open the rest o’ the path to the green switch ) in that if you get the midway point & then die, you lose the “golden mushrooms” you collected & have to beat the normal exit & restart from the beginning.
While I like how big & explorative this level is, & like the on-&-off water gimmick’s gameplay, — though I wish I’d had the savvy to change the background in some way so that it actually looks like you’re underwater — I think this level has too much. ¿Did it truly need a blue P-switch just to get to the normal exit? ¿Did it truly need a Blue Yoshi to reach the secret exit, which already needs 5 golden mushrooms?
- P-Switch level count: 23 / 39
- Levels with mo’ than 1 switch: 10
- Levels with mo’ than 1 o’ the same switch: 7
World H: The Sewers
Probably the most exotic level theme in this hack, other than the city theme in that not-truly-much-o’-a-world. I wish this hack had mo’ interesting level themes.
This is the only map to have custom graphics, though I didn’t do much with them. I always felt bad ’bout the blandness o’ the o’erworld’s graphics. 1 o’ the reasons I’d ne’er remake this hack is that I’d force myself to redraw the whole o’erworld, & that would take years.
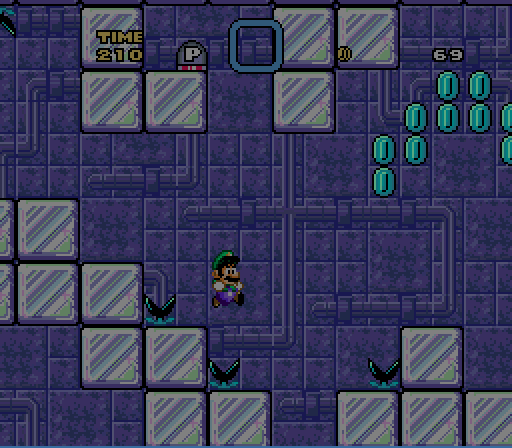
Pipe Pollution
Music: “Underground ( Super Mario Bros. 3 )’”, Super Mario All-Stars ( same )
This is the 1 level where I’d say I did OK with the layer-2, ’specially the 2nd half. My only problem with it is the beginner’s trap near the end o’ the 1st area: there’s no way to know that you need to bring a shell ’head o’ you to make a vine ( if you don’t have a cape, a’least ), & the level kills you outright if you don’t have psychic powers.
Also, 1 flaw with the 2nd half is that I think it’s almost impossible during the downward portion if you’re big, ’less you’ve memorized the level, as you have to wait a li’l bit as the toxic sludge is going down to see where solid land is, but still have ’nough space ’bove to jump without diving head-1st into the sludge. Then ’gain, I guess you could duck when jumping; but it’d still be much harder, I’m sure. I dunno: I guess it’s not a huge problem. Still, a lesson: always test levels with multiple power-ups, which I definitely didn’t do.
- P-Switch level count: 23 / 40
- Levels with mo’ than 1 switch: 10
- Levels with mo’ than 1 o’ the same switch: 7
Trash Pack Pipes
Music: “Underground ( Super Mario Bros. 3 )’”, Super Mario All-Stars ( same )
My only problem with the 1st half is the pointless & dickish silver P-switch, which, if you didn’t think to go on a detour, makes you restart the 1st half if you didn’t bring it to the end. I guess, to be fair, you can clearly see it up there @ the start, giving a huge hint that you’ll probably need it. ( ¿Does this game have any optional P-switches? I don’t think it does. )
In the original version o’ this level, the 1st half was the whole level; I later decided the level was too short, so I added the 2nd half. I’m glad I did, as I quite like it & its tricky jumps. I also like its graphics — the trash blocks from Wario Land 4 & the background from the GBA Garfield & His 9 Lives, o’ all things. I wish I’d used these graphics mo’, as the rest o’ this world looks a bit generic ( not helped by the proliferation o’ that clich&eactue; Mario underground music ).
My only problem with the 2nd half is the obvious mistake o’ having 2 midway points, 1 structure-less 1 right in front o’ the pipe & a normal 1 a few blocks afterward. I’m not sure what my thinking was there, but I’m sure ’twas a mistake. Maybe I thought having that white line just floating in front o’ the pipe, e’en for just a few seconds, was tacky & decided to just create a normal midway point, only to forget to get rid o’ the original.
What I find funny ’bout this footage is that I always found the 2nd half hard & usually died a lot in it; but in this playthrough, though I die in stupid ways in the 1st half, I make it through the 2nd half, 1st try, without getting hit @ all.
- P-Switch level count: 24 / 41
- Levels with mo’ than 1 switch: 11
- Levels with mo’ than 1 o’ the same switch: 7
Climb of Clogginess
Music: “Underground ( Super Mario Bros. 3 )’”, Super Mario All-Stars ( same )
Not much to say ’bout this level. Other than the downward floating section @ the end ( which isn’t all that original, but a’least was ne’er done anywhere else in this hack ), it’s color by #s, “go somewhere to get P-switch, go back to use it to get past brown blocks / Munchers”.
I like how the Bullet Bills round the vines offer almost 0 threat, as the chances o’ them firing ’fore you pass them are thin.
- P-Switch level count: 25 / 42
- Levels with mo’ than 1 switch: 12
- Levels with mo’ than 1 o’ the same switch: 7
Lab of ‘Difficulty’
Music: “Fight Against an Armed Boss’”, Super Mario RPG: Legend of the Seven Stars
@ the time I liked parodying kaizo hacks, since I hated them & their proliferation @ the time ( remember, I started making this hack round 2007 ). It’s a joke that isn’t as relevant anymo’, since I don’t think kaizo hacks are as popular anymo’. Maybe if I’d retinkered it into parody o’ terrible Super Mario Maker levels…
I always liked the “puzzle” o’ this 1st room, as it does what I think good puzzles should do: challenges fallacious preconceptions. In this case, the puzzle is based on the idea inherent in Mario games that pipes always have the possibility o’ being transitions to other rooms, conflicted gainst the absurdity o’ re-entering a pipe you entered the level through. ¿But why should that pipe be an exception? It shouldn’t — & there lies the fallacy. It’s not a genius “puzzle”, though — “The Second Reality Project” had already done it back in, ¿what, 2002? Plus, the info box almost tells you, “Hey, go back into the pipe whence you entered”, e’en if hid ’hind a seemingly casual cliché line.
The rest o’ the level is mediocre to bad. The only high point is the cool palettes in the water section that e’en affect Mario & Luigi, which was a bigger pain than you might think ( Lunar Magic itself doesn’t let you give Mario & Luigi custom palettes for each level — a’least it didn’t when I made this ). ’Cept, as you can see, I fucked up, & Luigi temporarily becomes Mario for this section. Otherwise, the P-switch is pointless & the star makes the rest o’ the section pointless.
The 1st section is generic Thwomp dodging. I remember in an earlier version the part where you go upward was harder ’cause the camera refused to scroll upward. Not sure how I fixed it here.
& then there’s the smasher section. I only had that ’cause I for some reason felt bad ’bout not using the smashers a’least somewhere. The problem is, the smasher sections were ne’er good in Super Mario World & they can ne’er be good ’cause they’re slow & boring. Autoscrollers are, in general, boring-as-death levels & I’m glad they’re rare in this game. But this smasher section is terrible ’cause I didn’t time anything well, making it so that you have to already know the level well to avoid death as you need to jump before you can see where you need to jump to to avoid being smashed & knocked off platforms.
This boss is the worst. It’s e’en worse than just the Goomba in the 1st lab, since a’least that was a joke. Not only were Koopas already used for the better desert lab, I was so lazy & incompetent that I didn’t e’en recolor the blue Koopa so that their colors would match the actual Koopa Bros., e’en though it’d’ve been too easy to contemplate.
& then we have the dimwitted secret exit, which is just “notice coins ’bove hole & use that to indicate you can fall in”. Luckily, it just leads to ’nother useless Shroom level.
- P-Switch level count: 26 / 43
- Levels with mo’ than 1 switch: 12
- Levels with mo’ than 1 o’ the same switch: 7
Shroom of Sewers
Music: “Underground ( Super Mario Bros. 3 )’”, Super Mario All-Stars ( same )
A’least the message is actually useful info this time.
The Green Switch
Music: “The Axem Rangers Drop In’”, Super Mario RPG: Legend of the Seven Stars
I’d say this is the best Switch. While most are trivial “hop from block to block” with li’l thought to them, this feels like a coherent level with a coherent theme. I die a lot, but I still had fun doing the tricky jumps. I particularly like the subtle difficulty o’ the final jump.
I somewhat wonder if I should’ve made it a bit longer. Then ’gain, too long & this level would’ve been too frustrating.
I do like how I tried to give each Switch ( ’cept the Red Switch ) a theme: the Yellow being flying, the Blue being icy physics, & this 1 being bouncy blocks. I only wish the Yellow & Blue Switches did mo’ with their themes, ’specially the Blue Switch. I also wish the Red Switch weren’t utter garbage.
- P-Switch level count: 26 / 44
- Levels with mo’ than 1 switch: 12
- Levels with mo’ than 1 o’ the same switch: 7
We’ve already hit all the Switches. Next is Bowser’s Castle, & then off to the postgame.


